
Tools
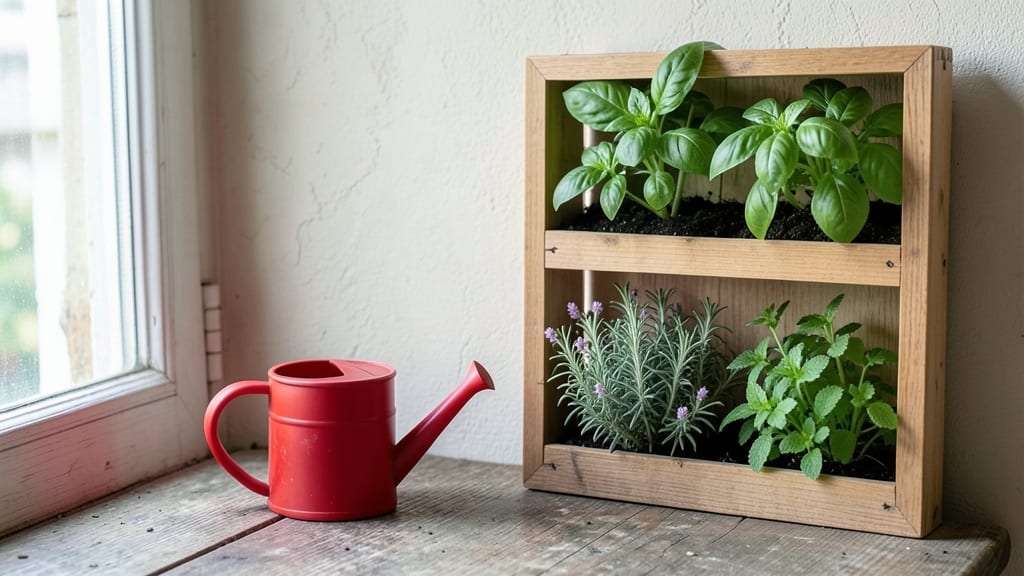
Transforming blank walls into a fragrant, functional herb garden is one of my favorite ways to reclaim vertical space. ✨ The herb wall garden I built last spring now gives me fresh basil, thyme, and parsley right outside my kitchen—no matter how small the yard.
It’s not just practical; it’s a daily reminder of how much greenery can brighten even the tightest corners.
You don’t need fancy tools or a green thumb to get started. A simple wooden frame with fabric pockets, a pre-made modular system, or even repurposed gutters can hold your herbs.
I started with just rosemary, oregano, and mint because they thrive in tight spots, but you can mix in almost any culinary herb. The key is spacing—about 4 to 6 inches between plants—and making sure they get at least 4 to 6 hours of sunlight daily.
Within weeks, you’ll have lush, accessible greens that smell amazing when brushed against. The best part? No bending, no weeding, and no wasted space. It’s the perfect solution for balconies, patios, or even indoor windowsills.
Plus, harvesting is a breeze—just snip what you need and watch it regrow. Ready to turn your wall into a harvest?
Whether you’re working with a sunny windowsill or an outdoor fence, the setup scales easily. Just adjust the materials to fit your space and climate—herbs like cilantro might need more shade in hot afternoons, while thyme can handle full sun.
Start small, experiment, and soon you’ll have a thriving, low-maintenance herb garden that’s always within arm’s reach.
📚 In This Guide
- What you need
- Instructions
- Tips and common mistakes
- Wrapping up and next steps
What you need
- ● Wall-mounted planter or fabric pocket system: 1–3 units (depending on size; 12"–24" width per section is ideal)
- ○ Optional: Pre-drilled brackets for stability (if not included)
- ● Potting mix: 2–4 quarts of lightweight, well-draining soil (e.g., cactus/succulent mix or herb-specific blend)
- ● Pro tip: Mix in perlite or vermiculite (10–20%) for extra drainage!
- ● Herb seedlings or cuttings: 6–12 plants (e.g., basil, thyme, rosemary, parsley—1 plant per pocket)
- ○ Optional: Seeds (if starting from scratch; use fast-growing varieties like basil or cilantro)
- ● Basic tools: Hand trowel (for planting)
- ● Spray bottle (for gentle watering)
- ● Measuring cup (for soil/fertilizer)
- ● Location: South/west-facing wall (6+ hours of sunlight daily for most herbs)
- ● Alternative: Grow lights (12–16 hours/day) for low-light spaces
- ○ Optional upgrades: Self-watering system (e.g., wicking fabric or drip irrigation kit)
- ● Decorative elements (e.g., LED string lights or terracotta accents)
- ● Fertilizer (balanced liquid fertilizer or slow-release granules)
Step-by-Step instructions for building your herb wall garden
Here's how to transform a blank wall into a thriving herb garden—no green thumb required.
🪴 Step 1: Assemble the Wall Garden Structure
Start by attaching the pre-drilled wall garden kit to your chosen wall using the included anchors and screws. I recommend placing it near a window that gets at least 6 hours of sunlight daily—south or west-facing walls work best. Make sure the wall is clean and dry before attaching to prevent mold later.
If your kit doesn't include a water reservoir, install one at the bottom of the frame. This ensures herbs get consistent moisture without you having to water daily. Fill the reservoir with 1 gallon of water and let it soak into the fabric pockets for 10 minutes before planting.
🌱 Step 2: Prepare the Growing Medium
Fill each pocket of the wall garden with 2 cups of lightweight potting mix per section. Press it down gently so it stays in place but doesn't compact too tightly—herbs need room for roots to breathe. I like to mix in a handful of perlite to improve drainage, especially for herbs like basil that hate soggy roots.
Leave about ½ inch of space between the soil and the top of each pocket. This prevents soil from spilling out when you water and gives your herbs room to grow upward. Tap the pockets lightly on the sides to settle the mix evenly.
☀️ Step 3: Plant Your Herb Starts
Remove each herb plant from its nursery pot and gently loosen the roots if they're circling. Place one plant per pocket, positioning it so the top of the root ball sits just below the soil surface. Press the soil around the base lightly to secure it—this keeps plants stable against wind or accidental bumps.
I always plant taller herbs like rosemary and thyme in the back pockets and shorter ones like parsley and chives in the front. This creates a natural tiered look and prevents taller plants from shading their neighbors. Water immediately after planting to help the soil settle around the roots.
💧 Step 4: Water and Maintain Consistency
Water your herb wall garden thoroughly until you see water dripping from the bottom reservoir. This ensures the entire system is hydrated from the roots up. After the initial watering, check the reservoir daily—top it off with ½ cup of water whenever it looks empty. Overwatering is just as bad as underwatering, so wait until the top inch of soil feels dry before adding more.
Fertilize every 4-6 weeks with a balanced liquid fertilizer diluted to half strength. I use a spray bottle to apply it directly to the soil in each pocket. This keeps nutrients consistent without overloading the plants. Watch for yellowing leaves—they often signal either overwatering or a need for fertilizer.
✂️ Step 5: Prune and Harvest Regularly
Start harvesting herbs when they reach 3-4 inches tall. Pinch off individual leaves or small stems just above a set of leaves to encourage bushier growth. For example, snip basil leaves from the top of the stem, leaving at least 2-3 sets of leaves remaining. This prevents the plant from becoming leggy and bare at the bottom.
Prune any yellow or wilted leaves immediately to keep your garden looking fresh. I also trim back any stems that grow too long or flop over the edge of the pockets. Regular pruning not only keeps your herbs productive but also prevents pests from hiding in overgrown foliage.
Tips & tricks for perfect herb wall garden
Transforming a blank wall into a thriving herb garden is easier than you think—here’s how to avoid common pitfalls and maximize your vertical space.
Location is Everything: That 6-hour sunlight requirement in Step 1 is non-negotiable for most herbs. If your only window faces north, consider supplementing with a grow light for 4-6 hours daily. I’ve seen herbs thrive with this combo—just place the light 6-12 inches above the plants. South or west-facing walls are ideal, but don’t let perfect be the enemy of good.
Soil Preparation Secret: In Step 2, don’t skip the perlite—it’s the difference between soggy roots and happy herbs. For extra drainage, mix in a handful of coarse sand too. I’ve found that basil and parsley especially appreciate this airy mix. Tap those pockets firmly after filling to eliminate air pockets that could cause uneven moisture distribution.
Planting Layout Matters: When arranging your herbs in Step 3, think vertically as much as horizontally. Taller herbs like rosemary and thyme belong in the back pockets, but don’t forget to space them properly—crowding can lead to competition for sunlight. I like to leave at least 2 inches between plants in adjacent pockets to prevent overcrowding as they grow.
Watering Wisdom: The 10-minute soak in Step 1 and daily ½ cup top-ups in Step 4 create the perfect moisture balance. Here’s the trick: After the initial soak, check the reservoir again after 24 hours. If it’s empty, your herbs are thirsty—if it’s still half full, you’re overwatering. Yellowing leaves usually mean either too much water or not enough nutrients, so adjust accordingly.
Pro Tips for Herb Wall Garden
- Transforming a blank wall into a thriving herb garden is easier than you think—here’s how to avoid common pitfalls and maximize your vertical space.
- Location is Everything: That 6-hour sunlight requirement in Step 1 is non-negotiable for most herbs.
- Soil Preparation Secret: In Step 2, don’t skip the perlite—it’s the difference between soggy roots and happy herbs.
Frequently asked questions
Got questions about creating your own herb wall garden? You’re not alone! Here are some common queries—and their answers—to help you grow with confidence.
What’s the best time of year to start an herb wall garden?
For most herbs, spring or early summer is ideal—when temperatures are mild and days are longer. However, herbs like rosemary, thyme, and oregano thrive in heat and can be planted later. If you’re in a warm climate, you can start anytime! Just ensure your herbs get 6+ hours of sunlight daily.
How often should I water my wall-mounted herbs?
Watering needs vary, but most herbs prefer dry soil—overwatering is a common killer! Check moisture levels by sticking your finger 1 inch into the soil. Water when it feels dry, typically every 2–3 days in warm weather or every 5–7 days in cooler months. Drip irrigation or self-watering planters help maintain consistency.
Can I use any wall for an herb garden, or are there restrictions?
Most herb wall gardens work on exterior walls (brick, stucco, or wood) or fences with proper mounting hardware. For interior walls, ensure good airflow and natural light (south-facing windows are best). Avoid metal walls unless using insulated planters—herbs hate cold surfaces! Always check for structural weight limits (20–30 lbs per square foot is safe for most walls).
What are the easiest herbs to grow in a vertical garden?
Start with beginner-friendly herbs like:
- Basil – Fast-growing, loves warmth, and thrives in containers.
- Mint – Hardy and spreads easily (great for hanging pockets!).
- Parsley – Slow-growing but low-maintenance.
- Chives – Cold-tolerant and regrow quickly.
My herbs are wilting or turning yellow—what’s wrong?
Yellowing leaves often signal overwatering or poor drainage. Check for:
- Root rot: Let soil dry out between waterings; add perlite to potting mix.
- Underwatering: Wilting leaves may mean thirsty plants—adjust your watering schedule.
- Temperature stress: Herbs like basil hate cold drafts; move them indoors if temps drop below 50°F.
- Pests: Inspect for aphids or spider mites; spray with neem oil if needed.
Wrapping up and next steps
Creating an herb wall garden is a game-changer for small spaces—it’s practical, beautiful, and packed with fresh flavors at your fingertips! 🌿 Whether you’re a seasoned gardener or just starting out, this vertical solution maximizes your growing potential without sacrificing style.
The best part? You’ll enjoy harvesting herbs in minutes while adding a touch of green to your home.
Ready to take the next step? Start small—pick 2-3 herbs you love, gather your supplies, and let your creativity grow! Before you know it, you’ll be savoring homegrown basil, mint, or thyme in every meal. Happy planting! 🌱