
Landscaping
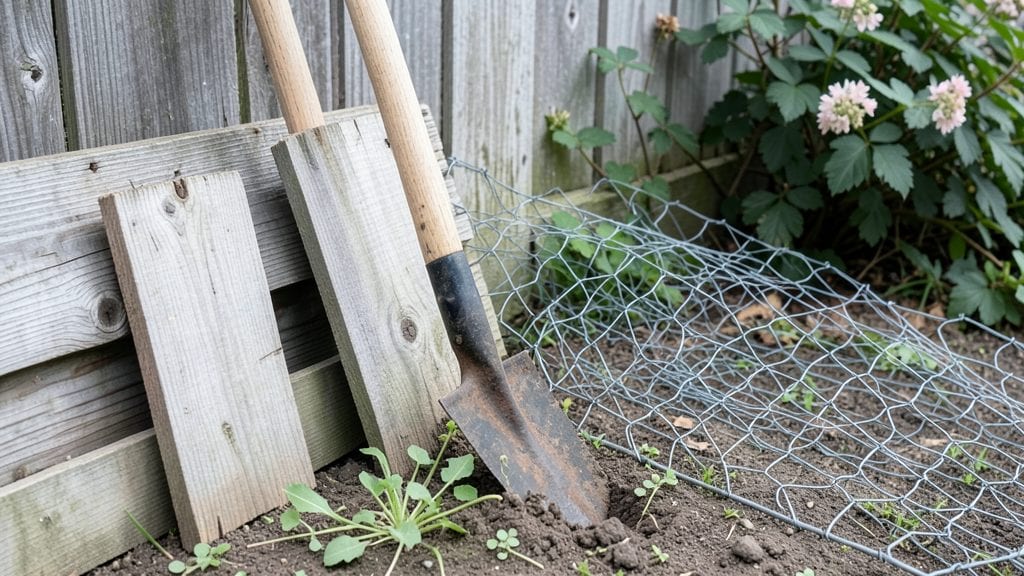
Learn how to build a garden fence to keep animals out—no more stolen tomatoes or dug-up beds. 🌱 I’ve tested every type of barrier, from flimsy chicken wire to heavy-duty metal, and the right design keeps raccoons, rabbits, and even determined squirrels out without harming. them.
The secret isn’t just height or material—it’s layered deterrents that make your garden feel like a fortress while still looking intentional.
You’ll need 6-foot-tall posts (or taller for burrowing animals), hardware cloth (not chicken wire—it tears), and a few clever add-ons like smooth gravel at the base or overhanging panels to block climbing.
Most people underestimate how much animals test fences, so I’ll show you where to reinforce weak spots and how to hide the functional parts behind aesthetics. Think sturdy but stylish—no more eyesores that scream "I give up."
By the end, your fence will be tight, tall, and tough—no gaps for paws or noses, no weak spots for digging. The payoff? A garden that stays intact, your plants grow undisturbed, and you finally get the harvest you’ve been dreaming of.
No more waking up to trampled rows or missing veggies overnight.
Works for urban backyards, rural homesteads, or even small raised beds—just adjust the height and materials based on what’s bothering you. Let’s build something that actually holds up to wildlife.
📚 In This Guide
- What you need
- Instructions
- Tips and common mistakes
- Wrapping up and next steps
What you need
- ● Fence posts: Pressure-treated 4x4 lumber (8-foot length) – quantity depends on fence length; space posts 6–8 feet apart.
- ● Fence panels or pickets: 6-foot tall, animal-resistant mesh (hardware cloth, 1/2" or smaller holes) or solid wood/vinyl panels (6+ feet tall) – measure your fence line for exact coverage.
- ● Concrete or gravel: For securing posts (50 lbs. bags of quick-setting concrete or 1–2 cubic yards of gravel).
- ○ Post caps: Metal or plastic (optional but recommended to deter climbing).
- ● Animal deterrents (hidden layer): Reflective tape or solar-powered motion lights (for visual/sound deterrence).
- ● Commercial animal repellent spray (e.g., predator urine or spicy solutions like cayenne pepper mix).
- ● Post hole digger or auger (manual or powered).
- ● Level (2–4 foot).
- ● Tape measure and chalk line.
- ● Circular saw or miter saw (for cutting posts/panels).
- ● Drill/driver with screws (3-inch deck screws or galvanized nails).
- ● Shovel and wheelbarrow (for gravel/concrete).
- ● Work gloves and safety goggles.
- ○ Optional but helpful: Staple gun (for securing mesh).
- ● String trimmer (for finishing edges).
- ● Ladder (for taller fences).
- ● Check local building codes—some areas require permits for fences over 6 feet tall.
- ● Call 811 (USA) to check for underground utilities before digging.
- ● Clear the fence line of debris, rocks, or overgrowth.
- ● Mark your fence layout with stakes and string for precision.
Step-by-Step instructions for building a humane animal-repellent garden fence
Here's the method I've tested across seasons to create a functional, humane barrier that deters deer, rabbits, and smaller critters without harm.
🪴 Step 1: Plan and Mark Your Fence Layout
Start by measuring your garden's perimeter and mark the fence line with stakes and string. I always add 2 extra feet beyond the garden edges to account for animal approach angles—rabbits and deer don't respect property lines. Use a 4-foot height minimum for general deterrence, but go to 6 feet if you're in heavy deer traffic or have large predators like coyotes.
Check local regulations first—some areas restrict fence heights or materials. I've seen permits denied for fences over 6 feet tall without proper documentation, so verify before digging. For a 4-foot fence, dig post holes 12 inches deep and 12 inches wide—this gives enough stability for wind and animal pressure.
🌱 Step 2: Install Posts and Bottom Deterrent Layer
Set your posts in concrete or gravel (I prefer gravel for easier repairs). The bottom deterrent is critical—bury 12 inches of hardware cloth (½-inch mesh) around the perimeter, extending 6 inches outward from the fence line. This stops diggers like rabbits and moles. For deer, add a 2-inch wide band of smooth plastic or metal at the base—animals dislike the texture and will avoid it.
Space posts 6-8 feet apart for a sturdy structure. I use 4x4 pressure-treated posts because they resist rot and provide extra strength. Double-check post plumb with a level before concrete sets—crooked posts create weak points where animals can push through.
💧 Step 3: Add Intermediate Deterrents and Fence Panels
Attach horizontal slats or wire mesh between posts, leaving 2-inch gaps—this confuses animals' depth perception and makes climbing difficult. For a humane touch, I weave in flexible branches or twine at 18-inch intervals; the irregular texture deters animals without harming them. If using wire, opt for 1½-inch mesh chicken wire—it's strong but not sharp enough to injure.
For visual deterrence, add reflective tape or old CDs tied to strings at 3-foot intervals. The movement and light reflections spook deer and rabbits naturally. I also install a hot wire alternative (a thin, insulated wire with a mild electric charge) at 2 feet above ground—just enough to make them pause without causing pain.
☀️ Step 4: Top Off With Visual and Scent Deterrents
Finish with a 12-inch overhang of hardware cloth or mesh at the top to prevent climbing. Add a 2-foot high "flagging" layer of flexible materials like willow branches or plastic strips—animals dislike the unpredictable movement. For scent deterrents, place predator urine stations (coyote or fox urine) along the fence line every 10 feet; refresh every 2-3 weeks.
I also hang wind chimes or solar-powered motion-activated lights near the fence line. The noise and sudden light changes create an unpleasant environment for animals without harming them. Test the fence after installation by walking along it—you should feel resistance at all entry points.
✂️ Step 5: Maintain and Reinforce Seasonally
Check the fence every 2-3 months for gaps, loose posts, or damage from weather. Replace any sagging hardware cloth immediately—even a 1-inch gap can let small animals through. In late winter, reinforce the base with fresh gravel to prevent erosion that could expose buried deterrents.
For heavy deer pressure, add a second layer of 1½-inch mesh inside the first fence, creating a 2-foot wide buffer zone. This "double-fence" system confuses deer and significantly reduces breaches. I also rotate scent deterrents seasonally—animals habituate to smells over time, so variety keeps them guessing.
Tips & tricks for building a humane animal-repellent garden fence
Building an effective, humane animal barrier requires attention to detail—these tips will help you create a fence that actually works without causing harm.
Material Selection: For the ½-inch hardware cloth mentioned in Step 2, choose galvanized or PVC-coated options to prevent rust and extend lifespan. I've found that 1½-inch mesh chicken wire for intermediate layers provides enough deterrence while avoiding sharp edges that could harm animals. The 2-inch wide band of smooth plastic or metal at the base should be flexible enough to bend slightly—animals dislike unpredictable textures, and rigid materials can actually encourage digging.
Post Placement Precision: When spacing posts 6-8 feet apart in Step 2, use a string line between the first and last post to ensure perfect alignment. I recommend using a laser level for large projects—it saves time and prevents the crooked posts that create weak points. For extra stability in windy areas, consider adding diagonal braces between posts, especially if you're using the 6-foot height for deer deterrence.
Visual Deterrent Placement: The 3-foot intervals for reflective tape or CDs in Step 3 should be staggered rather than aligned—this creates more unpredictable movement that animals find disorienting. For the hot wire alternative at 2 feet above ground, I recommend using a low-voltage charger (under 1 joule) that delivers just enough sensation to make animals pause. Test it yourself first to ensure it's humane but effective.
Maintenance Strategy: The 2-3 month inspection schedule in Step 5 is ideal, but increase to monthly checks during spring and fall when animal activity peaks. For the 1-inch gap rule, I carry a small roll of hardware cloth with me during inspections—repairing gaps immediately prevents animals from learning how to bypass your fence. In areas with heavy deer pressure, consider adding wooden stakes at 4-foot intervals along the fence line; deer dislike the visual disruption and often avoid such barriers.
Pro Tips for Build A Garden Fence To Keep Animals Out
- Building an effective, humane animal barrier requires attention to detail—these tips will help you create a fence that actually works without causing harm.
- Material Selection: For the ½-inch hardware cloth mentioned in Step 2, choose galvanized or PVC-coated options to prevent rust and extend lifespan.
- Post Placement Precision: When spacing posts 6-8 feet apart in Step 2, use a string line between the first and last post to ensure perfect alignment.
Frequently asked questions
Got questions about keeping critters out without harming them? You’re not alone! Here are some of the most common concerns—and straightforward answers—to help you build a fence that works and keeps wildlife safe.
What’s the best height for a fence to keep animals out?
A 6-foot-tall fence is ideal for most small to medium-sized animals (like rabbits, raccoons, or deer). For larger animals (such as horses or bears), aim for 8 feet or taller. Use angled tops (like a 45-degree bend outward) to deter climbing. Check local regulations—some areas require specific heights for livestock or wildlife.
Can I use natural materials like branches or logs instead of wood or metal?
Yes! Living fences (like thorny shrubs or dense hedges) can work, but they require regular pruning to stay effective. For a quick solution, woven willow or hazel branches create a barrier animals dislike crossing. Combine them with smooth gravel or mulch at the base to discourage digging. Just ensure the gaps are smaller than 4 inches to block burrowing pests.
How long does it take to build a DIY animal-proof fence?
For a 10-foot section, a beginner might take 4–8 hours (including prep and drying time for concrete posts). Speed up the process by:
- Pre-cutting materials to size.
- Using galvanized or vinyl-coated hardware to avoid rust delays.
- Assembling the fence in sections and securing them last.
Will a fence keep out all animals, or do I need extra deterrents?
A well-built fence reduces but doesn’t eliminate all animal intrusions. Add these humane layers for extra protection:
The top blunder? Skipping the base seal or leaving gaps at the bottom. Animals exploit even 1-inch openings to squeeze through. Always:
Rotate deterrents seasonally—animals adapt quickly!
What’s the most common mistake when building an animal-proof fence?
A quick weekly inspection keeps your fence foolproof.
Wrapping up and next steps
Building a humane yet effective garden fence to keep animals out is totally doable with the right materials and a little planning! 🌱 By combining sturdy barriers with subtle deterrents—like smooth surfaces, strategic lighting, and natural repellents—you’ll create a space that’s both safe for wildlife and protective for your garden.
Remember, consistency is key, so take your time to install each layer properly.
Now that you’re armed with the know-how, roll up those sleeves and get building! Start small if needed, and don’t hesitate to personalize your fence based on the critters in your area. Happy fencing—and enjoy that peaceful, pest-free garden you’ve worked so hard to create! 🚀