How To
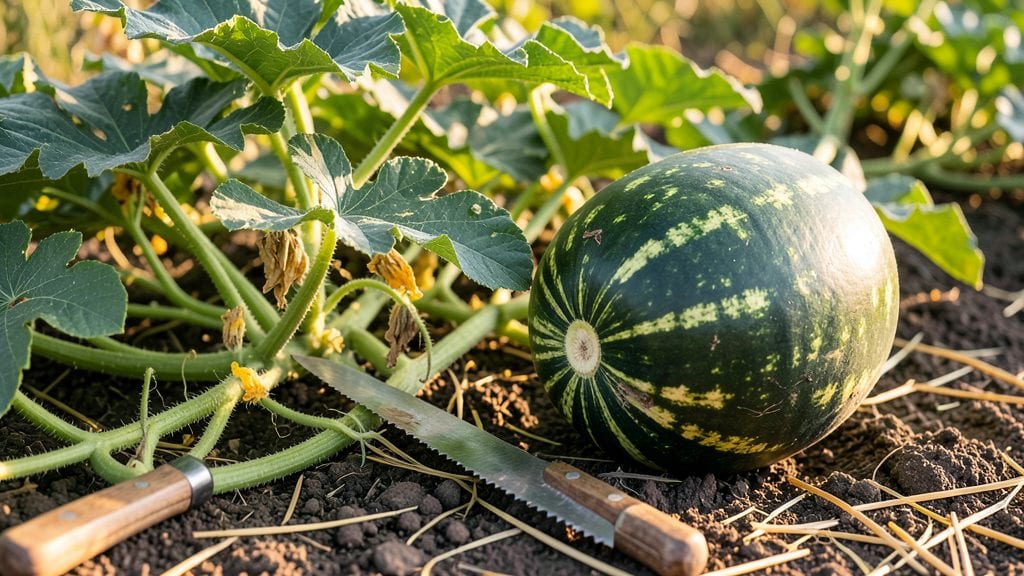
Knowing when to pick watermelon from your garden 🍉 is all about timing—because that perfect balance of sweetness and crunch disappears fast once you miss the window.
Nothing beats the satisfaction of biting into a homegrown watermelon—juicy, sweet, and perfectly ripe—but knowing when to harvest can be tricky. Miss the window, and you risk a mealy, bland fruit. Here’s how to master the art of watermelon ripeness so you never pick too early (or too late) again.
Forget relying on size alone—some of the best clues hide in the rind’s texture, the color of its ground spot, or even the sound it makes when tapped.
In USDA Zone 6a, where summer stretches from July to September, these 5 simple tricks will tell you exactly when your watermelon is ready to harvest.
Below, I’ll walk you through the visual, tactile, and even auditory cues to spot a ripe watermelon—plus the common mistakes that lead to disappointing slices. Ready to turn your garden into a sweet, summer-ready harvest?

5 Visual and physical signs your watermelon is ready to pick
Harvesting a watermelon at the perfect moment means the difference between a bursting, sweet slice and a watery, flavorless disappointment. The key lies in reading your plant’s visual and physical cues—each one a clue that your watermelon is ready to be picked.
Unlike many fruits, watermelons don’t ripen further after harvest, so timing is everything. Let’s break down the five foolproof signs that your watermelon is primed for picking.
Don’t rely on size alone—some varieties stay small but pack intense flavor, while others grow large but remain bland. Instead, focus on color shifts, texture changes, and even the sound of the fruit.
These indicators work together to give you a clear signal that your watermelon is peak ripeness. Whether you’re growing seedless varieties or heirloom types, these tips apply universally.
How to Know When to Pick Watermelon from Garden
- 1. Rind Color Deepens: Look for a glossy, deep hue—dark green for traditional varieties or stripe patterns that appear crisp and defined. Avoid dull or pale rinds, which signal underripe fruit.
- 2. Tendrils Dry and Curl: The small vine tendrils near the stem will turn brown and curl inward. If they’re still green and flexible, wait a few more days.
- 3. Field Spot Changes Color: Check the cream-colored spot on the rind where the fruit rested on the ground. When it turns from white to yellowish-cream, it’s a ripe sign.
- 4. Stem Begins to Dry: The main vine stem connecting the fruit to the plant will dry and shrink. If it’s still green and plump, the watermelon needs more time.
- 5. Thump Test Sounds Hollow: Tap the watermelon with your knuckles—ripe melons produce a deep, hollow sound. A dull thud means it’s not ready yet.
Start by examining the rind color—a telltale sign of ripeness. Traditional watermelons should develop a rich, deep green with bold stripes, while yellow-fleshed varieties like Yellow Crimson will turn golden. The rind should also feel hard and slightly waxy to the touch.
If it gives under gentle pressure, it’s not ready. Pro tip: Varieties like Sugar Baby may stay small but still ripen fully when these cues appear.
Next, inspect the tendrils—those tiny vines near the stem. When they dry out and curl inward, it’s a clear signal that the watermelon is nearing maturity. This change happens about 2-3 days before the fruit is fully ripe, so keep an eye out.
If the tendrils are still green and flexible, give your watermelon a few more days on the vine.
One of the most overlooked but reliable signs is the field spot, the pale area where the watermelon rested on the ground. When this spot shifts from white to cream-colored or yellowish**, it’s a strong indicator of ripeness.
This change happens as the fruit’s sugars develop, making it sweeter and more flavorful. Ignore this cue, and you might end up with a watermelon that’s underripe and bland.
The stem is another critical clue. As the watermelon ripens, the main vine stem connecting it to the plant will dry out and shrink. If you gently twist the stem near the fruit, it should break cleanly rather than tear.
A green, plump stem means the watermelon needs more time. This is especially important for heirloom varieties, which can take longer to mature.
Finally, put your ear to the test with the classic thump test. Tap the watermelon with your knuckles—ripe watermelons produce a deep, hollow sound, almost like a drum. An underripe watermelon will sound dull or muffled.
This works because the internal structure of a ripe watermelon is more air-filled and less dense. Pair this with the other signs for the most accurate results.
Timing your harvest correctly ensures your watermelon reaches its peak flavor and texture. Overripe watermelons can become mealy or seedy, while underripe ones lack sweetness. By combining these five visual and physical signs, you’ll never miss the perfect moment to pick your watermelon again. Happy harvesting! 🍉
How to test watermelon ripeness beyond the rind: the thump and sound trick
While rind color and field spots give clues, the thump test is the gold standard for watermelon ripeness. This tactile method reveals the internal sugar development that visual cues alone can’t. The science? A ripe watermelon’s water content shifts as sugars concentrate, creating a hollow sound when tapped.
But here’s the catch: a dull thump doesn’t always mean ripe—it could signal overripe or even underripe fruit. That’s why I combine the thump test with three other foolproof methods to guarantee perfect timing. Let’s break it down so you never guess again.
⚠️ Warning: The Thump Test Alone Can Mislead!
A hollow sound isn’t always ripe—it could mean the watermelon is overripe or even shriveled from heat stress. Always pair the thump test with two other ripeness checks (like the curl test or stem check) to avoid disappointment.
First, master the thump technique: tap the watermelon’s blossom end (the side that sat on the ground) with your knuckles. A ripe watermelon produces a deep, hollow echo, like knocking on a wooden door.
Listen closely—high-pitched sounds mean it’s still firming up, while dull thuds suggest it’s past its prime.
For extra accuracy, try the curl test on the main vine tendrils near the fruit. When these curl and dry while the smaller ones stay green, that’s your cue to harvest. This trick works because the vine redirects nutrients to the ripening fruit, causing the main tendrils to wither.
The stem check is another pro move: gently twist the fruit stem near the watermelon. If it snaps cleanly (rather than tearing), the fruit is ready. This happens because the abscission layer forms as the melon detaches naturally from the vine—a sign the plant is signaling it’s time to go.
Pro tip: Weigh your watermelon too! A ripe one feels heavy for its size because the seeds and flesh are fully developed. Lift it—if it’s light and hollow-sounding, it’s not ready. Combine all four methods, and you’ll nail the sweet spot every time.
Now you’ve got the tools to harvest with confidence, whether it’s your first watermelon or your tenth. The key? Patience and precision—because nothing beats that first bite of a perfectly ripe, homegrown watermelon. 🍉