
Watering
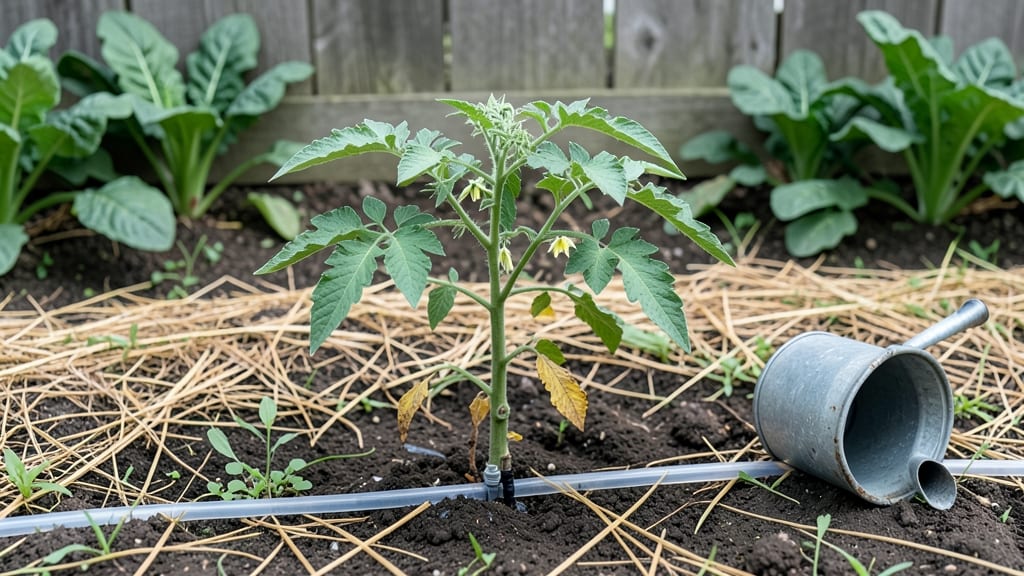
Setting up a watering system for gardens saves time, cuts water waste, and keeps plants thriving—no more lugging hoses or drowning seedlings. 💧 I learned the hard way that inconsistent watering leads to weak roots and wasted gallons, so I switched to drip irrigation after my first failed season.
The difference is night and day: plants stay hydrated at the roots where they need it most, and my water bill dropped by nearly 30%.
You’ll need basic supplies: drip tubing, connectors, an emitter kit, and a timer or manual valve—nothing fancy. Start with a simple setup for a small bed, then expand as you see how much easier it makes everything.
The tubing snaps together like puzzle pieces, and you can customize the layout to match your garden’s shape. Even beginners can do this in a weekend without calling a plumber.
Once installed, your garden will look like it’s getting a drink at the perfect time every day. No more soggy leaves or thirsty roots—just steady moisture that encourages deep growth.
You’ll notice stronger stems, better flavor in herbs, and fewer pests attracted to stressed plants. The system even works through winter for evergreens or spring bulbs.
Pro tip: Run a test the first time to check for leaks, and adjust the flow rate based on your soil type. Sandy soil drains fast, so you’ll need more frequent watering than clay.
With a little tweaking, this setup becomes your garden’s invisible helper—working while you’re at work, on vacation, or just too busy to water by hand.
📚 In This Guide
- What you need
- Instructions
- Tips and common mistakes
- Wrapping up and next steps
What you need
- ● Drip irrigation tubing: ¼" or ½" diameter, depending on your garden size (e.g., 50–500 ft, depending on needs).
- ● Emitters/drippers: 1–4 GPH (gallons per hour) per plant, spaced 12–24" apart (e.g., 10–50 emitters for a small garden).
- ● Mainline tubing: ½" or ¾" for distributing water (e.g., 25–100 ft, depending on layout).
- ● Connectors & fittings: End caps, tees, elbows, and couplers (match tubing sizes).
- ● Backflow preventer: 1 (to protect your system and water source).
- ● Pressure regulator: 1 (if using city water; 30–60 PSI recommended).
- ● Timer/automatic controller: 1 (programmable for efficiency).
- ● Water source adapter: Hose bibb or direct connection to a spigot.
- ● Stakes or landscape pins: For securing tubing to plants or ground.
- ● Scissors or tubing cutter (for clean cuts).
- ● Drill or hole punch (for attaching emitters to tubing).
- ● Measuring tape.
- ● Pliers (for tight connections).
- ● Glue (for PVC connections, if applicable).
- ● Filtration system: 50–100 mesh (to prevent clogs from debris).
- ● Fertigation kit: For adding nutrients to water.
- ● Solar-powered timer: For off-grid gardens.
- ● Smart controller: Wi-Fi-enabled for app control.
- ● Underground tubing: For a cleaner look (requires trenching tools).
Step-by-Step instructions for setting up a garden watering system
Here's the straightforward method I use to create an efficient, low-maintenance drip system that keeps plants thriving without wasted water.
💧 Step 1: Plan Your Layout and Mark Water Zones
Start by sketching your garden beds on paper or mapping them mentally. Group plants with similar water needs together—this ensures consistent moisture delivery. Use a spray paint marker to mark the center of each plant's root zone where the drip emitter will go. I like to space emitters about 12-18 inches apart along rows, closer for shallow-rooted plants like lettuce and farther for deep-rooted ones like tomatoes.
Run a garden hose through your planned layout to visualize the path. Bend it gently to follow bed contours—sharp turns create pressure drops that reduce flow. If you're using a backflow preventer, install it near the water source before the hose splits into branches. This prevents contaminated water from flowing back into your home plumbing.
🪴 Step 2: Install the Mainline and Branch Lines
Lay your mainline tubing (½-inch tubing for most gardens) along the hose path you marked. Secure it with landscape staples every 2-3 feet to keep it off the soil and prevent damage from mowers or foot traffic. Use a tubing cutter for clean cuts—never tear tubing by hand, as jagged edges restrict water flow.
Attach branch lines (¼-inch tubing) to the mainline using barb fittings and a tubing connector. Insert the branch line into the barb fitting until it stops, then press the connector firmly. For each plant, cut a 6-12 inch branch line and attach a drip emitter at the end. I like to bury branch lines 1-2 inches deep in soil to protect them from UV damage and keep the garden looking tidy.
⏰ Step 3: Connect Emitters and Test for Even Flow
Attach drip emitters to each branch line, spacing them near the base of plants where roots spread. For micro-sprinklers (which work well for ground covers), position them 6-12 inches above soil level. Turn on the water slowly and watch for equal flow from each emitter—adjust emitters or check for clogs if water sputters or drips unevenly.
Use a pressure regulator (set to 20-30 psi) to prevent emitter damage from high water pressure. If your system has multiple zones, install a manual valve for each so you can water different areas independently. Run the system for 10-15 minutes while checking for leaks at connections. Tighten any fittings that drip—this is the time to fix issues before burying lines.
☀️ Step 4: Bury Lines, Add Filters, and Set a Schedule
Once everything flows smoothly, bury mainline and branch tubing (except emitters) 1-2 inches deep in soil, using a trowel to avoid cutting lines. Cover with mulch to protect tubing and retain moisture. Install a mesh filter (100-150 micron) at the water source to prevent clogs—this saves hours of troubleshooting later.
Set a watering schedule based on plant needs. Most drip systems run 2-4 times per week, delivering ½ to 1 gallon per hour per emitter. Use a timer to automate cycles, and adjust seasonally—plants need less in cool weather and more during 90°F+ heat. I like to water early morning (before 8 AM) to reduce evaporation and fungal risks.
Tips & tricks for perfect garden watering systems
A few quick tricks that'll make your drip irrigation system work even better—and last longer—than you'd expect.
Layout Planning: Before marking your zones in Step 1, walk through your garden at different times of day. Sunlight patterns change how quickly water evaporates—shady areas need less frequent watering than full-sun zones. I mark my layout with a garden hose first, then adjust emitter spacing based on actual sunlight exposure. This prevents overwatering in some spots while others dry out.
Tubing Installation: In Step 2, don't be tempted to reuse old garden hoses as tubing—they're not designed for low-pressure drip systems and can crack over time. If you're on a budget, look for ½-inch poly tubing specifically made for irrigation at garden centers. The 2-3 foot spacing for landscape staples keeps tubing secure, but I add an extra staple at every fitting connection to prevent leaks during water pressure changes.
Testing Phase: The 10-15 minute test run in Step 3 is your chance to catch everything before burying lines. I recommend testing each zone separately if you have multiple valves—this helps pinpoint exactly where leaks or uneven flow occur. Watch for "sputtering" emitters, which usually means a clog or air pocket in the line. A quick tap on the tubing often dislodges air bubbles without needing to dismantle anything.
Seasonal Adjustments: Your watering schedule in Step 4 should change with the seasons. During 90°F+ heat, I increase my system's runtime by 20-30% and water in the early morning to prevent fungal growth. In cooler weather, I reduce to 2 times per week and might even pause completely during rainy periods. A simple rain sensor attached to your timer makes this automatic!
Pro Tips for Set Up Watering System For Garden
- A few quick tricks that'll make your drip irrigation system work even better—and last longer—than you'd expect.
- Layout Planning: Before marking your zones in Step 1, walk through your garden at different times of day.
- Tubing Installation: In Step 2, don't be tempted to reuse old garden hoses as tubing—they're not designed for low-pressure drip systems and can crack over time.
Frequently asked questions
Got questions about setting up your garden’s watering system? You’re not alone! Here are some of the most common concerns—and their straightforward solutions—to help you drip-irrigate like a pro.
What’s the best time of day to run my drip irrigation system?
Water your garden early morning (4–8 AM) to minimize evaporation and fungal diseases. Avoid late evenings, as damp foliage can encourage pests. If you’re using a timer, set it for 30–60 minutes per session, depending on soil type and plant needs.
How do I know if my drip system is delivering enough water?
Check for even moisture—soil should feel damp but not soggy. Place a trowel near emitters and dig down 1–2 inches; if it’s dry, adjust flow rates or add more emitters. Pro tip: Use a moisture meter for precision, especially for thirsty plants like tomatoes or peppers.
Can I use a drip system for all types of plants?
Yes! Drip irrigation works for vegetables, flowers, shrubs, and even trees, but adjust emitter flow rates. Container plants need frequent, shallow watering (use micro-sprayers), while deep-rooted plants (like herbs) thrive with slow, deep soaks. Avoid overhead watering for delicate flowers to prevent mildew.
What should I do if my system keeps clogging?
Clogs are usually caused by debris, mineral buildup, or algae. Start by flushing the system with vinegar or a mild bleach solution (1:10 ratio) monthly. Install filters (50–100 mesh) at the main line, and avoid using hard water without a water softener. For stubborn clogs, disassemble emitters and soak them in white vinegar for 30 minutes.
Is a drip system worth the investment for small gardens?
Even for small plots (under 100 sq. ft.), drip systems save time, water, and money by delivering moisture directly to roots. They’re low-maintenance and reduce weeds by keeping soil moist but not saturated. Start with a basic kit (under $50) and scale up as needed.
Still stuck? Drop your question in the comments—we’re happy to help you troubleshoot!
Wrapping up and next steps
Setting up a watering system for your garden doesn’t have to be overwhelming—with the right tools and a little planning, you’ll transform your yard into a thriving, low-maintenance oasis! 🌱 Whether you choose a simple drip irrigation setup or a more advanced smart system, the key is consistency and efficiency.
Start small, test your system, and soon you’ll enjoy lush plants with minimal effort.
Ready to take the next step? Monitor your garden’s progress over the first few weeks, adjust as needed, and soon you’ll be the envy of the neighborhood with your perfectly hydrated blooms! 💦