
Tools
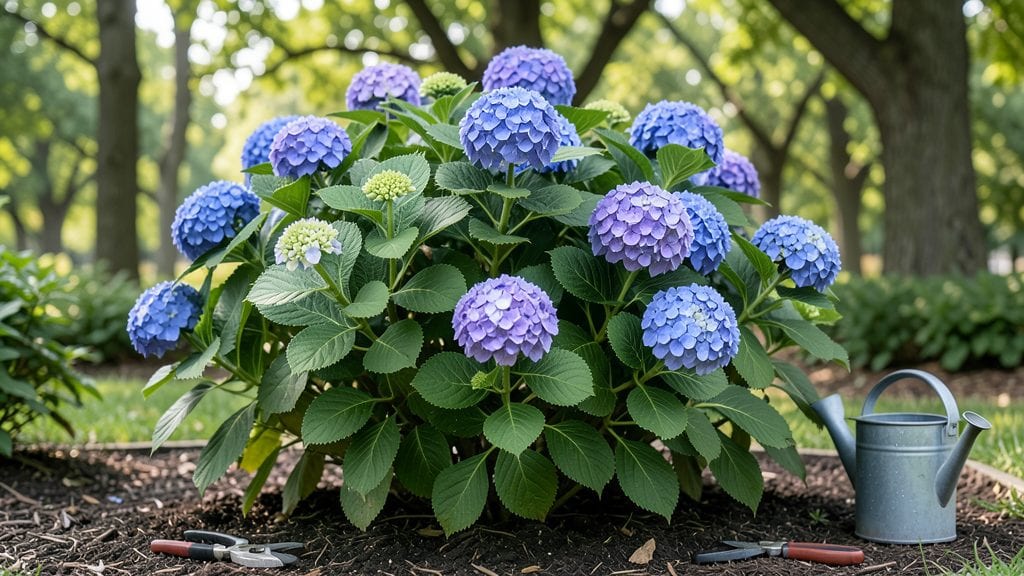
Creating a hydrangea flower garden that bursts with color all season long is easier than you think—especially when you focus on the right varieties and placement. I’ve designed my backyard borders with hydrangeas that bloom in waves, from early summer’s lacecaps to fall’s bold mopheads, with minimal fuss.
The key isn’t just picking pretty flowers; it’s choosing plants that thrive together and require almost no pruning once established.
Start with a mix of hydrangea types—like the compact Endless Summer series or the fragrant Annabelle—paired with shade-loving perennials such as hostas or ferns. These companions keep the garden lush while hydrangeas take center stage.
A 5-gallon container is perfect for patio displays, while larger bushes anchor borders beautifully. The real magic happens when you group them by color: blues turn pink in acidic soil, and whites stay crisp all season.
You’ll spend less time pruning and more time admiring the results—think velvety blooms that last from June through frost. The secret? Prune old wood in late winter for rebloomers, and let others go wild for that effortless, natural look.
Even in partial shade, hydrangeas deliver dramatic color with almost no effort, making them the ultimate low-maintenance star.
This approach works for any space—containers, borders, or even as a focal point near your patio. The best part? Once you’ve got the layout right, the garden practically maintains itself. Let’s get those hydrangeas planted and turn your yard into a year-round showstopper.
📚 In This Guide
- What you need
- Instructions
- Tips and common mistakes
- Wrapping up and next steps
What you need
- ● Hydrangea plants: Choose 3–5 varieties (e.g., Hydrangea macrophylla, H. paniculata, or H. arborescens) for year-round color. Buy 1–2 plants per variety (6–10 total for a small garden).
- ● Well-draining potting mix: 5–10 gallons (depending on pot size). Use a blend of peat moss, perlite, and compost (or a pre-mixed hydrangea soil).
- ● Organic mulch: 2–3 inches of pine bark, shredded leaves, or wood chips to retain moisture and regulate soil temperature.
- ● Slow-release fertilizer: A balanced 10-10-10 or acid-loving plant fertilizer (e.g., Miracle-Gro Azalea/Camellia). Apply 1–2 tbsp per plant at planting time.
- ○ Soil pH tester: Optional but helpful to check soil acidity (hydrangeas thrive in pH 5.2–6.0).
- ● Garden trowel or spade: For digging holes (12–18 inches deep and wide).
- ● Gloves: Heavy-duty gardening gloves to protect your hands.
- ● Watering can or hose with a gentle spray nozzle: Hydrangeas love consistent moisture (1–2 inches per week).
- ● Pruning shears: Sharp, bypass-pruners (sterilized with rubbing alcohol) for minimal pruning (late winter/early spring).
- ○ Stakes or cages (optional): For tall varieties like H. paniculata to support heavy blooms.
- ● Wheelbarrow or bucket: For mixing soil amendments or transporting mulch.
- ● Sunlight: Partial shade (4–6 hours of morning sun) is ideal, but some varieties tolerate full sun with extra water.
- ● Water access: A nearby hose or drip irrigation system for consistent hydration.
- ● Space: Plant hydrangeas 3–6 feet apart (check variety-specific spacing).
- ● Knowledge of your zone: Most hydrangeas thrive in USDA Zones 3–9; adjust planting time accordingly.
Step-by-Step instructions for designing a stunning hydrangea flower garden
Here's how to create a lush, low-maintenance hydrangea display that thrives through all seasons.
🌱 Step 1: Select and Prepare Planting Sites
Hydrangeas thrive in partial shade—choose locations with morning sun and afternoon shade, especially in hotter climates. The ideal spot gets 4-6 hours of filtered light daily, protecting blooms from harsh afternoon rays that can scorch petals. Test your site by observing how sunlight moves through the area at different times of day.
Dig planting holes twice as wide as the root ball but only as deep as the container's base. This prevents burying the plant too deeply, which can suffocate roots. Loosen the soil at the bottom of the hole with a garden fork to encourage root penetration into surrounding earth. Amend heavy clay soil with 2 inches of organic compost to improve drainage while retaining moisture.
☀️ Step 2: Plant Hydrangeas for Optimal Growth
Remove the plant from its container and gently tease apart any circling roots to encourage outward growth. Position the root ball in the hole so the top sits 1 inch above ground level—this prevents rot during heavy rains. Backfill with native soil mixed with 1 cup of bone meal per plant to provide slow-release phosphorus for strong root development.
Water deeply immediately after planting to eliminate air pockets and settle the soil. The top 2 inches of soil should feel moist but not soggy. Mulch around the base with 3 inches of shredded bark, keeping it 6 inches away from the stem to prevent rot. This mulch layer conserves moisture and regulates soil temperature, which is critical for hydrangeas that prefer 60-70°F soil temperatures.
💧 Step 3: Establish a Consistent Watering Routine
Hydrangeas demand 1-1.5 inches of water weekly, delivered through deep waterings 2-3 times per week rather than frequent shallow waterings. Check moisture by inserting your finger 2 inches into the soil—if it feels dry, water thoroughly until it runs out the drainage holes. Overhead watering can promote fungal diseases, so use a soaker hose placed at the base of each plant.
During the first growing season, monitor soil moisture daily, especially in 75°F+ temperatures. Wilting leaves indicate thirst, but soggy soil signals overwatering. Adjust your schedule based on rainfall—hydrangeas naturally absorb water through their extensive root systems, so they rarely need supplemental watering during heavy rain periods. Fertilize monthly with balanced 10-10-10 granular fertilizer during the growing season for vibrant blooms.
✂️ Step 4: Prune Strategically for Season-Long Blooms
Prune late winter or early spring before new growth appears, focusing on dead, crossing, or weak branches. Cut just above a bud or leaf node at a 45-degree angle to promote faster healing. Never prune more than 1/3 of the plant in a single season, as this stresses hydrangeas and reduces flowering potential. For mophead and lacecap varieties, remove spent blooms after they fade to encourage new growth.
If your hydrangeas produce fewer blooms than expected, they may need more sunlight or adjusted pruning. Bigleaf hydrangeas (like 'Endless Summer') bloom on old and new wood, so prune lightly in late winter and deadhead spent flowers throughout summer. For panicle and smooth hydrangeas, which bloom on new wood, prune back 1/2 to 2/3 of the plant in late winter to stimulate vigorous new growth and abundant flowers.
🌿 Step 5: Maintain Soil pH for Color Changes
Bigleaf hydrangeas are famous for their pH-sensitive color shifts—acidic soil (below 6.0) produces blue blooms, while alkaline soil (above 6.0) yields pink flowers. Test your soil annually using a home pH kit and adjust by amending with sulfur (to acidify) or lime (to alkalize). Apply amendments in early spring and water thoroughly to integrate them into the soil.
For dramatic color transformations, divide your garden into sections with different pH levels. For example, plant 'Nikko Blue' hydrangeas in acidic soil and 'Annabelle' in neutral to slightly alkaline soil. Mulch with pine needles to naturally lower pH or use crushed eggshells to raise it gradually. Regular soil testing ensures consistent color results year after year, making your hydrangea garden a stunning visual centerpiece.
Tips & tricks for perfect hydrangea flower garden
Creating a stunning hydrangea garden that thrives year-round requires attention to detail, and these expert tips will elevate your results from good to spectacular.
Soil Preparation: Before planting, conduct a thorough soil analysis to understand its natural composition. If your soil is particularly dense or compacted, consider adding 3-4 inches of organic matter throughout the planting area, not just in the holes. This creates a more hospitable root zone for your hydrangeas and improves overall drainage. The 2 inches of compost mentioned in Step 1 should be thoroughly mixed with the native soil to prevent pockets of different textures that could stress the roots.
Planting Depth and Root Care: When positioning your hydrangeas, pay special attention to the root flare—the point where the roots transition to the trunk. This should sit just above soil level, never buried. If you notice circling roots during planting, gently separate them with your fingers rather than cutting them, as this encourages outward growth. The 1-inch elevation mentioned in Step 2 is crucial for preventing crown rot, especially in regions with heavy rainfall.
Watering Strategy: The 1-1.5 inches of water weekly guideline in Step 3 is ideal, but timing matters just as much as quantity. Water in the early morning hours to allow foliage to dry completely before evening, reducing fungal disease risk. During the first growing season, consider using a drip irrigation system set to deliver water slowly at the base of each plant, which mimics natural rainfall patterns and promotes deeper root growth.
Pruning Precision: When pruning in late winter or early spring, use sharp, clean pruners to make precise cuts just above a bud or leaf node. The 45-degree angle mentioned in Step 4 isn't just for aesthetics—it helps water run off the cut, preventing rot. For varieties that bloom on old wood, like mophead hydrangeas, avoid heavy pruning that removes last year's growth, as this is where your flowers will develop. A good rule of thumb is to never remove more than one-third of the plant's total volume in any single pruning session.
Pro Tips for Hydrangea Flower Garden
- Creating a stunning hydrangea garden that thrives year-round requires attention to detail, and these expert tips will elevate your results from good to spectacular.
- Soil Preparation: Before planting, conduct a thorough soil analysis to understand its natural composition.
- Planting Depth and Root Care: When positioning your hydrangeas, pay special attention to the root flare—the point where the roots transition to the trunk.
Frequently asked questions
Got questions about creating your dream hydrangea flower garden? You’re not alone! Here are answers to the most common queries to help you grow stunning blooms with ease.
When is the best time to plant hydrangeas?
Plant hydrangeas in early spring or fall when the soil is workable but not frozen. This gives roots time to establish before extreme heat or cold. If you’re planting in summer, keep the soil moist and provide afternoon shade to reduce stress. Pro tip: Container-grown hydrangeas can be planted year-round in mild climates!
Do hydrangeas need a lot of pruning?
Not at all! Most hydrangeas (like mophead and lacecap types) bloom on old wood, so prune only after flowering in late summer or early fall. For panicle hydrangeas (which bloom on new wood), prune in late winter or early spring. Light shaping is all you need—no heavy cuts required!
How often should I water my hydrangeas?
Hydrangeas love consistent moisture, especially in their first year. Water deeply 1-2 times per week, aiming for 1-2 inches of water per week. Mulch around the base to retain moisture and protect roots. Watch for: Yellowing leaves (overwatering) or crispy edges (underwatering). Adjust based on your climate!
How can I change my hydrangea flower colors?
Hydrangea color depends on soil pH! For blue flowers, add aluminum sulfate to acidic soil (pH 5.5-6.0). For pink flowers, raise pH with lime (pH 6.0-7.0). Test soil annually and amend gradually. Fun fact: Some varieties (like Endless Summer) naturally shift colors!
What pests or diseases should I watch for?
Common issues include:
- Slugs/snails: Use beer traps or diatomaceous earth.
- Spider mites: Spray with water or neem oil if leaves yellow.
- Powdery mildew: Improve airflow and avoid overhead watering.
- Leaf spot: Prune infected leaves and apply fungicide if needed.
Most problems are preventable with good drainage and proper spacing!
Can I grow hydrangeas in containers?
Choose large containers (15+ gallons) with drainage holes and use well-draining potting mix. Dwarf varieties like Little Lime or Mini Penny are perfect for pots. Move containers to partial shade in hot afternoons and water daily in summer.
Wrapping up and next steps
Creating a hydrangea flower garden is a rewarding way to enjoy year-round beauty with minimal effort—especially when you master the art of low-maintenance pruning! Whether you’re drawn to the bold blooms of mophead varieties or the delicate lace of lacecap hydrangeas, these plants thrive with just a little care.
Now that you’re equipped with the right tools, techniques, and answers to common questions, it’s time to roll up your sleeves and get growing!
Your next step? Pick your favorite hydrangea type and sketch a simple layout for your garden. Need inspiration? Snap a photo of your space and share it with fellow gardeners for tips—you’ll be admiring your lush, vibrant blooms in no time! 🌸✨