Light Requirements
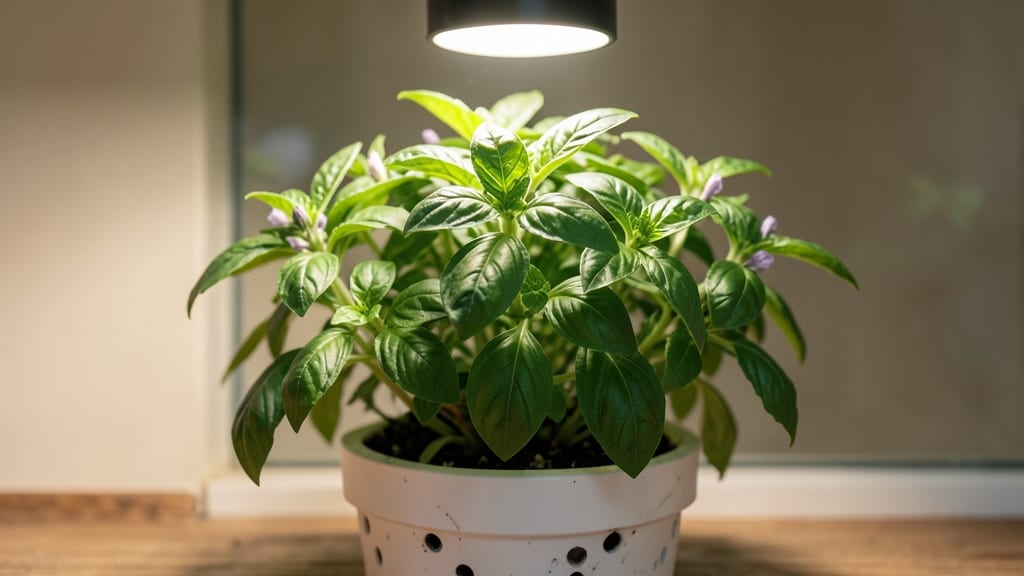
An indoor kitchen garden with LED lighting transforms your countertop into a fragrant, functional space that never stops producing. 🌿 I used to buy fresh herbs at the store, but after my first basil plant thrived under a simple LED setup, I never looked back—now I have fresh cilantro, parsley, and mint growing year-round, just steps from where I cook.
The setup is simpler than you’d think: a basic LED grow light, shallow containers with drainage, and plants that love indoor conditions like basil, chives, or dwarf varieties of thyme.
Even a small windowsill can work if you supplement with a light, but the right LED setup means you can place your garden anywhere—no natural light required. I started with a $30 clip-on light and a few thrift-store pots, and it’s paid for itself in saved grocery trips.
You’ll harvest fresh leaves whenever you need them, and the air in your kitchen will smell like a Mediterranean market. The plants stay compact, so they won’t overwhelm your space, and you’ll avoid the wilting, expensive herbs from the store.
Plus, watching those green shoots grow right above your cutting board is oddly satisfying—like having a tiny, edible forest indoors.
Works for apartments, tiny kitchens, or even a sunny corner of a large home. The key is matching your plants to the light and space, then keeping it simple. Let’s get your kitchen garden growing!
📚 In This Guide
- What you need
- Instructions
- Tips and common mistakes
- Wrapping up and next steps
What you need
- ● LED Grow Lights: 1-2 full-spectrum LED grow lights (10W–20W per plant, adjustable height)
- ○ Optional: smart LED lights with timers or app control (e.g., 12–16 hours/day)
- ● Containers: 3–6 drainage-friendly pots (6–12 inches deep, with holes at the bottom)
- ● 1 tray or saucer (to catch excess water)
- ● Growing Medium: 1–2 bags of high-quality potting mix (sterilized, well-draining)
- ○ Optional: coco coir or perlite (for better aeration, 10–20% mix)
- ● Herb Seeds or Seedlings: 6–12 herb seeds (e.g., basil, mint, parsley, thyme) or 3–6 starter plants
- ● Basic Tools: 1 spoon or small trowel (for planting)
- ● 1 spray bottle (for gentle watering)
- ○ 1 pH testing kit (optional but helpful for soil health)
- ● 1 humidity dome (to retain moisture for seedlings)
- ● 1 self-watering system (e.g., wicking mats or drip irrigation)
- ● 1 grow light stand or shelf (adjustable height, 18–24 inches above plants)
- ● 1 small fan (for air circulation, prevents mold)
- ● 1 notebook or app (to track watering, light cycles, and growth)
Step-by-step instructions for creating an indoor kitchen garden
Here's how to transform your kitchen into a thriving herb garden—no yard required.
🪴 Step 1: Choose and Prepare Your Containers
Start with 4 medium-sized pots (6-8 inches deep) that have drainage holes—herbs hate soggy roots. I like terra cotta because it breathes, but plastic works too if you drill extra holes. Place a coffee filter or mesh over each hole to keep soil in while letting water out.
Fill each pot with 1 gallon of potting mix, leaving 1 inch of space at the top. Tap the pot gently to settle the soil, then water it until moisture runs out the drainage holes. This preps the soil for planting and ensures even moisture distribution.
🌱 Step 2: Plant Your Herb Starts
Dig a hole in each pot twice as deep as the herb's root ball. Gently remove your herb plants from their nursery containers and place them in the holes, spacing them 3-4 inches apart if using multiple herbs in one pot. Press the soil around the roots to secure them, but don’t pack it down too tightly.
Water each plant thoroughly until the soil is damp 1 inch deep. You’ll know it’s right when water drips out the bottom but doesn’t puddle. Avoid wetting the leaves—this helps prevent fungal diseases. I like to water from the bottom by placing pots in a tray of water for 10 minutes, then letting them drain.
☀️ Step 3: Set Up Your LED Grow Light
Position your LED grow light 6-12 inches above the tallest plants. Herbs need 12-16 hours of light daily, so set a timer for consistency. I use a simple plug-in timer to automate it—no guesswork, no forgotten watering. Adjust the height as your herbs grow; if they stretch toward the light, they’re not getting enough intensity.
Watch for signs of light stress: yellowing leaves or leggy stems mean the light’s too far away. If leaves turn brown or crispy, it’s too close. The ideal setup keeps foliage vibrant and compact. Rotate the pots a quarter turn weekly so all sides get even light exposure.
💧 Step 4: Maintain Moisture and Humidity
Check soil moisture every 2-3 days by sticking your finger 1 inch deep. Water when it feels dry, but don’t let it stay soggy. Overwatering is the #1 killer of indoor herbs. I use a spray bottle to mist the leaves occasionally—especially for basil and parsley—to mimic outdoor humidity.
Group your pots together to create a microclimate. The warmth from the light and the plants themselves help maintain even moisture. If you notice wilting, it’s usually a sign of underwatering, but yellowing leaves often mean overwatering. Adjust your schedule based on what you see—herbs are forgiving if you catch issues early.
✂️ Step 5: Harvest and Prune Regularly
Start harvesting when your herbs reach 3-4 inches tall. Pinch off the outer leaves first to encourage bushier growth. Basil, for example, loves to be pruned—snip just above a set of leaves to promote new branches. Regular harvesting keeps your plants productive and prevents them from flowering too soon.
Use clean scissors or fingers to avoid damaging stems. I like to harvest in the morning when oils are at their peak. Store fresh herbs in a jar of water in the fridge, just like flowers, to keep them crisp for up to a week. With consistent care, your indoor garden will stay lush and flavorful all year.
Tips & tricks for perfect indoor herb gardens
Transforming your kitchen into a thriving herb garden takes more than just pots and soil—it's about creating the right conditions. Here are the secrets that'll help your herbs flourish year-round.
Container Selection: While terra cotta is my favorite for its breathability, don't overlook plastic pots—they retain moisture better for herbs like mint that prefer consistently damp soil. Whatever you choose, make sure each of your 4 medium-sized pots has drainage holes covered with mesh. This simple step prevents root rot while keeping soil in place. I've found that adding a layer of pebbles at the bottom of each pot improves drainage even more.
Lighting Strategy: The 12-16 hours of daily light is non-negotiable, but positioning matters just as much. Place your LED grow light 6-12 inches above the tallest plants and adjust as they grow. I've learned the hard way that moving the light too far away causes leggy growth, while keeping it too close burns the leaves. A simple trick: if your herbs start stretching toward the light, they're hungry for more intensity. Rotate your pots a quarter turn weekly to ensure even growth all around.
Watering Wisdom: That 10-minute bottom-watering technique in Step 2 is a game-changer. It ensures water reaches all the roots without sogging the top layer. For herbs like thyme and rosemary that prefer drier conditions, let the top inch of soil dry out completely between waterings. I keep a spray bottle handy to give basil and parsley a gentle misting—they love the extra humidity. Remember, wilting usually means underwatering, while yellowing leaves signal overwatering.
Harvesting Technique: When your herbs reach 3-4 inches tall, start harvesting the outer leaves first. This encourages bushier growth and prevents flowering, which makes herbs taste bitter. For basil, I snip just above a set of leaves to promote new branches. Pro tip: Harvest in the morning when essential oils are at their peak. Store your freshly cut herbs in a jar of water in the fridge—it keeps them crisp for up to a week, just like fresh flowers.
Pro Tips for Indoor Kitchen Gardens
- Transforming your kitchen into a thriving herb garden takes more than just pots and soil—it's about creating the righ...
- Container Selection: While terra cotta is my favorite for its breathability, don't overlook plastic pots—they retain ...
- Lighting Strategy: The 12-16 hours of daily light is non-negotiable, but positioning matters just as much. Place your...
Frequently asked questions
Got questions about starting an indoor kitchen garden?
You’re not alone! Here are answers to the most common queries to help you grow confidently—even with LED lighting.
How much light do herbs actually need with LED grow lights?
Most herbs thrive with 12–16 hours of light daily from LED grow lights. Use a timer for consistency! Leafy herbs (like basil or parsley) need moderate intensity (2000–3000 lumens), while peppery herbs (cilantro, dill) prefer brighter light (3000–5000 lumens). Adjust the height of your lights (6–12 inches above plants) to avoid leggy growth.
Can I grow herbs indoors year-round, or do they need a "rest" period?
Yes! With proper LED lighting, you can grow herbs year-round—no rest needed. However, some herbs (like dill or cilantro) may bolt (flower) faster indoors due to consistent light. Harvest leaves frequently to encourage bushier growth. For a "break," simply reduce light to 8 hours/day for a few weeks, then return to full light.
Are LED grow lights worth the investment over regular bulbs?
Absolutely!
LED grow lights are energy-efficient (use 50–70% less power than incandescents), long-lasting (50,000+ hours vs. 1,000 for bulbs), and customizable (adjustable spectra for different herbs). While the upfront cost is higher ($50–$200), they pay off in faster growth, higher yields, and lower electricity bills.
What’s the easiest herb to grow indoors for beginners?
Start with basil, mint, or parsley—they’re forgiving and grow quickly. Basil loves warmth and bright light, mint thrives in humidity, and parsley tolerates cooler temps. Avoid finicky herbs like thyme or rosemary (they need more light/heat) until you’re comfortable. Pro tip: Sprinkle seeds on soil (no need to bury deeply) for faster germination!
How do I keep pests away from my indoor herb garden?
Indoor pests (like spider mites or fungus gnats) are rare but annoying. Prevent them by:
- Using sterile soil (pasteurize or buy pest-free mixes).
- Avoiding overwatering (let soil dry slightly between waterings).
- Isolating new plants for 1–2 weeks.
Wrapping up and next steps
Creating an indoor kitchen garden with LED lighting is a rewarding way to enjoy fresh herbs year-round—no green thumb required! 🌱 With the right setup, you’ll harvest vibrant flavors while saving space and money.
Whether you’re a seasoned gardener or just starting, this low-maintenance method makes growing herbs effortless and exciting.
Ready to dive in? Start small—pick one herb to test your newfound skills, then expand your garden as confidence grows. Your kitchen (and taste buds) will thank you!