
Tools
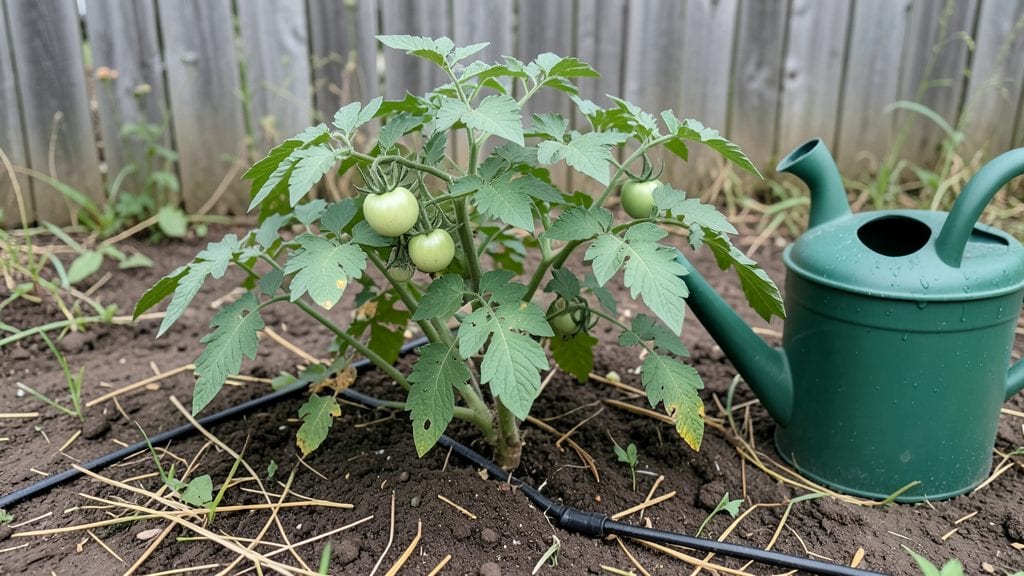
An irrigated garden bed turns your watering chores into a set-it-and-forget-it system that actually saves water. 💧 I’ve tried the manual watering routine, the sprinklers, and even the fancy timers—until I finally built my first self-watering bed last summer.
The difference? No more wilting plants when I’m on vacation, no more guessing when to water, and a garden that thrives without wasting a drop.
The beauty of these systems is how customizable they are. You can start with a simple raised bed paired with a drip irrigation line or go all-in with a buried reservoir and automated valves.
The key is matching the setup to your space—whether that’s a small balcony container or a full in-ground plot. Soil prep matters too: loose, well-draining mixes work best, and adding compost keeps roots happy without clogging the irrigation.
What you’ll end up with is a garden that stays consistently moist without drowning—think lush basil that never bolts, tomatoes that ripen evenly, and herbs that stay fragrant all season. The best part?
You’ll cut your water usage by up to 50% compared to traditional methods, and the system pays for itself in saved time and healthier plants. Here’s how to design one that fits your yard and your watering style.
Works for everything from strawberries to peppers, and adapts to both sunny and partially shaded spots. The only real limit is your imagination—and maybe your budget for supplies. Let’s get into the details so you can skip the trial-and-error phase.
📚 In This Guide
- What you need
- Instructions
- Tips and common mistakes
- Wrapping up and next steps
What you need
- ● Garden bed frame: Wooden planks (cedar or redwood, 2x6 or 2x8, 8–10 ft long, 4–6 pieces), or pre-made raised bed kit.
- ● Water reservoir: Large plastic bin (5–20 gallons, food-grade), or a repurposed container (e.g., trash can, barrel).
- ● Irrigation tubing: ½-inch drip irrigation tubing (10–20 ft, depending on bed size).
- ● Emitters/Nozzles: Drip irrigation emitters (0.5–4 GPH, 1–2 per plant, adjust based on plant count).
- ● Waterproof liner: Pond liner or heavy-duty plastic sheeting (slightly larger than bed dimensions).
- ● Gravel or landscape fabric: ¼-inch gravel (2–3 bags) or landscape fabric to separate soil from liner.
- ● Soil: High-quality potting mix or compost blend (enough to fill bed to desired depth, typically 6–12 inches).
- ● Tools: Drill with hole saw (for tubing holes)
- ● Scissors or tubing cutter
- ● Staple gun (for securing liner)
- ● Measuring tape, level, and pencil
- ● Shovel or garden fork
- ● Water filter (if using tap water) to prevent clogging.
- ● Timer or smart irrigation controller (for automated watering).
- ● Mulch (straw or wood chips) to retain moisture.
- ● Solar-powered water pump (for elevated beds or large setups).
- ● Decorative stones or edging (to finish the look).
Step-by-Step instructions for building an irrigated garden bed
Here's how to create a simple, efficient self-watering system that keeps plants thriving with minimal effort.
🪴 Step 1: Design and Prepare the Garden Bed Layout
Choose a flat, level spot with at least 4 feet of width for your bed. I like to outline the area with landscape fabric first—this prevents weeds from creeping up through the soil later. Dig the bed to a depth of 12 inches, removing any grass or debris.
For a 4-foot-wide bed, I recommend a length of 8 feet to maximize space while keeping the bed manageable. The key is to avoid walking on the bed once planted, so plan access paths around it. Mark the edges with stakes and string for a clean, straight border.
💧 Step 2: Install the Water Reservoir and Distribution System
At one end of the bed, dig a hole 1 foot deep and 2 feet wide to create a water reservoir. Line it with a heavy-duty plastic liner (like a pond liner) to hold water without seeping into the soil. Fill the reservoir with 10 gallons of water—this is enough to keep most vegetable beds hydrated for 7-10 days.
Next, lay a ½-inch diameter perforated irrigation tubing along the bottom of the bed, connecting it to the reservoir. Use a small submersible pump (if needed) to circulate water slowly through the tubing. Space the holes in the tubing 12 inches apart to ensure even moisture distribution. Test the flow by filling the reservoir and checking for leaks or dry spots.
☀️ Step 3: Layer the Soil for Optimal Drainage and Retention
Start with a 2-inch layer of coarse gravel at the bottom of the bed (excluding the reservoir area). This prevents clogging and allows excess water to drain away from roots. On top of the gravel, add a 4-inch layer of compost to enrich the soil and improve water retention.
Fill the remaining space with a mix of 50% potting soil and 50% perlite—this blend drains well but holds moisture longer than regular garden soil. Avoid compacting the layers; instead, fluff them gently with your hands to create air pockets. This setup ensures roots get oxygen while staying hydrated.
🌱 Step 4: Plant and Connect the Irrigation System
Dig holes for your plants, spacing them according to their mature size (check seed packets for guidelines). Water the reservoir fully before planting, then place each plant in its hole, covering roots with soil. Press lightly around the base to remove air pockets but don’t pack too tightly.
Once all plants are in, connect the irrigation tubing to the reservoir’s outlet. If using a pump, submerge it fully in the water and set it to run for 10-15 minutes every other day to maintain moisture. For passive systems, the reservoir’s gravity will slowly feed water through the tubing as needed. Monitor the water level weekly and refill as necessary.
⏰ Step 5: Monitor and Adjust for Seasonal Changes
Check the system weekly during the first month to ensure even watering. Look for signs of overwatering (yellowing leaves) or underwatering (wilted plants). Adjust the tubing’s flow rate by partially closing the valve if water pools at the edges. In hotter months, you may need to refill the reservoir every 3-4 days.
Add a 1-inch layer of mulch on top of the soil to reduce evaporation and keep roots cool. This also suppresses weeds and keeps the bed looking neat. If plants show signs of stress (like drooping or discoloration), check the tubing for clogs or the reservoir for adequate water levels. With this setup, you’ll spend less time watering and more time enjoying your garden.
Tips & tricks for perfect irrigated garden beds
Here's what I've learned after building and maintaining these systems for years—tricks that'll help you avoid common pitfalls and get the most out of your self-watering garden.
Soil Layering Secret: In Step 3, don't skip the 2-inch gravel layer—it's the foundation of your system's efficiency. I've seen people skip it, and within weeks, their tubing gets clogged with soil. The gravel creates space for water to flow while preventing soil particles from blocking the perforations in your tubing. Pro tip: Rinse the gravel before adding it to remove any fine dust that could cause clogs later.
Reservoir Placement: When creating your 1-foot deep reservoir in Step 2, position it at the lowest point of your bed. This ensures gravity helps distribute water evenly through the tubing. I've had to rebuild systems where people put the reservoir at the highest point—water just pools there instead of circulating. Also, place the reservoir at least 12 inches away from where you'll plant to avoid disturbing roots later.
Tubing Flow Test: After laying your tubing in Step 2, fill the reservoir and run the system for those critical 10-15 minutes before planting. Watch for dry spots or areas where water pools excessively. If you notice uneven flow, adjust the tubing position or add small holes in problem areas. This test run prevents headaches later when plants show stress from inconsistent watering.
Seasonal Adjustments: The instructions mention checking weekly, but in Step 5, I actually monitor my system every 3 days during summer heatwaves. On extremely hot days, you might need to run the pump for 20 minutes instead of the standard 10-15 minutes. Keep a small notebook nearby to track how often you need to refill the reservoir—this becomes your personal watering schedule for that specific bed location.
Pro Tips for Irrigated Garden Bed
- Here's what I've learned after building and maintaining these systems for years—tricks that'll help you avoid common pitfalls and get the most out of your self-watering garden.
- Soil Layering Secret: In Step 3, don't skip the 2-inch gravel layer—it's the foundation of your system's efficiency.
- Reservoir Placement: When creating your 1-foot deep reservoir in Step 2, position it at the lowest point of your bed.
Frequently asked questions
Got questions about setting up and maintaining an irrigated garden bed?
Here are some of the most common ones—plus straightforward answers to help you get growing with confidence!
How often should I water an irrigated garden bed?
With a properly designed system, you’ll only need to refill the reservoir every 1-2 weeks (depending on climate and plant type). The wicking or drip irrigation keeps soil consistently moist without overwatering. Check soil moisture occasionally—if it’s dry 1-2 inches down, it’s time to top up!
Can I use an irrigated garden bed in winter?
Yes, but with adjustments! In freezing temps, bury the reservoir or use insulated materials (like foam boards) to prevent water from freezing. For drip systems, drain and store hoses or use frost-proof emitters. Cold-hardy plants (kale, spinach, carrots) thrive year-round in protected beds.
What if my plants look wilted even with irrigation?
Wilting can mean clogged lines, low water pressure, or root-bound plants. First, check the reservoir level and inspect tubing for blockages (flush with vinegar if needed). If roots are circling, prune them gently and refresh the soil. Overcrowding can also starve plants—thin seedlings if necessary!
Are there cheaper alternatives to a full DIY system?
Start with a simple wicking bed (fabric + gravel + soil) for under $50. For drip systems, repurpose old hoses or PVC pipes with basic emitters. Olla pots (unglazed clay pots) are a low-tech, zero-power option—just bury them and let water seep out!
Can I mix vegetables and flowers in one bed?
Yes, but choose companions wisely! Pair shallow-rooted plants (lettuce, herbs) with deep-rooted ones (tomatoes, carrots) to avoid competition. Avoid mixing heavy feeders (like corn) with light feeders (like strawberries). Flowers like marigolds deter pests—win-win!
What’s the biggest mistake beginners make?
Underestimating drainage! Without proper drainage, roots rot and plants drown. Always include a 2-3 inch gravel layer at the bottom and slope the bed slightly. Test your setup by flooding it—water should drain within 30 minutes. No standing water = happy plants!
Wrapping up and next steps
Creating an irrigated garden bed is a game-changer for efficient, eco-friendly gardening! With a self-watering system, you’ll save time, reduce waste, and enjoy thriving plants with minimal effort. Whether you're a beginner or a seasoned gardener, this setup makes watering effortless—so grab your tools and get growing!
Ready to take the next step? Start small with a single bed, experiment with plants, and soon you’ll be expanding your zero-waste oasis. Happy gardening! 🌱✨