
Tools
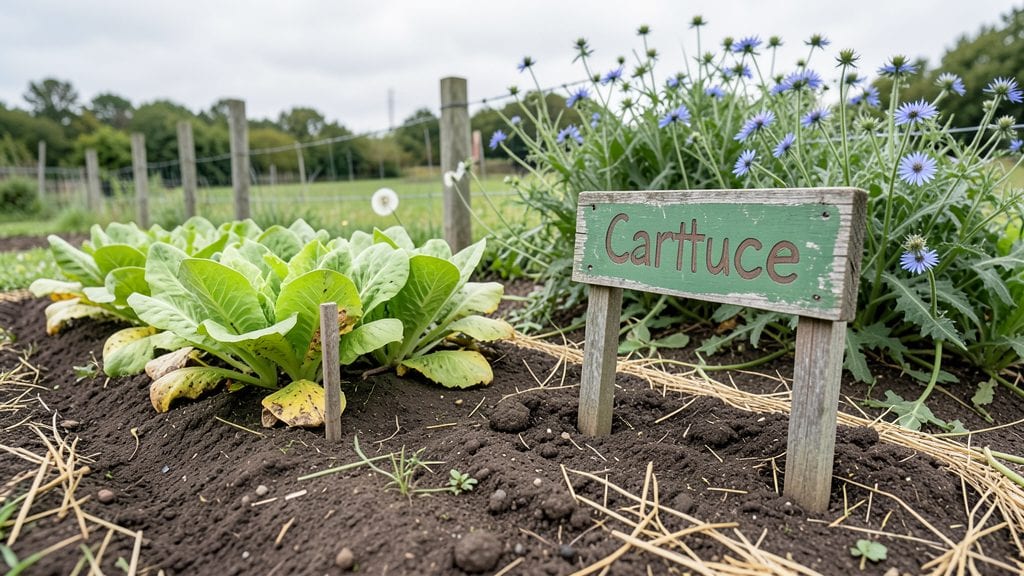
Large garden signs transform a simple yard into a curated space that tells a story. 🌿 I used to think garden signs were just for labeling herbs, but now they’re the unexpected focal points that tie my entire outdoor design together.
Whether you’re marking a vegetable patch or creating a whimsical entryway, the right sign elevates every corner of your garden.
The beauty of large signs is their versatility—wood for rustic charm, metal for modern edges, or slate for timeless elegance. I’ve seen them used as bold directional markers, artistic backdrops for flower beds, or even as functional plant identifiers that double as decor.
The key is matching the material to your garden’s vibe while keeping the text legible from a distance.
Imagine stepping into your garden and seeing a custom sign welcoming guests or a playful marker for your tomato patch. These aren’t just labels; they’re design elements that make your space feel intentional and inviting.
With a little creativity, you can turn functional signs into the star of your outdoor aesthetic.
Works for any style—from cottage-core cottages to sleek contemporary landscapes. The best part? They’re just as useful in winter as they are in spring, keeping your garden’s personality alive year-round. Let’s explore how to make them work for you.
📚 In This Guide
- What you need
- Instructions
- Tips and common mistakes
- Wrapping up and next steps
What you need
- ● Base Material (Choose One): Plywood or MDF board (½" to ¾" thick, 4’x8’ sheets for cutting)
- ● Corrugated metal sheets (16- or 20-gauge, 4’x8’ panels)
- ● Cedar or redwood planks (1"x6" or 1"x8", 8-foot lengths)
- ● Paint & Finishes: Outdoor-rated paint (acrylic latex or chalk paint, 1–2 quarts)
- ● Stain or sealant (for wood, 1 quart)
- ● Clear polycrylic or spar urethane (1 pint, for durability)
- ● Lettering Supplies: Stencils or vinyl letters (custom-cut to size)
- ● Permanent markers or chalkboard paint (for hand-lettering)
- ● Cutting Tools: Jigsaw or circular saw (for plywood/metal)
- ● Tin snips (for metal sheets)
- ● Utility knife (for scoring lines)
- ● Assembly Tools: Drill/driver (with wood/metal bits)
- ● Screws or nails (deck screws for wood, self-tapping for metal)
- ● Sandpaper (80–120 grit, for smoothing edges)
- ○ Optional Extras: Standoffs or brackets (for elevated signs)
- ● LED string lights (for nighttime glow)
- ● Weatherproof adhesive (for attaching letters)
- ● A designated workspace (garage, patio, or driveway)
- ● Basic DIY skills (cutting, drilling, painting)
- ● Design inspiration (sketch your sign layout or use a template)
- ● Pro Tip: 💡 Measure twice, cut once—especially for large signs!
How to install large garden signs for maximum impact
Here's how to make your garden signs stand out year-round with simple, foolproof placement.
🪴 Step 1: Choose the Right Locations for Visibility
Scan your garden for high-traffic areas where signs will catch the eye immediately. I always start with the main entrance path and the patio seating area—these spots get the most attention. Avoid placing signs in shady corners where they’ll blend into the foliage or get lost against walls.
For maximum visibility, position signs at eye level (about 4-5 feet tall) when viewed from the most common vantage point. If you're using tall, freestanding signs, place them where they won’t block pathways or obscure plantings. Sketch a rough layout first—you’ll spot awkward spots before you drill anything.
☀️ Step 2: Prepare the Installation Surface
Clean the surface where your sign will mount—dirt, moss, or loose paint will prevent proper adhesion. Use a wire brush to scrub away debris from wood, and wipe down metal or plastic surfaces with rubbing alcohol to remove oils. For ground stakes, clear a 6-inch radius around the planting area to avoid tripping hazards.
If mounting to wood, sand any rough edges lightly to create a smooth surface. For concrete or brick, mark the drill points with a pencil so you can line up screws or anchors precisely. I like to use a level tool here—even a slight tilt makes signs look unprofessional, and you’ll notice it immediately.
✂️ Step 3: Secure Signs with Durable Hardware
For freestanding signs, drive stakes deep enough so at least 4 inches remain buried for stability. Use a rubber mallet to tap them in gently—hammering too hard can crack the sign or damage the stake. For wall-mounted signs, pre-drill pilot holes 1/16 inch smaller than your screws to prevent wood splitting.
Tighten hardware snugly but don’t over-torque—wood can crack, and metal signs may bend. I always double-check by giving each screw a slight tug after installation. If any sign wobbles, add an extra anchor or reinforce with a second screw above or below the original placement.
💧 Step 4: Weatherproof and Maintain for Longevity
Seal wooden signs with outdoor varnish or paint if they’re not pre-treated, focusing on edges where moisture seeps in. For metal signs, apply a clear weatherproof coating to prevent rust. I test this by running a finger along the surface—if it feels slightly tacky, the sealant’s working.
Clean signs 2-3 times per year with mild soap and water, avoiding abrasive scrubbers that scratch surfaces. Store removable signs indoors during winter if your climate gets harsh. Check hardware annually—tighten loose screws and replace rusted stakes before they fail mid-season.
🌿 Step 5: Arrange for Seasonal Themes and Flexibility
Group signs by theme (e.g., herbs near the kitchen garden, flowers by the entrance) but leave 12-18 inches between them for airflow. Rotate signs seasonally—swap summer veggie labels for autumn harvest signs to keep the garden feeling fresh. I keep a small inventory of interchangeable signs so transitions take less than 10 minutes.
Add lighting to nighttime signs with solar-powered stakes or low-voltage landscape lights. Position lights so they illuminate the sign’s edges—this creates a soft glow that’s visible from a distance. Test at dusk to ensure the effect works as intended before finalizing placements.
Tips & tricks for perfect large garden signs
A few simple tricks will transform your garden signs from ordinary to eye-catching statement pieces that elevate your outdoor space.
Location Strategy: In Step 1, when choosing locations, consider the "golden triangle" rule: place signs where they create visual interest from three key vantage points—the main entrance, patio seating area, and garden pathway intersections. This creates a natural flow that guides visitors through your garden. I always test by standing in each spot and asking, "Can I see the sign clearly without straining?" If not, it's not the right location.
Pre-Drilling Precision: For Step 3, when pre-drilling pilot holes, use a pencil to mark your screw placement first. Then, hold the sign against the wall and trace around the screw holes with a thin marker. This ensures perfect alignment when you remove the sign for cleaning or seasonal rotation. I've ruined more than a few installations by forgetting this simple step!
Seasonal Rotation Hack: The 10-minute seasonal rotation mentioned in Step 5 becomes even easier with a simple labeling system. Use colored dots or small labels on the back of each sign to indicate its seasonal placement. For example, red dots for summer veggie signs and blue for autumn harvest signs. This visual cue makes swapping signs during transitions feel like a breeze, not a chore.
Lighting Placement: When adding lighting in Step 5, position lights slightly below the sign's bottom edge rather than directly behind it. This creates a soft halo effect that makes the sign appear to float. I like to test lighting at dusk with my phone's flashlight app—it gives an instant preview of how the final setup will look.
Pro Tips for Large Garden Signs
- A few simple tricks will transform your garden signs from ordinary to eye-catching statement pieces that elevate your outdoor space.
- This creates a natural flow that guides visitors through your garden.
- Pre-Drilling Precision: For Step 3, when pre-drilling pilot holes, use a pencil to mark your screw placement first.
Frequently asked questions
Got questions about transforming your outdoor space with large garden signs? You’re not alone! Here are some of the most common queries—and their answers—to help you make the best choice for your yard.
What’s the best material for large garden signs that last?
Durability depends on your climate and usage. Metal signs (like aluminum or copper) resist weather and pests, while wood offers rustic charm but needs sealing. Resin or PVC are lightweight and low-maintenance. For heavy rain or snow, opt for powder-coated metal or UV-resistant plastic.
When is the best time to install large garden signs?
Spring or early summer is ideal—soil is workable, and you can enjoy them during peak gardening season. However, large garden signs can be installed year-round if secured properly (e.g., with stakes or anchors). Winter installation is fine if you use frost-resistant materials and avoid frozen ground.
Are DIY large garden signs cheaper than buying pre-made ones?
It depends! DIY signs (using wood, chalkboard paint, or vinyl) can save money, but pre-made signs offer professional quality, durability, and design variety. Factor in tools, materials, and time—if you’re crafty, DIY might pay off. For instant impact, pre-made signs (especially metal or resin) are worth the investment.
How do I troubleshoot a wobbly or unstable large garden sign?
Start by checking the base: Ensure stakes, anchors, or weights (like sandbags) are secure. For heavy signs, bury stakes deeper or use concrete footings. If the sign is lightweight, add non-slip pads or adjust the angle slightly to improve wind resistance. Avoid placing them in high-traffic areas where they might get knocked over.
Can I customize large garden signs with my own designs?
Many large garden signs are blank canvases (like wooden planks, metal sheets, or acrylic panels) ready for paint, vinyl decals, or stencils. For a polished look, use weatherproof paint or sealants. If DIY isn’t your style, some retailers offer custom engraving or printing services for personalized messages or artwork.
Wrapping up and next steps
Transforming your garden into a stunning, year-round showcase is easier than ever with large garden signs—they’re the perfect way to add personality, guide visitors, and celebrate your green space.
Whether you opt for rustic wood, sleek metal, or vibrant vinyl, these bold statement pieces elevate any outdoor area with minimal effort. Now’s the time to take action!
Ready to make your garden stand out? Start by sketching your vision—think colors, materials, and placement—then browse our curated collection or visit a local supplier. With the right sign, your garden will become a true reflection of your style, inviting compliments and admiration all season long. 🌿✨