
Tools
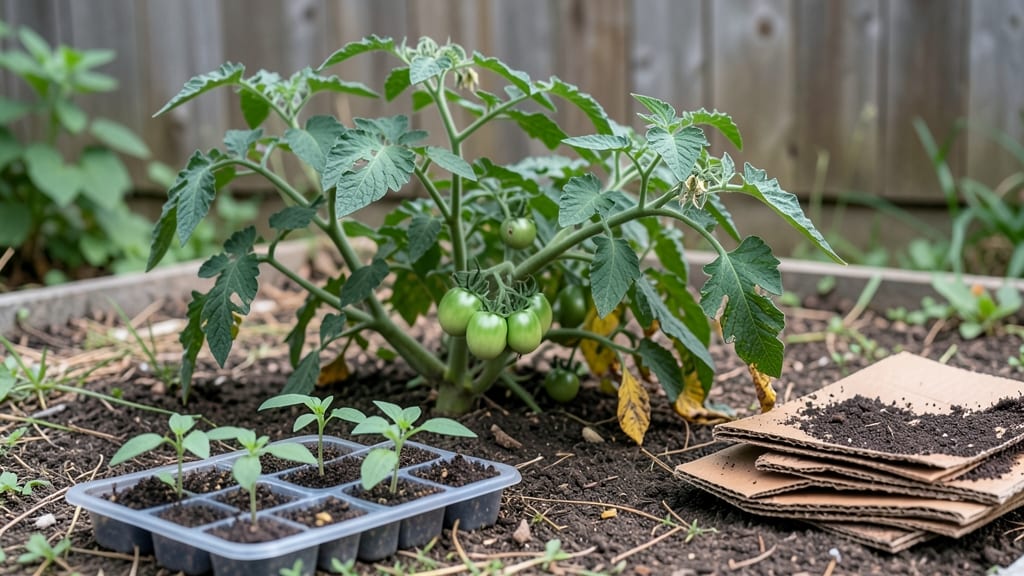
The lasagna method gardening transforms poor soil into a thriving garden bed without a single shovel turn. I stumbled onto this technique after struggling with rocky, compacted ground in my backyard—now my tomatoes and peppers grow like they’re in a greenhouse.
The secret lies in layers: cardboard to smother weeds, compost for nutrients, and straw to lock in moisture. No tilling, no backbreaking work, just stacking materials like a lasagna.
This method works especially well for urban gardeners, small spaces, or areas with heavy clay. You’ll need basic supplies: brown cardboard (no glossy ink), compost or well-aged manure, and straw or leaves for mulch.
The process takes about 30 minutes to assemble, and within 4-6 weeks, you’ll have rich, fluffy soil ready for planting. It’s also perfect for poor soil—no need for expensive amendments.
By summer, you’ll harvest vibrant green vegetables with fewer pests and better water retention. The bed stays moist longer, weeds struggle to take root, and your plants grow faster than in traditional soil.
I’ve grown everything from lettuce to pumpkins using this method—even in my city balcony planters. The best part? You’ll spend less time weeding and more time enjoying your garden.
Whether you’re working with a raised bed, in-ground plot, or containers, the lasagna method adapts easily. Start small—even a 4-foot by 8-foot bed makes a difference—and watch your garden transform into a low-maintenance paradise. Ready to try it?
📚 In This Guide
- What you need
- Instructions
- Tips and common mistakes
- Wrapping up and next steps
What you need
- ● Browns (Carbon-Rich Layers): Dried leaves – 1-2 inches thick per layer (shredded for faster decomposition)
- ● Straw or hay – 2-3 inches per layer (avoid seed-containing hay)
- ● Cardboard or newspaper – 1-2 sheets per layer (ink-free, no gloss)
- ● Wood chips or shredded bark – 1-2 inches per layer (untreated, coarse texture)
- ● Greens (Nitrogen-Rich Layers): Fresh grass clippings – 1 inch per layer (use sparingly to avoid matting)
- ● Kitchen scraps (fruit/veggie peels, coffee grounds) – ½ inch per layer
- ● Manure (composted) – 1-2 inches per layer (cow, horse, or chicken)
- ● Green plant trimmings – 1-2 inches per layer (weed-free)
- ○ Garden fork or pitchfork – for fluffing layers (optional but helpful)
- ● Gloves – to protect hands from prickly materials
- ● Water source (hose or sprinkler) – to moisten layers between additions
- ● Shovel or spade – for initial soil prep (if needed)
- ● Measuring tape or ruler – to track layer thickness
- ○ Optional (but handy!): Compost thermometer – to monitor decomposition heat
- ● Landscape fabric – to block weeds if layering over grass
- ● Compost accelerator – speeds up breakdown (e.g., worm castings)
Instructions for building a no-dig lasagna garden bed
This method transforms poor soil into rich, fertile layers without backbreaking digging.
Choose and Clear the Site
Select a flat, easily accessible location with at least 6 hours of sunlight daily. Remove any weeds, grass, or debris from the area—this prevents competition and ensures your lasagna layers stay clean. I like to use a 12-inch square board to mark the bed dimensions before clearing, which keeps the shape neat and prevents over-expansion.
If the area has stubborn weeds like bindweed or nutsedge, smother them first with 3-4 layers of thick cardboard (no glossy paper) or 12-18 inches of newspaper layered tightly. This blocks light and kills weeds in 2-4 weeks without chemicals. Avoid plastic sheets—they trap heat and can create anaerobic conditions that harm soil life.
Build the Carbon-Rich Foundation
Start with a 4-6 inch layer of coarse material to improve drainage and prevent compaction. I use shredded leaves, straw, or dry grass clippings (no seed heads) as the base. These materials break down slowly, providing structure while adding organic matter. Spread evenly across the cleared area, fluffing with a rake to avoid clumping.
Next, add a 3-4 inch layer of brown materials—these are carbon-rich and provide the "brown" in your lasagna. Use cardboard, dry leaves, straw, or wood chips (avoid treated wood). Wet these layers lightly if they’re dry, but don’t soak them. The goal is to mimic the decomposition process of a natural forest floor, where carbon-rich layers feed microorganisms over time.
Add Nitrogen-Rich "Meat" Layers
Now for the nitrogen-rich "green" layers—these balance the carbon and feed microbes as they decompose. Use fresh grass clippings, coffee grounds, vegetable scraps (no meat/dairy), or manure (composted or well-aged). Spread a 2-3 inch layer evenly, then top with another 2-3 inch layer of browns to contain the nitrogen. This alternation prevents odor and ensures steady decomposition.
I like to finish this phase with a 1-inch layer of finished compost—this adds beneficial microbes and nutrients immediately. Avoid using raw manure or fresh kitchen scraps directly; they can create heat spikes that kill soil life. If you’re using manure, ensure it’s been composted for at least 6 months to avoid burning plants.
Top With Finishing Layers
Conclude with a 2-3 inch layer of finished compost or well-rotted manure to provide immediate nutrients. This top layer also helps retain moisture and protects the bed from erosion. I like to sift the compost lightly to remove large chunks, ensuring a fine, crumbly texture that blends easily with the soil below.
Finally, add a 1-2 inch layer of mulch—straw, wood chips, or shredded leaves work well. This protects the bed from heavy rains, reduces weed growth, and keeps the soil moist. Water the entire bed thoroughly after layering, ensuring the top 2 inches of soil feel damp but not soggy. This kickstarts the decomposition process and helps the layers settle.
Plant and Maintain
Wait 4-6 weeks before planting to allow the lasagna layers to break down partially. You’ll know it’s ready when the bed feels spongy and warm to the touch, with no sharp edges from the original layers. Plant directly into the bed—no need to mix or dig. I like to create small holes with a trowel, place the plants gently, and water deeply to settle the roots.
Throughout the growing season, maintain the bed by adding 1-2 inches of compost or mulch every few months. This replenishes nutrients and keeps the soil structure intact. Avoid tilling or digging—this disrupts the beneficial microbes and compacts the soil. Instead, use a broadfork or your hands to gently aerate the surface if needed.
Tips & tricks for perfect lasagna method gardening
These practical insights will help you avoid common pitfalls and maximize the potential of your no-dig garden bed.
Layer Composition: The key to success lies in maintaining the proper carbon-to-nitrogen ratio throughout your lasagna bed. In Step 3, when adding nitrogen-rich materials like fresh grass clippings or vegetable scraps, always follow with a 2-3 inch layer of browns. This prevents odor and ensures steady decomposition. I've found that using a simple ratio of 3 parts browns to 1 part greens works perfectly for most garden beds.
Material Preparation: Before adding cardboard or newspaper in Step 1, tear them into 2-3 inch strips to ensure they break down more quickly. This prevents them from forming a solid barrier that could inhibit root growth. For wood chips in Step 2, choose untreated varieties to avoid introducing chemicals into your soil ecosystem. The 4-6 inch base layer should be fluffed thoroughly to create air pockets that encourage microbial activity.
Timing and Patience: The 4-6 week waiting period before planting in Step 5 is crucial for establishing a healthy soil structure. During this time, monitor the bed's temperature—it should feel warm to the touch when ready. If you're in a cooler climate, you might need to extend this period slightly. I've seen beds in northern climates take up to 8 weeks to fully stabilize before planting.
Maintenance Strategy: When maintaining your bed throughout the growing season, focus on adding compost or mulch to the surface rather than mixing it in. This preserves the beneficial microbial communities that form between your carefully layered materials. I recommend using a broadfork to gently aerate the surface if you notice compaction developing over time.
Pro Tips for Lasagna Method Gardening
- These practical insights will help you avoid common pitfalls and maximize the potential of your no-dig garden bed.
- Layer Composition: The key to success lies in maintaining the proper carbon-to-nitrogen ratio throughout your lasagna bed.
- Material Preparation: Before adding cardboard or newspaper in Step 1, tear them into 2-3 inch strips to ensure they break down more quickly.
Frequently asked questions
Got questions about the lasagna method gardening? You’re not alone! Here are answers to the most common ones to help you get started with confidence.
What exactly is the lasagna method, and how is it different from traditional gardening?
The lasagna method is a no-dig gardening technique where you build nutrient-rich layers (like lasagna!)—cardboard, compost, leaves, and straw—on top of the soil. Unlike traditional digging, it preserves soil structure, improves drainage, and attracts worms naturally. Perfect for beginners or lazy gardeners!
How long does it take for a lasagna garden bed to be ready for planting?
Most beds break down enough for planting in 2–4 weeks, but you can plant right away if the layers are thin (like herbs or shallow roots). For deeper veggies (tomatoes, carrots), wait until the pile shrinks by ⅓. Pro tip: Add a handful of compost tea to speed up decomposition!
Is the lasagna method cheaper than buying bagged soil or compost?
Absolutely!
You’ll save money by using free or low-cost materials like:
- Cardboard (from recycling)
- Grass clippings/leaves (yard waste)
- Newspaper (shredded)
- Kitchen scraps (fruit/veggie peels)
Will lasagna gardening attract pests like rodents or insects?
Not if you layer correctly! Avoid meat/dairy scraps (they attract rodents) and bury food waste deep. Use carbon-rich layers (straw, leaves) to balance nitrogen (grass clippings). If pests appear, add diatomaceous earth or plant pest-repelling herbs (basil, mint) nearby.
Can I use the lasagna method in cold climates or during winter?
Yes! In cold areas, build beds in fall so they decompose over winter. Cover with straw mulch (6+ inches) to insulate roots. For spring planting, add a warm layer (compost or manure) to jumpstart growth. Bonus: Snow acts as extra mulch!
What if my lasagna bed smells bad or molds?
Bad smells mean too much green (nitrogen-rich) material without enough brown (carbon-rich) layers. Fix it by:
- Adding dry leaves, straw, or shredded paper
- Mixing in wood ash (sparingly)
- Avoiding meat/dairy scraps
Wrapping up and next steps
The lasagna method gardening is your ticket to effortless, sustainable, and thriving gardens—no backbreaking digging required! 🌱 By layering organic materials like cardboard, compost, and mulch, you create a nutrient-rich bed that nurtures plants while reducing waste.
Whether you're a beginner or a seasoned gardener, this method saves time, improves soil health, and delivers bountiful harvests with minimal effort.
Ready to transform your garden? Start small—pick a sunny spot, gather your materials, and build your first lasagna bed today! Your future self (and your plants) will thank you. 🌟