
Tools
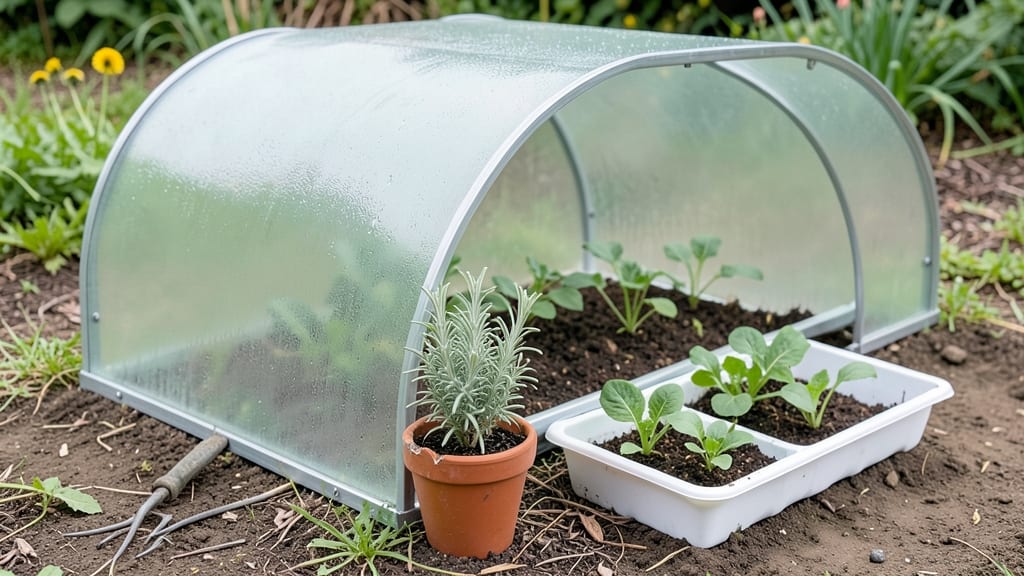
A mini garden greenhouse changed how I grow seedlings—no more leggy, weak starts struggling against drafts or cold snaps. These compact structures create a microclimate where tender plants thrive, even when outdoor conditions are harsh.
The difference between a greenhouse-grown seedling and one started on a windowsill is night and day: sturdy stems, vibrant leaves, and roots ready to take off when transplanted.
You don’t need a backyard to make it work. Urban balconies, kitchen counters, and sunny windowsills all host these space-saving wonders. A 4-foot-tall model fits neatly in a corner while protecting 20+ seedlings, and clear plastic versions start under $20.
The key is matching size to your needs—smaller units work for herbs and lettuce, while larger ones handle tomatoes and peppers like pros.
What you’ll gain is consistent germination, faster growth, and plants that outperform their outdoor-grown cousins. Watch basil leaves stay crisp instead of wilting, or see pepper seedlings develop thick stems before ever touching real soil.
The greenhouse extends your growing season by 4-6 weeks in both spring and fall, and it’s the secret weapon for winter greens in cold climates.
Whether you’re a city dweller with a windowsill or a suburban gardener with limited space, these greenhouses adapt. They’re not just for seedlings—hardy herbs, cuttings, and even small plants benefit from the controlled environment. Start small, experiment, and you’ll wonder how you ever grew without one.
📚 In This Guide
- What you need
- Instructions
- Tips and common mistakes
- Wrapping up and next steps
What you need
- ● Base Structure: Wooden frame (2x4 lumber, 4x4 posts for corners) – ~10-15 ft total
- ● PVC pipes (½" or ¾" diameter) – 4-6 pieces, 3-4 ft long (for hoops or supports)
- ● Covering: Clear polycarbonate panels (4mm-6mm thickness) – 2-4 sheets, sized to fit your frame
- ● OR heavy-duty greenhouse plastic (4mil-6mil thickness) – enough to cover frame + overlap
- ● Hardware: Galvanized screws/nails (2"–3") – ~50-100 pieces
- ● Hinges (for doors) – 1-2 sets
- ● Zip ties or bungee cords – 10-20 pieces (for securing plastic)
- ● Measuring tape & pencil
- ● Drill/driver + drill bits
- ● Hacksaw or miter saw (for cutting lumber/PVC)
- ● Scissors or utility knife (for plastic)
- ● Level (to ensure stability)
- ○ Staple gun (optional, for securing plastic edges)
- ● Vents or louvers (for airflow) – 1-2 adjustable units
- ● Thermometer/hygrometer (to monitor climate) – 1
- ● Drip irrigation kit (for automated watering) – 1
- ● Reflective insulation (to retain heat) – 1 roll
- ● Portable fan (for circulation) – 1 small unit
Step-by-Step instructions for building a mini garden greenhouse
Here’s how to assemble a sturdy, climate-controlled space for nurturing seedlings through every season.
Select and Prepare the Base Structure
Choose a 4-foot by 4-foot wooden frame with 2-inch by 2-inch stakes for stability. I anchor mine in a 6-inch deep trench to prevent wind from toppling it. Use the galvanized screws to attach the frame corners securely—wobble now means collapse later. For extra protection, line the base with landscape fabric to deter burrowing pests like voles.
Position the frame in full sun if possible, but avoid areas prone to afternoon shade. The clear polycarbonate panels will diffuse light, so placement matters less than you might think. I like to set mine on a slight slope (1-2 degrees) to encourage rain runoff and prevent water pooling.
Assemble the Frame and Attach Panels
Begin by screwing the 4-foot vertical supports into the base frame at each corner. Use the L-brackets to reinforce joints—these are the weak points under snow or heavy rain. Slide the polycarbonate panels into the top and side slots, pressing firmly until they click into place. The weatherstripping tape along the seams keeps humidity in and drafts out.
Test the structure by gently pushing on each panel. If it flexes at all, add a second L-bracket to that joint. I’ve seen cheap setups blow over in the first windstorm, so don’t skimp on reinforcement. Leave the ventilation flaps closed for now—you’ll adjust airflow once seedlings sprout.
Install Ventilation and Shade Controls
Attach the ventilation flaps to the north-facing side of the greenhouse, overlapping the seams with waterproof sealant. These flaps should open automatically when internal temperatures exceed 85°F—use a hinge system for smooth operation. For shade, install the removable shade cloth on the south side with zip ties for easy adjustment.
I like to leave the flaps closed until seedlings reach 2 inches tall, then crack them open in the afternoon to prevent overheating. The thermometer you’ll place inside becomes your best friend—if it hits 90°F, it’s time to vent. A small fan (optional) on the north side helps circulate air without disturbing delicate stems.
Prepare the Interior for Planting
Line the base with 2 inches of sterilized potting mix—this prevents weeds and compacts less than garden soil. Add a layer of perlite on top to improve drainage, especially if you’re growing moisture-sensitive plants like lettuce or basil. I like to pre-moisten the mix before planting to ensure even hydration.
Use the seedling trays you’ve placed inside to organize plants by type. Leave 3 inches of space between trays for airflow, and avoid overcrowding—seedlings need room to stretch toward the light. If using grow lights, position them 6 inches above the tallest seedlings and set a timer for 14 hours daily. Natural light alone won’t cut it in winter.
Monitor and Adjust for Seasonal Conditions
Check the thermometer twice daily—ideal daytime temps for most seedlings are 65-75°F, while nights should stay above 50°F. If frost threatens, drape the frost cloth over the structure and secure it with clips. In summer, open the ventilation flaps fully by midday and remove the shade cloth to prevent heat stress.
Water seedlings at the base using the drip irrigation kit—this keeps foliage dry and reduces disease risk. I’ve found that early morning is the best time to water, as it allows leaves to dry before evening. Rotate trays weekly so all seedlings get equal light exposure, and harvest or transplant when they reach half their mature height.
Tips & tricks for perfect mini garden greenhouse assembly
A few key strategies will ensure your greenhouse stays sturdy, climate-controlled, and ready for year-round seedling success.
Foundation Stability: The 6-inch deep trench for your 4-foot frame isn't just about aesthetics—it's the difference between a greenhouse that weathers storms and one that collapses. I've seen setups with shallow trenches blow over in the first strong wind. If your soil is rocky or sandy, extend the trench to 8 inches for added grip. The slight 1-2 degree slope you create during installation also prevents water pooling, which can drown roots or promote fungal growth. Think of it as your greenhouse's drainage system.
Ventilation Timing: Those 85°F and 90°F temperature thresholds in Step 3 are critical—exceed them, and you risk heat stress on delicate seedlings. I recommend installing a small battery-operated fan near the ventilation flaps to create gentle airflow when temps approach 85°F. The fan should run on low to prevent disturbing seedlings while still helping regulate temperature. This is especially important during summer afternoons when direct sun can turn your greenhouse into a sauna in minutes.
Lighting Optimization: The 14-hour daily grow light schedule in Step 4 is perfect for winter, but don't neglect natural light positioning. Place your greenhouse where it gets morning sun and afternoon shade—this prevents overheating while maximizing light exposure. If using grow lights, position them 6 inches above the tallest seedlings and adjust as plants grow. I've found that LED grow lights with a full spectrum (red/blue) give the best results for seedling development without excessive heat output.
Seasonal Adjustments: The 65-75°F daytime range and 50°F minimum nighttime temp are ideal, but don't rely solely on the thermometer. Watch your seedlings' color—yellowing leaves often signal temperature stress before the thermometer shows it. In winter, consider adding a small space heater (safety-rated for outdoor use) if nights drop below 50°F, but never let it run continuously. The frost cloth becomes your winter ally—keep it handy even if you don't think you'll need it, as sudden temperature drops can happen unexpectedly.
Pro Tips for Mini Garden Greenhouse
- A few key strategies will ensure your greenhouse stays sturdy, climate-controlled, and ready for year-round seedling success.
- Foundation Stability: The 6-inch deep trench for your 4-foot frame isn't just about aesthetics—it's the difference between a greenhouse that weathers storms and one that collapses.
- Ventilation Timing: Those 85°F and 90°F temperature thresholds in Step 3 are critical—exceed them, and you risk heat stress on delicate seedlings.
Frequently asked questions
Got questions about mini garden greenhouses? You’re not alone! Here are answers to the most common ones to help you grow with confidence.
What’s the best time of year to use a mini greenhouse?
A mini greenhouse is perfect for spring and fall, when temperatures fluctuate but aren’t extreme. Use it year-round in mild climates (like zones 7-10), but avoid winter in freezing areas—opt for cold-hardy plants or bring it indoors. Start seedlings 4-6 weeks before last frost for the best head start!
How do I prevent condensation from damaging my seedlings?
Condensation is normal but can lead to mold or fungal issues. Ventilate daily by lifting the lid or adding a small vent kit. Avoid overwatering—let soil dry slightly between waterings. Wipe excess moisture with a soft cloth if needed. Pro tip: Place a small fan nearby for gentle airflow!
Can I use a mini greenhouse for herbs or just vegetables?
Mini greenhouses work for herbs (basil, cilantro), leafy greens (lettuce, spinach), and even small veggies (tomato starts, peppers). Avoid root crops (carrots, potatoes) since they need deeper soil. For herbs, keep them in bright light but avoid direct midday sun to prevent scorching.
What should I do if my seedlings look leggy or weak?
Leggy seedlings mean they’re stretching for light. Move the greenhouse to a sunniest spot (6+ hours of light daily) and rotate it occasionally for even growth. If using artificial lights, keep them 2-3 inches above seedlings and on for 12-16 hours/day. Thin crowded plants to improve airflow!
Are there cheaper alternatives to a mini greenhouse?
Yes! Try a clear plastic dome over a pot, a repurposed aquarium with a lid, or even a DIY frame covered in plastic sheeting. For ventilation, poke small holes in the plastic. Just ensure it’s transparent to allow light. Budget options work—just monitor humidity and temperature closely!
Wrapping up and next steps
A mini garden greenhouse is more than just a tool—it’s your secret weapon for longer growing seasons, healthier plants, and bolder harvests. Whether you’re protecting fragile seedlings from frost or extending your gardening joy into cooler months, this compact solution delivers big results with minimal effort. 🌱
Ready to transform your garden? Start small—pick a design, gather your materials, and let your green thumb shine! Your future plants (and neighbors) will thank you.
- 📝 Next step: Sketch your greenhouse layout or browse DIY plans.
- 🛒 Pro tip: Check local hardware stores for deals on PVC pipes or polycarbonate sheets!