Tools
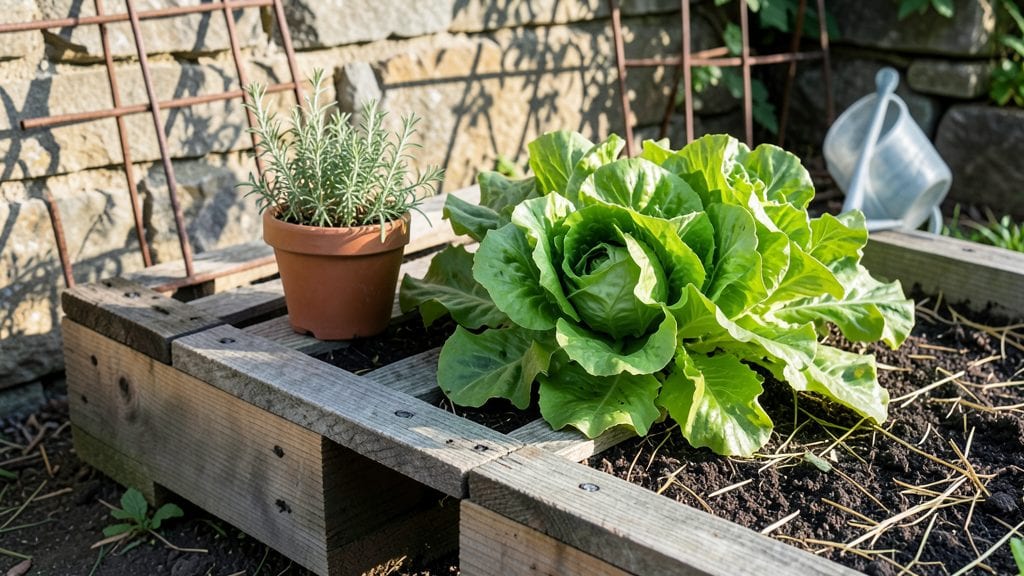
A pallet gardening bench transforms leftover wood into a multi-functional space-saver that grows plants while doubling as seating. 🌱 I built mine from two weathered pallets and a few screws—now it holds herbs, flowers, and even my morning coffee.
The best part? It’s free if you source pallets locally, and the rustic look fits any garden style.
You’ll need basic tools: a drill, sandpaper, and outdoor paint or stain for longevity. Skip the fancy lumber—pallets are sturdy, and with a little prep (removing nails, sanding rough edges), they’re ready for planting.
Add trellises for vines or stackable pots for flexibility, and suddenly, you’ve got a versatile garden feature that works in tiny yards or city balconies.
Imagine fresh basil within arm’s reach while you relax, or a vertical garden that turns a dull corner into a lush display. The bench stays durable for years with simple care: occasional sealing and keeping planters slightly elevated to prevent rot.
Plus, it’s a conversation starter—neighbors always ask how I got so much growing in such a small space.
Perfect for urban dwellers, small-space gardeners, or anyone who wants to repurpose materials without sacrificing style. Let’s turn that pallet into your next favorite garden spot—here’s exactly how to make it happen.
📚 In This Guide
- What you need
- Instructions
- Tips and common mistakes
- Wrapping up and next steps
What you need
- ● Wooden pallets: 2–3 sturdy pallets (check for HT or IP stamps for heat-treated or pesticide-free wood).
- ● Screws: 2–2.5" deck screws (60–80 screws, depending on pallet size).
- ● Wood glue: 1 tube (for extra reinforcement).
- ● Sandpaper: 80–120 grit (for smoothing rough edges).
- ○ Outdoor paint/stain: Non-toxic, weather-resistant (optional but recommended).
- ● Drill/driver: With screw attachment.
- ● Measuring tape: For precise cuts.
- ● Saw: Handsaw or circular saw (if trimming pallets).
- ● Paintbrush/roller: For finishing touches.
- ● Landscape fabric: To line the planter and prevent weeds.
- ● Potting soil: High-quality, well-draining mix (1–2 bags).
- ● Plants/seeds: Herbs, veggies, or flowers of your choice!
- ● Cushions/throw pillows: For extra seating comfort.
Step-by-Step instructions for building a pallet gardening bench
Here's how to transform a simple pallet into a functional, space-saving garden bed that maximizes your yard's potential.
🪴 Step 1: Select and Prepare Your Pallet
Choose a heat-treated or weathered wood pallet (avoid chemically treated ones—look for "HT" stamps). Sand down any rough edges or splinters with 80-grit sandpaper to prevent injuries and ensure clean contact with your plants. I like to flip the pallet so the rough side faces down—this hides imperfections and creates a cleaner planting surface.
Check for loose boards or nails. Remove any protruding nails with pliers and replace damaged boards with scrap wood if needed. The goal is a stable base that won't wobble when planted. For extra stability, place the pallet on cinder blocks or bricks to elevate it slightly and improve drainage.
🌱 Step 2: Line the Pallet for Protection and Drainage
Lay down a landscape fabric layer to prevent soil from falling through gaps and to block weeds. Cut it to fit snugly inside the pallet frame, tucking excess fabric into the corners. This step is critical—without it, your soil will erode quickly and roots may escape through the slats.
Next, add a 1-inch layer of gravel over the fabric. This creates a drainage layer that prevents waterlogging, which is especially important if your pallet sits on uneven ground. Press the gravel down lightly to create a flat surface for planting. You'll see the difference immediately when watering—excess moisture drains away instead of pooling.
💧 Step 3: Fill with Soil and Plant Your Choices
Fill the pallet with a mix of topsoil and compost (I use a 70/30 ratio for most vegetables). Moisten the soil before planting—this helps roots establish faster. For a 4-foot pallet, you'll need about 2-3 cubic feet of soil mix, depending on how tightly you pack it.
Plant shallow-rooted vegetables like lettuce, herbs, or strawberries along the edges where light can reach easily. Deeper-rooted plants like tomatoes or peppers go in the center. Space plants according to their mature size—crowding leads to competition for nutrients and poor air circulation, which invites pests. Water gently after planting to settle the soil around the roots.
☀️ Step 4: Position and Maintain for Optimal Growth
Place your pallet bench in a location that gets at least 6 hours of sunlight daily. A south-facing spot works best in most climates. If your pallet sits on grass or soil, consider adding feet or casters to make it movable—this lets you rotate crops for better sun exposure or protect plants from harsh afternoon sun if needed.
Water deeply 2-3 times per week, checking that the soil stays moist but not soggy. The elevated design means soil dries faster than ground-level beds, so monitor moisture closely. Mulch the top with straw or shredded leaves to retain moisture and suppress weeds. You'll notice healthier plants with fewer pests when the soil stays consistently moist.
✂️ Step 5: Extend the Season with Simple Upgrades
To grow through cooler months, add a clear plastic cover or row fabric over the pallet when temperatures drop below 50°F. This creates a microclimate that protects tender plants. For extra insulation, wrap the sides with bubble wrap or cardboard during frost warnings—this keeps roots warmer and extends your growing season by weeks.
Rotate crops annually to prevent soil depletion. Every spring, refresh the soil by adding a 1-inch layer of compost and mixing it in lightly. This keeps nutrients high and prevents diseases from building up in the same soil. With these simple upgrades, your pallet bench becomes a year-round growing powerhouse.
Tips & tricks for perfect pallet gardening bench
These game-changing strategies will help you transform your pallet into a thriving, long-lasting garden bed that outperforms traditional planters.
Material Selection: When choosing your pallet in Step 1, prioritize heat-treated ("HT") wood over chemically treated options—the fumes from chemical treatments can leach into your soil and harm plants. I've found that weathered pallets actually work better than brand-new ones because they've already undergone natural weathering, reducing the risk of leaching. For extra stability, look for pallets with at least 3 solid boards on each side—they'll support more weight and last longer through seasons.
Drainage Optimization: The 1-inch gravel layer in Step 2 is non-negotiable for preventing root rot, especially in cooler climates. For even better drainage, consider adding a second layer of coarse perlite mixed with your gravel—this creates air pockets that improve oxygen flow to roots. I've seen pallets with poor drainage develop fungal issues within weeks, so don't skip this critical layer. The gravel should be clean river rock, not construction-grade gravel which can contain harmful additives.
Soil Mix Strategy: That 70/30 topsoil-to-compost ratio in Step 3 works beautifully, but here's the pro tip: add 1 cup of worm castings per cubic foot of soil mix. Worm castings contain beneficial microbes that jumpstart plant growth and improve nutrient uptake. For container gardening, this makes a noticeable difference in plant vigor within just 2-3 weeks. If you're growing heavy feeders like tomatoes, increase the compost ratio to 40% for better long-term performance.
Season Extension: The 50°F temperature threshold mentioned for season extension is perfect for tender crops, but for hardy greens like kale or spinach, you can push it down to 40°F. For extra warmth, I've had great success using old window screens as lightweight row covers—they allow sunlight while trapping heat. The key is proper ventilation: leave the ends open slightly to prevent condensation buildup, which can lead to fungal diseases.
Pro Tips for Pallet Gardening Bench
- These game-changing strategies will help you transform your pallet into a thriving, long-lasting garden bed that outperforms traditional planters.
- Material Selection: When choosing your pallet in Step 1, prioritize heat-treated ("HT") wood over chemically treated options—the fumes from chemical treatments can leach into your soil and harm plants.
- Drainage Optimization: The 1-inch gravel layer in Step 2 is non-negotiable for preventing root rot, especially in cooler climates.
Frequently asked questions
Got questions about turning pallets into functional gardening benches? Here are some of the most common ones—and their answers!
What’s the best type of wood for a pallet gardening bench?
Opt for heat-treated (HT) or kiln-dried pallets—these are safer for gardening since they’re free of chemicals like MB (methyl bromide). Avoid chemically treated pallets (marked "MB" or "CH"), as they can leach toxins into your soil.
How do I stabilize a wobbly pallet bench?
Add support blocks (like cinder blocks or wooden legs) under the pallet’s corners for stability. For extra reinforcement, screw 2x4 braces diagonally between the legs and pallet frame. Sand rough edges to prevent splinters!
Can I use a pallet gardening bench for herbs or only veggies?
Pallet benches work great for herbs (basil, mint, parsley), leafy greens (lettuce, spinach), and small veggies (radishes, green onions). Just ensure the pallet is elevated enough for drainage and use well-draining potting mix.
What’s a quick fix if my pallet bench starts rotting?
If you spot rot, remove affected wood and replace it with untreated lumber. Seal all surfaces with non-toxic wood sealant (like linseed oil) to extend the bench’s lifespan. For severe damage, consider a fresh pallet or a pallet alternative like cedar planks.
How often should I water a pallet gardening bench?
Check soil moisture daily—pallets dry out faster than ground soil due to exposure. Water early in the morning to reduce evaporation. Most plants need 1–2 inches of water per week, but adjust based on your climate (e.g., more in summer, less in rain).
Wrapping up and next steps
Ready to transform your space with a pallet gardening bench? This creative project not only maximizes your growing area but also adds a rustic charm to your garden or patio. Whether you’re a seasoned DIYer or a beginner, the key is to start small—gather your materials, follow the steps with patience, and let your green thumb shine! 🌱
Now that you’re armed with tips and answers, roll up your sleeves and build yours today! Share your progress or final design with fellow gardeners—you might inspire someone else’s next big project. Happy gardening!