Pests and Diseases
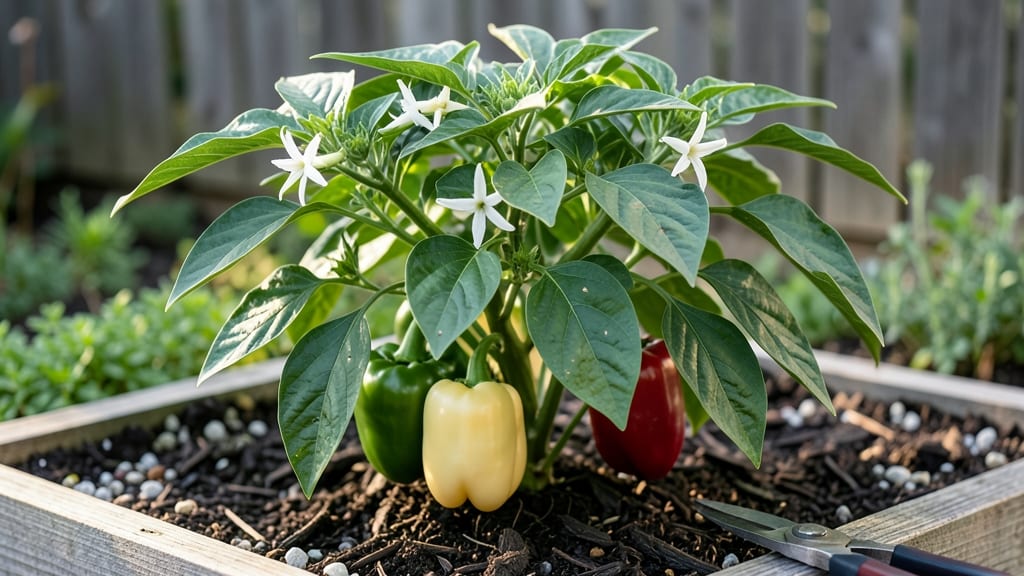
Here are some essential pepper gardening tips to turn your ambitious pepper patch from a flop into a fiery success—starting with soil warmth and spacing. 🌱 pepper patch into a sad, stunted disappointment. The good news? Once you nail the basics, you’ll be harvesting glossy, vibrant peppers all season long.
Start with well-draining soil mixed with compost, and plant seeds indoors 8-10 weeks before your last frost. Peppers crave warmth, so keep soil temperatures above 65°F—a heat mat helps if your spring is chilly.
Once seedlings are sturdy, transplant them 12-18 inches apart in full sun, and mulch to keep roots cool and moisture steady. Water at the base (never overhead) to avoid fungal issues.
Here’s where the magic happens: prune side shoots to focus energy on fruit production, and fertilize lightly with a balanced mix every 4-6 weeks. By mid-summer, you’ll see peppers forming—jalapeños, bell peppers, or whatever you planted—and the key to keeping them pest-free is consistent care.
Aphids and spider mites love peppers, but a strong spray of water or neem oil usually clears them up fast.
Harvest when peppers reach your preferred size or color, and don’t wait too long—they’ll turn mealy if left on the vine. Store them in a cool, dry place or freeze extras for later.
The first harvest is always the sweetest, and once you taste homegrown peppers, you’ll never go back to store-bought again.
📚 In This Guide
- What you need
- Instructions
- Tips and common mistakes
- Wrapping up and next steps
What you need
- ● Seeds or Seedlings: Pepper seeds (varieties like Jalapeño, Bell, Cayenne, or Habanero) – 5–10 seeds per plant (or 3–5 healthy seedlings if starting from nursery plants).
- ● Organic seeds recommended for chemical-free gardening.
- ● Containers or Garden Bed: Containers: 5–10 gallon pots with drainage holes (1 plant per pot).
- ● Garden bed: Well-draining soil, 6+ inches deep, in full sun (6–8 hours/day).
- ● Soil: Potting mix: Lightweight, organic mix with perlite or vermiculite (e.g., Miracle-Gro Potting Mix).
- ● Garden soil: Amend with compost (2–3 inches) and perlite/sand (20%) for drainage.
- ● Fertilizer: Balanced fertilizer (10-10-10) or compost tea for organic growth.
- ● Calcium supplement (e.g., crushed eggshells or Epsom salt) to prevent blossom-end rot.
- ● Pest & Disease Prevention: Neem oil (1–2 tbsp per gallon of water) for fungal/bacterial issues.
- ● Insecticidal soap or spinosad for aphids/spider mites.
- ● Row covers (lightweight fabric) to deter flying pests.
- ● Copper tape or diatomaceous earth for slug/snail barriers.
- ● Trellis or cages (for bushier varieties like Bell peppers).
- ● pH test kit (ideal soil pH: 6.0–6.8).
- ● Pruning shears for shaping plants.
- ● Mulch (straw or wood chips) to retain moisture and deter weeds.
- ● Grow lights (if starting indoors or in low-light areas).
Instructions for growing healthy, productive pepper plants
Here’s my battle-tested approach to growing peppers that thrive from seed to harvest—without the pests or common pitfalls.
🌱 Step 1: Start Seeds Indoors at the Right Time
Peppers need warmth to germinate, so begin seeds indoors 8-10 weeks before your last frost date. I use a seedling heat mat to keep soil at 80-85°F—this ensures germination in 7-14 days instead of the 3 weeks you’ll get with room-temperature soil. Plant seeds ¼ inch deep in the seed-starting mix and cover lightly with additional mix.
Mist the surface with a spray bottle until the mix is evenly moist but not soggy. Place the tray under a grow light immediately—pepper seedlings stretch desperately toward weak light, and you’ll never recover them once they get leggy. Keep the light 2-3 inches above the seedlings and raise it as they grow.
☀️ Step 2: Harden Off and Transplant After Warmth Arrives
Two weeks before your last frost, start hardening off seedlings by placing them outside in a sheltered spot for 1-2 hours daily. Gradually increase their outdoor time over 10-14 days, watching for first true leaves to harden and darken. Transplant only after soil temperatures reach 60°F—peppers refuse to grow in cold soil, and you’ll see stunted growth if you rush it.
Dig holes 12-18 inches apart (depending on variety) and bury seedlings deeper than they were in pots—this encourages stronger root systems. Water deeply at the base immediately after planting to settle the soil and reduce transplant shock. Mulch with straw to retain moisture and suppress weeds.
💧 Step 3: Maintain Consistent Moisture and Fertility
Peppers hate soggy soil but also suffer in drought, so water 1-2 inches per week, letting the top 1-2 inches of soil dry out between waterings. I use a drip irrigation system to deliver water at the base—this prevents fungal diseases that splashing water spreads. Fertilize every 2-3 weeks with a balanced 10-10-10 fertilizer once flowers appear, but cut back after harvest to avoid late-season growth that won’t mature.
Watch for yellowing leaves—this usually means overwatering or nutrient deficiency. If leaves curl or drop, your plants are thirsty. Peppers also need full sun (6-8 hours daily), so rotate pots or plants weekly to prevent lopsided growth toward the light.
✂️ Step 4: Prune and Harvest for Maximum Yield
Prune suckers (the small shoots that form in the leaf axils) to redirect energy to fruit production. Remove any leaves touching the soil to improve airflow and reduce disease risk. Harvest peppers when they reach 75% of their mature size—this encourages continuous production. Use pruning shears to cut stems ¼ inch above the fruit to avoid damaging the plant.
If birds or pests become an issue, cover plants with floating row covers until flowers appear. Once fruit sets, remove the covers to allow pollination. I’ve found that hand-pollinating with a small brush on cloudy days boosts yield in greenhouses or shady spots.
Tips & tricks for perfect pepper plant growth
Here's what nobody tells you about growing peppers that actually thrive—and how to avoid the most common pitfalls along the way.
The Heat Factor: That 80-85°F soil temperature in Step 1 is non-negotiable for germination. I've seen seeds take 3 weeks to sprout at room temperature, but with a heat mat, they pop up in just 7-14 days. Pro tip: Place your heat mat on a thermostat-controlled pad—peppers won't germinate reliably below 75°F, and overheating above 90°F can kill seeds before they sprout.
Lighting Strategy: Pepper seedlings are light-hungry divas. That 2-3 inch distance from grow lights in Step 1 should be your minimum starting point, but raise it as seedlings grow to prevent burning. I've learned the hard way that weak light causes leggy, weak stems that snap when you try to transplant—once they get this way, you can't fix them. Use a timer for 14-16 hours of light daily to mimic summer conditions.
Transplanting Wisdom: Burying seedlings deeper than their original pots in Step 2 isn't just about roots—it's about creating a stronger stem base. I've seen plants that were transplanted shallowly develop weak stems that flop over under fruit weight. For extra insurance, make a small trench around each plant after transplanting to encourage lateral root growth. This helps establish plants faster in 60°F soil.
Watering Secret: The 1-2 inch weekly watering guideline in Step 3 works, but timing matters just as much. Water in the morning so foliage dries completely by evening—this prevents fungal diseases like powdery mildew. I use a moisture meter to check soil moisture at 1-2 inch depth before watering, which helps me avoid both overwatering and underwatering. Mulching with straw, as mentioned, keeps moisture consistent while suppressing weeds that compete for nutrients.
Pro Tips for Pepper Gardening Tips
- Here's what nobody tells you about growing peppers that actually thrive—and how to avoid the most common pitfalls alo...
- The Heat Factor: That 80-85°F soil temperature in Step 1 is non-negotiable for germination. I've seen seeds take 3 we...
- Lighting Strategy: Pepper seedlings are light-hungry divas. That 2-3 inch distance from grow lights in Step 1 should ...
Frequently asked questions
Got questions about keeping your pepper garden thriving? Here are answers to the most common concerns—from pests to timing and everything in between!
When is the best time to plant peppers outdoors?
Plant peppers after the last frost when soil temps hit 60°F+ (15°C+). Peppers are heat-lovers and won’t germinate in cold soil. Start seeds indoors 8–10 weeks before transplanting for an earlier harvest. Pro tip: Use a soil thermometer to check temps—peppers hate surprises!
How do I keep pests like aphids and spider mites off my peppers?
Prevent pests with neem oil (spray weekly) or insecticidal soap. Introduce ladybugs or lacewings for natural control. For spider mites, mist plants daily to boost humidity. Quick fix: Knock off pests with a strong water spray—just avoid wetting leaves at night to prevent disease.
Can I grow peppers in containers? What’s the best setup?
Use pots at least 12–18 inches deep with drainage holes. Choose self-watering containers for busy gardeners. Mix potting soil + compost (60/40 ratio) and add a slow-release fertilizer at planting. Space tip: 1 pepper plant per 5–6 inches of container width.
Why are my pepper plants dropping flowers or fruit?
Flower/fruit drop usually means stress—check for:
- Temperature swings (peppers need consistent warmth, 70–85°F).
- Underwatering (soil should stay evenly moist, not soggy).
- Over-fertilizing (too much nitrogen = leafy growth, no fruit).
- Pollination issues (hand-pollinate with a paintbrush if bees are scarce).
How long does it take for pepper plants to produce fruit?
From seed to harvest:
- Seedlings: 6–8 weeks indoors (if started early).
- Transplant to first flowers: 60–70 days.
- Flowers to fruit: 45–60 days (varies by variety).
- Total time: 100–120 days for most peppers (check seed packets for specifics).
Wrapping up and next steps
Growing your own pest-free peppers is not only rewarding but also a delicious way to enjoy fresh, homegrown produce! 🌱 With the right pepper gardening tips—like choosing disease-resistant varieties, maintaining proper spacing, and using organic pest control—you’ll set yourself up for a thriving harvest.
Remember, consistency is key, whether it’s watering, fertilizing, or monitoring for early signs of trouble.
Now that you’re armed with these proven tricks, it’s time to roll up your sleeves and get planting! Start small if you’re new, and don’t forget to document your progress—you’ll be amazed at how much you learn along the way. Happy gardening! 🌶️