
Container Gardens
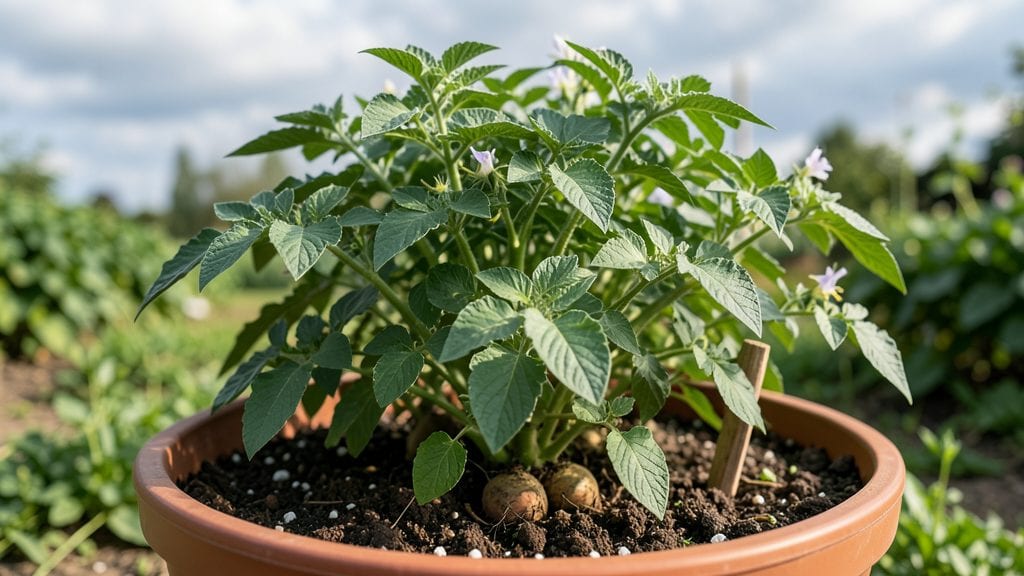
Growing potatoes in containers lets you stack harvests vertically instead of sprawling across your yard. 🌱 I used to think potatoes needed a whole garden bed, but after my first container harvest—12 pounds from a 5-gallon bucket—I never looked back.
The secret is choosing the right containers, layering soil as the plants grow, and keeping them consistently moist without drowning the roots.
You’ll need 5-gallon buckets, grow bags, or deep pots (at least 12 inches deep), high-quality potting mix with compost, and seed potatoes cut into chunks with at least two eyes each.
Spacing isn’t an issue when you stack—just plant two or three chunks per container and watch them fill the space as they grow. The real magic happens when you add more soil as the stems reach the rim, encouraging deeper tuber formation.
By harvest time, you’ll pull up earthy, crisp potatoes with minimal effort—no weeding, no bending over, and no wasted space. The first harvest comes in 8-10 weeks, and if you plant successive crops, you can keep pulling potatoes all summer long.
Even my black thumb can’t kill these when done right.
Works for apartments, balconies, or small yards—just adjust container size based on how many potatoes you want. Here’s how to set it up without the usual mess or guesswork.
📚 In This Guide
- What you need
- Instructions
- Tips and common mistakes
- Wrapping up and next steps
What you need
- ● Container(s): 1–3 deep containers (10–18 inches deep, 12–18 inches wide). Options include: Grow bags (5–10 gallons, with drainage holes)
- ● Fabric pots (10+ inches deep)
- ● Plastic or wooden bins (with drainage)
- ● Stackable containers (if growing vertically)
- ● Potato seeds: 2–3 seed potatoes per container (certified disease-free, 2–3 oz each). Popular varieties: Yukon Gold, Red Pontiac, or Fingerlings.
- ● Potting mix: 1–2 bags of high-quality, well-draining soil (sterile, organic blend preferred). Avoid garden soil—it compacts too easily!
- ● Compost or fertilizer: 1 cup balanced organic fertilizer (5-5-5 or 10-10-10) or worm castings per container.
- ● Drainage: Small rocks, gravel, or broken pottery pieces (for the bottom 2–3 inches of containers).
- ● Watering can or hose: With a gentle spray nozzle for even moisture.
- ● Pruners or scissors: For harvesting and trimming foliage.
- ● Mulch (straw or grass clippings) to retain moisture and suppress weeds.
- ● Plant markers to track varieties if growing multiple types.
- ● Container stackers or a sturdy shelf for vertical growing (if space is tight!).
- ● Slow-release fertilizer tablets for hassle-free nutrition.
- ● Garden gloves to keep hands clean while handling soil.
Step-by-Step instructions for growing potatoes in containers
Here's my foolproof method for growing potatoes vertically in containers—no digging, no fuss, just space-saving harvests.
🪴 Step 1: Choose and Prepare Your Stacking Containers
Use the 5-gallon fabric grow bags for your potato plants. These bags let roots grow downward while saving space. Cut the bottom off each bag—this prevents soil from falling out and allows excess water to drain. Stack them vertically, leaving about 2 inches between each bag to add soil later.
Fill the bottom bag with 3 gallons of potting mix, leaving 2 inches of space at the top. Moisten the soil until it feels damp but not soggy—think of a wrung-out sponge. This ensures roots get a good start without drowning. I always add a handful of compost to the mix for extra nutrients.
🌱 Step 2: Plant Certified Seed Potatoes
Cut the 1-pound bag of seed potatoes into pieces, ensuring each piece has at least 2-3 eyes (the little dimples where sprouts emerge). Let the cut pieces dry for 24 hours to prevent rot. Plant 3-4 pieces per bottom bag, placing them 2 inches deep in the soil.
Cover the seed potatoes with 1 inch of soil, then water gently until the soil is evenly moist. Place the stack in a spot with full sun—at least 6-8 hours daily. Here's the thing: potatoes need light to grow, but too much heat can stress them, so a partially shaded afternoon works too.
💧 Step 3: Water and Add Soil as Plants Grow
Water the potatoes once a week, giving them about 1 gallon per bag each time. You’ll know it’s enough when water drips out the bottom of the bag—this prevents soggy roots. When the green shoots reach 6 inches tall, add 2 inches of fresh potting mix to the top of the bag, covering the stems up to the leaves.
Repeat this process every 2-3 weeks until you’ve filled all 5 bags. This encourages more tuber growth while keeping the plant upright. I like to water in the morning so the soil has time to dry slightly before nightfall—potatoes hate wet feet.
☀️ Step 4: Maintain and Harvest Your Potatoes
Keep the soil moist but not waterlogged—dry soil is better than soggy. When the flower buds appear, your potatoes are about half-grown. If you need early harvests, gently dig around the sides of the bags after 8-10 weeks. For full-sized potatoes, wait until the foliage yellows and dies back, usually around 12-14 weeks.
To harvest, carefully empty the bags and sift through the soil to find your potatoes. Brush off excess dirt and let them cure in a cool, dark place for 1-2 weeks before storing. This step is crucial—it thickens their skins and improves storage life. You’ll be amazed at how many potatoes you get from such a small setup!
Tips & tricks for perfect potatoes container gardening
A few game-changing tips will help you maximize your yield and avoid common container gardening pitfalls with potatoes.
Soil Quality Matters: The 3 gallons of potting mix in your bottom bag should include a good-quality organic mix with at least 20% compost by volume. I've found that adding a handful of worm castings to that compost boosts early growth—your plants will thank you with stronger stems and more tubers. In Step 1, don't skimp on the compost; it's where all the magic happens for flavor and yield.
Eye Selection is Critical: When cutting your 1-pound bag of seed potatoes in Step 2, focus on pieces with 2-3 eyes that are slightly larger than the others. Those bigger eyes produce more sprouts, which means more potato plants per bag. After cutting, let those pieces dry for the full 24 hours—this prevents rot and gives you healthier starts. I've ruined batches by skipping this drying step, so trust me on this!
Watering Wisdom: That once-a-week watering in Step 3 might seem generous, but it's essential. The 1 gallon per bag ensures the roots get what they need without waterlogging. Here's what I learned the hard way: water in the morning so excess moisture evaporates during the day, preventing fungal issues. And when you see water dripping from the bottom, that's your cue—it means the soil is perfectly hydrated without being soggy.
Harvest Timing Strategy: The 8-10 week early harvest window is your secret weapon for fresh potatoes. If you're patient, waiting until the 12-14 week mark gives you full-sized potatoes, but those early harvests let you enjoy homegrown spuds months before your neighbors! After harvesting, that 1-2 week curing period in a cool, dark place is non-negotiable—it develops those thick skins that keep potatoes fresh for months in storage.
Pro Tips for Potatoes Container Gardening
- A few game-changing tips will help you maximize your yield and avoid common container gardening pitfalls with potatoes.
- Soil Quality Matters: The 3 gallons of potting mix in your bottom bag should include a good-quality organic mix with at least 20% compost by volume.
- Eye Selection is Critical: When cutting your 1-pound bag of seed potatoes in Step 2, focus on pieces with 2-3 eyes that are slightly larger than the others.
Frequently asked questions
Got questions about growing potatoes in containers? You’re not alone! Here are some of the most common queries—plus quick, practical answers to help you dig into success.
What’s the best container size for growing potatoes?
For one potato plant, aim for a container that’s at least 12 inches deep and 12 inches wide. If you’re growing multiple plants, use a 5-gallon bucket or larger (like a fabric grow bag) to give roots room to spread. Stackable containers work great—just ensure they have drainage holes!
Can I grow potatoes in a 5-gallon bucket?
A 5-gallon bucket is perfect for one potato plant. Drill drainage holes in the bottom, fill it with well-draining soil, and plant your seed potatoes. Just be prepared to harvest early (when flowers appear) since space is limited. For bigger yields, opt for a deeper container or stack buckets!
When is the right time to plant potatoes in containers?
Plant seed potatoes 2–3 weeks before your last frost date in spring. If you’re in a warm climate, you can also plant in fall for a winter harvest. Containers warm up faster than ground soil, so don’t wait too late—cool soil slows sprouting. Pro tip: Use chitted potatoes (sprouted in indirect light) to jumpstart growth!
What can I do if my container-grown potatoes are stunted or not producing?
Stunted growth usually means not enough nutrients, light, or space. Check your soil—potatoes love rich, loose soil mixed with compost. If leaves turn yellow, add a balanced fertilizer (like 10-10-10). Ensure your container gets 6+ hours of sunlight daily, and if roots are crowded, consider upgrading to a larger container or harvesting early.
Are there potato varieties that do better in containers?
Yes! Opt for compact, early-maturing varieties like:
- ‘Yukon Gold’ – Great for flavor and adaptability.
- ‘Red Pontiac’ – Disease-resistant and space-efficient.
- ‘Fingerling’ types – Naturally small and perfect for containers.
- ‘New Potatoes’ – Harvest young for tender, bite-sized tubers.
Can I reuse containers from last year’s potatoes?
Yes, but sterilize them first! Scrub containers with a 10% bleach solution or soak in hot water to kill pests/diseases. Replace old soil or mix in fresh compost to replenish nutrients. Avoid reusing containers if you noticed blight or rot—it’s better to start fresh!
Wrapping up and next steps
Container gardening for potatoes is your ticket to a space-saving, rewarding harvest—no backyard required! 🌱 Whether you’re a beginner or a seasoned green thumb, stacking containers unlocks endless possibilities for growing crisp, homegrown spuds. The key? Start small, stay consistent, and celebrate every tiny victory.
Ready to dig in? Your next step? Grab a container, some soil, and a seed potato—and let the fun begin! Plant your first batch this weekend, and soon, you’ll be feasting on the fruits (and roots!) of your labor. Happy growing! 🥔✨