Picking
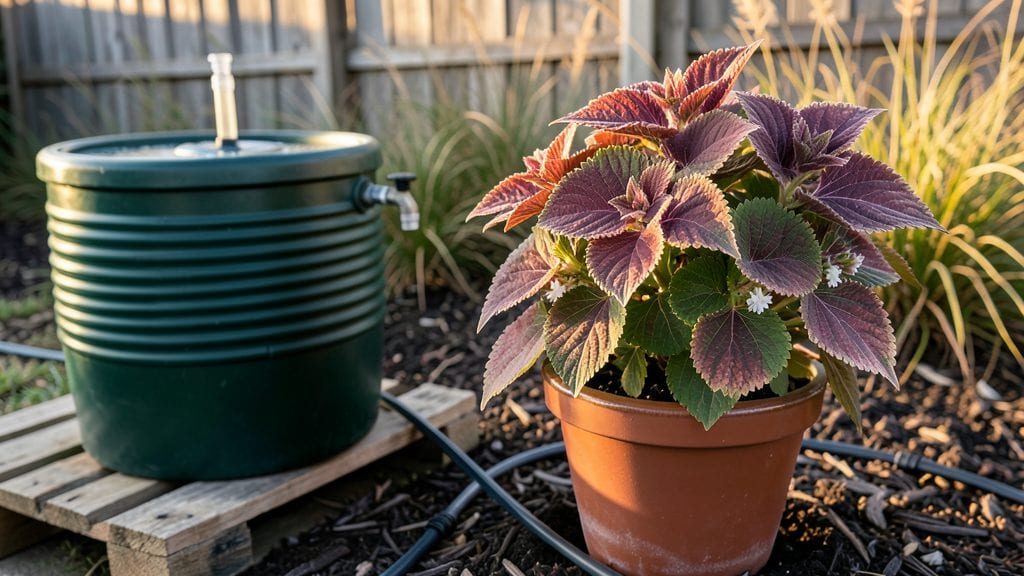
My rainwater harvesting garden slashed my water bill by nearly half last year—and it only took a weekend to set up. The system is simpler than most people think: a few barrels, some gutters, and plants that thrive on less water.
I’ll show you exactly how to turn your downspouts into a free, renewable water source without breaking the bank or complicating your yard.
You don’t need fancy equipment or a massive property—just a few basic supplies like food-grade barrels, a first-flush diverter, and some mesh to keep debris out. Native plants and drought-tolerant perennials do most of the work, drinking up what you collect while keeping your garden lush.
Even in my dry climate, the right setup keeps everything green without a single drop from the tap.
By summer’s end, you’ll have a system that runs itself, with water stored for dry spells and plants that stay vibrant without extra effort. The real magic? No more wasted rainwater running off your roof, and no more worrying about drought restrictions.
Plus, your garden becomes a quiet, efficient machine that works with nature instead of against it.
Whether you’re starting from scratch or just want to upgrade an existing garden, this approach scales to any space. Let’s get your system designed so you can enjoy the savings—and the satisfaction—all year long.
📚 In This Guide
- What you need
- Instructions
- Tips and common mistakes
- Wrapping up and next steps
What you need
- ● Rainwater collection surface: Roof (metal, asphalt, or cedar shingles—avoid wood shakes or clay tiles)
- ○ Optional: A blank">shed roof or patio cover (100+ sq. ft. for decent yield)
- ● Gutters & downspouts: 5–6 inch blank">vinyl or aluminum gutters (per 20 ft. of roof)
- ● Elbow connectors & downspout extensions (1–2 per downspout)
- ● Storage system: Food-grade barrels (55–75 gallons) (1–2 per system) or
- ● IBC tote (275–330 gallons) (1 per system, with a blank">rainwater harvesting kit)
- ● Filtration: First-flush diverter (1 per downspout)
- ● Mesh screen (fine, 100–200 micron) for debris
- ● Pumps & irrigation: Submersible pump (12V, 1–2 GPM) or gravity-fed drip system
- ● Drip irrigation kit (with emitters for plants)
- ● Drill & bits (for gutter/downspout installation)
- ● Screwdriver set (Phillips & flathead)
- ● Measuring tape & level
- ● Pliers & wire cutters (for connections)
- ○ Optional: Caulk gun (for sealing gaps) or blank">UV-resistant tubing
- ● Check local blank">building codes (some areas restrict rainwater use)
- ● Ensure your roof is in good condition (no leaks or mold)
- ● Designate a permeable drainage area for overflow (gravel bed or swale)
- ● Pro tip: Test your soil’s blank">percolation rate if using underground storage!
Simple rainwater harvesting garden setup for year-round savings
Here's how to create a functional system that captures rainwater efficiently without complicated tools.
Choose Your Collection Point and Materials
Start by selecting a clean, elevated surface like a roof or patio area to collect rainwater. I recommend using 4-5 large plastic barrels (55-gallon size works best) with tight-fitting lids to prevent contamination. Place them on sturdy stands or cinder blocks to keep them off the ground and improve drainage. You'll need a downspout diverter to redirect water from gutters into your barrels—this simple plastic attachment slips onto the downspout and angles water into your containers.
If you don't have gutters, position barrels directly under roof edges or use a wide-mouth funnel to channel water from flat surfaces. The key is minimizing debris—place a fine mesh screen over each barrel opening to block leaves and dirt while letting water flow through. This keeps your stored water clean and usable for longer.
Set Up the Drainage and Overflow System
Drill a small hole near the bottom of each barrel using a 1-inch hole saw—this creates a spigot for easy access. Insert a ball valve or hose bib into the hole and secure it tightly with plumber's tape to prevent leaks. The valve should be positioned so you can attach a hose or watering can directly. I like to place the barrels on adjustable stands so I can lower them slightly to create a gentle slope for drainage.
For overflow protection, attach a flexible downspout extension to each barrel's lid. This directs excess water away from your barrels and prevents spills during heavy rain. Test your setup by filling a barrel halfway—water should drain smoothly through the valve when opened, and overflow should flow cleanly into your extension pipe. This ensures your system won't flood or waste water during downpours.
Install a Filtration System for Safe Use
Before using harvested water on edible plants, you'll need to filter out debris and sediment. I use a berkey-style gravity filter connected to the barrel's spigot, but a simple sock filter works too—just fill a clean nylon stocking with coarse sand and gravel, then place it inside the barrel's spout. This removes larger particles before water flows out.
For finer filtration, add a 5-micron sediment filter to your hose connection. Run the filtered water through a bleach treatment (1/8 teaspoon of unscented bleach per gallon) if you plan to use it for vegetables. Let the treated water sit for 30 minutes before use to kill any remaining bacteria. You'll know your filtration is working when water runs clear and free of visible particles—this means it's safe for watering non-edible plants or even flushing toilets.
Connect to Your Garden Irrigation
Attach a braided polyethylene hose to your barrel's valve and run it to your garden beds. Use a manual valve to control flow—this prevents overwatering and lets you direct water exactly where you need it. For larger gardens, consider a drip irrigation kit with adjustable emitters to distribute water evenly. Place the hose on the ground or use stakes to elevate it slightly for better coverage.
Test your setup by filling a barrel and running water through the hose. You should see a steady, even flow without splashing. Adjust the hose's elevation or add more emitters if water isn't reaching all areas of your garden. This step ensures your harvested rainwater is as efficient as possible, reducing waste and maximizing savings. You'll notice your plants thrive with this gentle, consistent watering method compared to harsh overhead sprinklers.
Maintain and Monitor Your System
Check your barrels weekly for debris buildup, especially after storms. Skim off any leaves or sediment that accumulate on the surface—this prevents mold and keeps water fresh. Top off the bleach treatment every 2-3 months if you're using the water for edible plants. I also recommend rotating barrels monthly to ensure even distribution of sunlight and prevent algae growth in shaded areas.
Monitor your water levels during dry spells—if barrels run low, consider adding a water level indicator (like a clear plastic tube inserted into the barrel) to track usage. In winter, drain barrels completely and store them indoors or cover them with a tarp to prevent freezing. With regular maintenance, your system will provide thousands of gallons of free water annually, slashing your water bill while keeping your garden lush year-round.
Tips & tricks for simple rainwater harvesting systems
Building a rainwater harvesting system doesn't have to be complicated—these practical tips will help you create an efficient setup that saves water without the hassle.
Collection Point Strategy: In Step 1, position your 55-gallon barrels under the most frequently used downspouts or roof edges to maximize collection. I've found that placing them on adjustable stands creates a slight slope that helps with drainage and prevents stagnant water. If you're working with flat surfaces, use wide-mouth funnels to channel water efficiently without losing precious gallons to splashing. The goal is to capture as much rainwater as possible while keeping maintenance simple.
Drainage and Overflow Protection: When setting up your drainage system in Step 2, make sure the 1-inch hole for your ball valve is positioned at least 4 inches from the bottom of the barrel. This prevents sediment buildup at the valve and keeps water flowing smoothly. For overflow protection, use flexible downspout extensions that direct excess water away from your barrels and into a drainage area. I've seen systems fail when overflow pipes were too short—always extend them at least 3 feet away from your barrels to prevent erosion near the collection points.
Filtration Efficiency: The 30-minute bleach treatment in Step 3 is your best defense against bacteria, but you can enhance it by adding a layer of activated carbon to your filtration system. This removes odors and additional contaminants. For the sock filter, use a nylon stocking filled with a mix of coarse sand and small gravel—this creates multiple filtration layers. Test your filtration by running water through it before using it on plants; if it runs clear, your system is working properly.
Maintenance Made Easy: In Step 5, I recommend adding a small piece of floating bamboo or a clean wooden stick to each barrel. This creates gentle ripples that prevent algae growth by disrupting stagnant water. Also, mark your barrels with a permanent marker to track when you last added bleach treatment—this simple habit prevents forgetting and keeps your water safe for edible plants. Regular maintenance like this ensures your system stays functional year-round with minimal effort.
Pro Tips for Rainwater Harvesting Garden
- Building a rainwater harvesting system doesn't have to be complicated—these practical tips will help you create an efficient setup that saves water without the hassle.
- Collection Point Strategy: In Step 1, position your 55-gallon barrels under the most frequently used downspouts or roof edges to maximize collection.
- Drainage and Overflow Protection: When setting up your drainage system in Step 2, make sure the 1-inch hole for your ball valve is positioned at least 4 inches from the bottom of the barrel.
Frequently asked questions
Got questions about rainwater harvesting for your garden?
Here are answers to the most common ones—so you can dive in with confidence!
How much rain do I need to make harvesting worth it?
Even light rainfall (like 1 inch per week) can fill a small system! Track your local averages—areas with seasonal dry spells or heavy storms (like 2+ inches at once) benefit most. A 500-gallon tank can collect 600+ gallons from a single storm in a 1,000 sq. ft. roof area. Use our calculator to estimate your potential!
Can I use harvested rainwater for anything besides plants?
Rainwater is safe for non-potable uses like watering lawns, flushing toilets, or even washing cars (if filtered). For edible gardens, avoid collecting from roofs treated with pesticides or asphalt. Always label containers clearly to prevent accidental drinking.
What’s the best time of year to set up a system?
Install before the first heavy rain—spring or early summer is ideal! This gives you time to test leaks and acclimate plants. In drier climates, a small pre-filled tank (even 50 gallons) can tide you over until the monsoon season. Pro tip: Cover tanks in winter to prevent freezing cracks!
How do I keep mosquitoes or algae out of my harvested water?
Mosquitoes thrive in stagnant water—so add a tight-fitting lid or use a first-flush diverter to remove debris. For algae, keep tanks in the shade and add a few grains of barley (natural oxygenator) or a small pump to circulate water. Empty and scrub tanks every 6–12 months!
Is a DIY system cheaper than buying a pre-made one?
Yes!
A basic 500-gallon DIY setup costs $200–$500 (using barrels, gutters, and PVC), while pre-made tanks start at $600+. Save even more by repurposing food-grade barrels or checking local recycling programs for free containers. Compare long-term savings—DIY pays off in 1–2 years!
What’s the #1 mistake beginners make?
Skipping a first-flush diverter! The first rainwater washes off dirt, bird droppings, and pollutants—directing it away prevents clogged filters and contaminated plants. Also, don’t use metal roofs (corrosion) or untreated wood (leaching) unless lined properly. Start simple: Test with a barrel first!
Wrapping up and next steps
Creating a rainwater harvesting garden isn’t just eco-friendly—it’s a smart, sustainable way to slash water bills and nurture your green space year-round. With simple DIY systems, you can turn every raindrop into a resource, reducing waste and boosting your garden’s resilience.
The best part? You don’t need a green thumb or a massive budget to get started—just a little planning and enthusiasm!
Ready to take the next step? Start small:
- Pick a sunny spot for your first barrel or system.
- Gather supplies (or repurpose what you have!).
- Watch your garden—and water bill—thrive!