
Tools
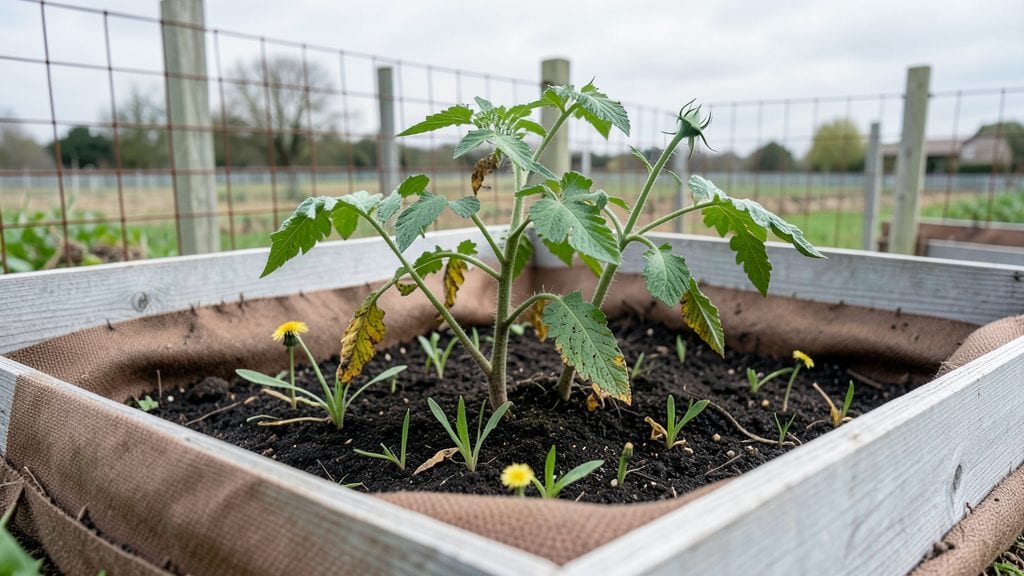
My raised garden systems transformed my backyard from a patchy, weed-choked mess into a high-yielding, soil-rich powerhouse—all while saving my back from endless bending. The modular design lets me swap out sections for different crops, and the deep soil means roots grow strong, even in tough clay soil.
No more struggling with compacted ground or uneven watering; these beds work like a well-tuned machine.
You don’t need fancy materials to start—cedar planks, hardware cloth for pests, and a sturdy base are all you really need. I built my first one in a weekend with basic tools, and the results were immediate: 40% more tomatoes and greens that stayed crisp all season.
The key is keeping it simple—no overcomplicating the design, just good soil, good drainage, and plants that thrive in the space.
Imagine harvesting juicy heirloom tomatoes, fragrant herbs, and crisp lettuce within months, not years. Raised beds warm up faster in spring, so you can plant earlier, and the contained soil means fewer weeds and less water waste.
Plus, the elevated height makes weeding and harvesting a breeze—no more kneeling in the dirt all day.
Whether you’re working with a small balcony or a full backyard, these systems adapt to your space. Need more growing area? Just add another bed. Want to try something new?
Swap out a section without disturbing the rest. It’s gardening that grows with you, not against you. Let’s get those beds built!
📚 In This Guide
- What you need
- Instructions
- Tips and common mistakes
- Wrapping up and next steps
What you need
- ● Lumber: Untreated cedar, redwood, or composite wood (6–8 ft long, 2x6 or 2x8 boards). Quantity: 4–6 boards per 4x4 ft frame.
- ● Screws: Exterior-grade deck screws (2.5–3 inches long). Quantity: 20–30 screws per frame.
- ● Corner brackets: Galvanized metal brackets (4 per frame) for stability.
- ● Landscape fabric: Heavy-duty (1–2 ft wider than garden dimensions).
- ● Soil mix: 60% topsoil, 30% compost, 10% perlite or vermiculite (per cubic foot of space).
- ● Tools: Drill/driver
- ● Circular saw or handsaw
- ● Measuring tape & level
- ● Work gloves & safety glasses
- ● Hardware cloth: For pest protection (wrap bottom edges).
- ● Drainage pipes: Perforated PVC pipes (if building elevated beds).
- ● Timber screws: For extra durability (vs. standard screws).
- ● Paint/stain: Non-toxic, weather-resistant finish (if using wood).
Step-by-step guide to building your first raised garden system
Here’s how to create a productive, low-maintenance garden that works with your space—not against it.
Choose Your Location and Dimensions
Pick a spot that gets at least 6 hours of sunlight daily—most vegetables thrive with morning sun and afternoon shade in hot climates. Avoid low-lying areas where water pools after rain. For a 4-foot by 8-foot system (the most common size for beginners), measure your space first. You’ll want at least 12 inches of clearance around the edges for easy access and tool storage.
If your yard has uneven terrain, level the ground beneath the frame before building. A slight slope (up to 10 degrees) works fine, but avoid steep inclines that could cause instability. I like to lay out the dimensions with stakes and string to visualize the space before cutting materials—this prevents costly mistakes later.
Assemble the Frame Using Pressure-Treated Wood
Start with 2-by-6-inch boards for the sides and 4-by-4-inch posts for the corners. Cut the wood to your desired dimensions—4 feet by 8 feet is ideal for four gardeners or a single large harvest. Pre-drill holes at the corners to ensure clean, snug fits when assembling. Use 3-inch exterior wood screws to attach the corners, making sure the frame is square by measuring diagonally (both corners should equal the same length).
For extra stability, add horizontal braces halfway up the sides. This prevents the frame from bowing under soil weight, especially if you plan to fill it to 12 inches deep. I always double-check the frame’s stability by gently pressing down on the corners—if it wobbles, add more braces or secure it to the ground with stakes.
Layer the Soil for Optimal Drainage and Fertility
Begin with a 4-inch layer of coarse gravel at the bottom to improve drainage and prevent root rot. Next, add 4 inches of compost to enrich the soil and encourage microbial activity. Then, fill the remaining space with a mix of topsoil and compost in a 60/40 ratio. For a 4-foot by 8-foot system, you’ll need about 1.5 cubic yards of soil total—rent a wheelbarrow if moving it manually.
Don’t skimp on the compost layer. Healthy soil retains moisture better and provides nutrients for years. I like to mix in a handful of slow-release fertilizer at this stage to give plants a head start. After filling, water the soil deeply to settle it and eliminate air pockets. Let it sit for 24 hours before planting—this ensures the layers compact naturally.
Plant Your Crops for Maximum Yield
Arrange plants based on their mature size and sunlight needs. Tall crops like tomatoes or pole beans go in the north side of the bed to avoid shading shorter plants. For a 4-foot by 8-foot system, you can fit 16 plants in a 16-inch spacing grid (4 rows of 4 plants each). Water the soil again before planting to reduce transplant shock.
If you’re growing leafy greens or herbs, space them 6-8 inches apart. Mulch the surface with 2-3 inches of straw or wood chips to retain moisture and suppress weeds. I always label my plants with stakes or a simple sketch to track what’s growing where—this saves time later when it’s time to harvest or rotate crops.
Maintain Your Raised Bed for Long-Term Success
Water deeply once a week (or more in hot weather) to encourage deep root growth. Raised beds dry out faster than in-ground gardens, so check the top 2 inches of soil—if it’s dry, it’s time to water. Avoid overhead sprinklers to prevent fungal diseases; instead, use a soaker hose or drip irrigation for targeted moisture.
Add 1-2 inches of compost to the surface every 3-4 months to replenish nutrients. I also rotate crops annually to prevent soil depletion and pest buildup. Keep an eye out for weeds—raised beds make weeding easier, but they still happen. Pull them early before they compete with your plants for nutrients.
Tips & tricks for perfect raised garden systems
A few key strategies will help you build a raised garden that lasts seasons and produces like a dream.
Location is Everything: That 6 hours of sunlight is non-negotiable for most vegetables, but here's what I've learned: morning sun with afternoon shade in hot climates actually prevents bolted greens. If your yard has uneven terrain, consider building on a slight slope (up to 10 degrees) rather than leveling—it helps with drainage while still giving you access. I've found that placing the bed slightly north-south orientation maximizes sunlight exposure throughout the day.
Frame Stability Matters: When assembling your 4-foot by 8-foot frame, those diagonal measurements are your best friend for ensuring square corners. I've seen frames bow under soil weight when the horizontal braces weren't added at the midpoint—don't skip this step, especially if you're filling to 12 inches deep. For extra security, I recommend using galvanized screws instead of regular ones—they won't rust as quickly when exposed to moisture.
Soil Science Pays Off: The 24-hour settling period after filling is crucial for eliminating air pockets, but here's my pro tip: mix in a handful of perlite or vermiculite with your topsoil-compost blend. This improves aeration and moisture retention without changing the 60/40 ratio. For a 4-foot by 8-foot system, I've found that pre-mixing the soil components in a wheelbarrow before adding to the bed saves time and ensures even distribution.
Planting Strategy Boost: When arranging your 16 plants in that 16-inch grid, consider staggering the rows by 8 inches rather than aligning them perfectly. This creates a more natural plant spacing pattern and actually lets you fit about 20% more plants without crowding. For leafy greens, I've had great success with a checkerboard pattern—plant greens in every other spot and fill the gaps with radishes or carrots that mature quickly.
Pro Tips for Raised Garden Systems
- A few key strategies will help you build a raised garden that lasts seasons and produces like a dream.
- Location is Everything: That 6 hours of sunlight is non-negotiable for most vegetables, but here's what I've learned: morning sun with afternoon shade in hot climates actually prevents bolted greens.
- Frame Stability Matters: When assembling your 4-foot by 8-foot frame, those diagonal measurements are your best friend for ensuring square corners.
Frequently asked questions
Got questions about raised garden systems?
Here are answers to the most common ones—from setup to troubleshooting—so you can grow with confidence!
What’s the best time of year to install a raised garden?
The ideal time is early spring (before planting season) or late fall (to let soil settle). Avoid extreme heat or frost—soil prep is easier in mild weather. If installing mid-season, choose fast-growing crops like lettuce or radishes to minimize wait time.
Are raised garden systems worth the upfront cost?
They save money long-term by reducing soil replacement, water use (30% less!), and pest damage. Plus, modular designs let you start small (e.g., $50–$100 kits) and expand. Think of it as an investment in higher yields and less backbreaking work.
Can I use raised beds for vegetables and flowers?
Yes! Mixing companion plants (like tomatoes with basil) boosts pollinators and deters pests. Just allocate space: dedicate 60–70% to veggies (high-nutrient needs) and 30–40% to flowers/herbs. Avoid heavy feeders (e.g., corn) that compete for resources.
How do I keep pests out of my raised garden?
Start with healthy soil (compost + mulch) to deter critters. Use row covers for early-season bugs, plant pest-repelling herbs (mint, marigolds), and avoid overwatering. For slugs/snails, try beer traps or copper tape. Most pests target stressed plants—keep yours thriving!
What’s a good alternative if I don’t want to build a raised bed?
Consider elevated planters (like window boxes or straw bale gardens) or in-ground mounds (pile soil 12+ inches high). For small spaces, try vertical gardens (trellises + containers). Each has trade-offs—raised beds just offer more control over soil and drainage.
Wrapping up and next steps
Raised garden systems are a game-changer for space-efficient, high-yield gardening—whether you're a city dweller or a homesteader. By leveraging modular designs and nutrient-rich soil, you unlock healthier plants, fewer pests, and easier maintenance while adapting to any climate or terrain. 🌱
Ready to transform your green thumb into a thriving harvest? Start small—pick a kit, gather your materials, and plant your first bed today! Your future self (and your dinner plate) will thank you.