Landscaping
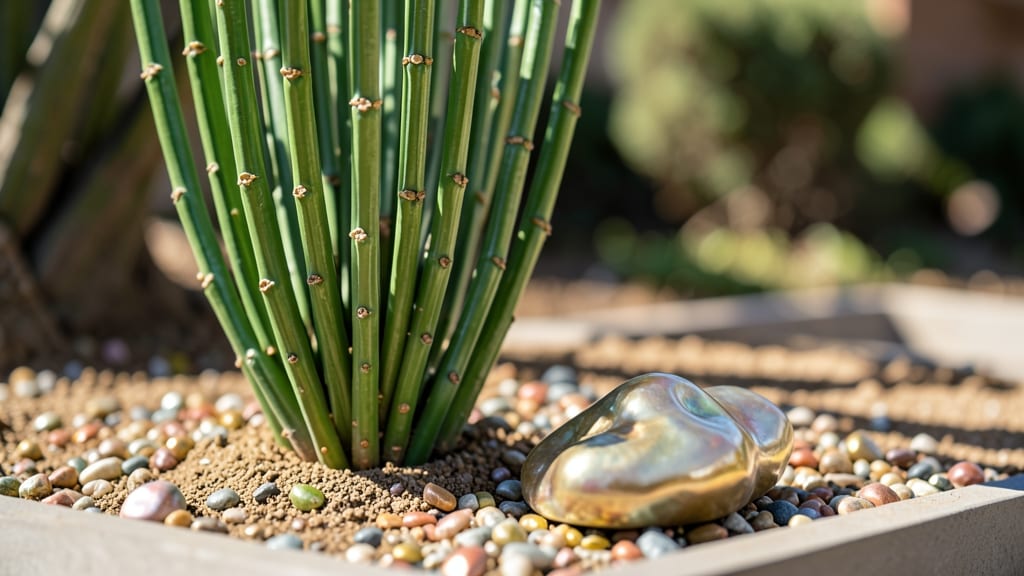
Transforming your garden into a year-round sparkle show starts with resin decorations that blend artistry with durability. 🌟 I’ve used resin pathways, fairy lights, and whimsical toadstools to create spaces that feel magical yet weatherproof—no fading, no chipping, just pure, lasting charm.
The best part? You can customize colors, textures, and shapes to match any theme, from rustic cottage to modern minimalist.
Resin’s real magic lies in its versatility. Use it to line garden paths with embedded glow-in-the-dark accents, craft miniature sculptures for fairy gardens, or even create waterproof planters that hold moss or succulents.
Most projects require just a few supplies: resin kits, molds, pigments, and a heat gun for bubbles—no advanced skills needed. My favorite? Mixing metallic flakes into clear resin for a starry-night effect that shimmers at dusk.
Imagine stepping onto a pathway that glows softly under moonlight or tucking tiny resin mushrooms among hostas for a woodland fairy tale vibe. These decorations stay vibrant through rain, snow, and sun, so your garden’s personality shines no matter the season.
The key is balancing resin’s boldness with natural elements—think driftwood, pebbles, or soft greenery to keep things grounded.
Whether you’re revamping a small balcony or a sprawling backyard, resin lets you add personality without the upkeep. Start small with a single statement piece, like a resin-lined birdbath, and watch how it elevates the whole space. The possibilities are endless, and the results? Pure, effortless enchantment.
📚 In This Guide
- What you need
- Instructions
- Tips and common mistakes
- Wrapping up and next steps
What you need
- ● Resin: Clear or colored epoxy resin (2–5 gallons, depending on project size). Pro tip: Opt for UV-resistant resin for outdoor durability! 🌞
- ● Resin hardener (matched to your resin type, usually a 1:1 or 2:1 ratio).
- ○ Molds & Silicone Forms: Garden-themed molds (e.g., pebbles, leaves, flowers, or custom shapes). Optional: DIY molds from silicone or rubber kitchen tools!
- ● Prerequisites: Clean, dry workspace (outdoor table or tarp-covered area).
- ● Protective gear: nitrile gloves, safety goggles, and a respirator (resin fumes can be strong!).
- ● Heat gun or torch (for bubble removal).
- ● Mixing cups, stir sticks, and a scale (for precise resin ratios).
- ● Glitter, dried flowers, or metallic pigments for added sparkle.
- ● Embedded objects (e.g., seashells, beads, or tiny figurines).
- ● Sealer spray (to protect finished pieces from weather).
- ● Stencils or paint pens (for custom designs).
Step-by-step instructions for crafting resin garden decorations
Transform your outdoor space with dazzling, weatherproof resin creations that catch the light all year.
🪴 Step 1: Design and Prepare Your Mold
Start by sketching your design on paper—think whimsical pathways, stepping stones, or decorative accents. For pathways, use a sturdy silicone mold that measures 12 inches long by 4 inches wide to create individual sections. Clean the mold thoroughly with rubbing alcohol to remove any debris or mold release residue from previous uses. This ensures your resin adheres perfectly and creates a smooth, bubble-free finish.
Here's the thing—resin reacts to temperature, so work in a space between 65-75°F. If your workshop runs cooler, place the mold near a heat source for 30 minutes before pouring. Cold resin thickens prematurely, trapping air bubbles that ruin the aesthetic. I like to lay down a silicone mat underneath my mold to catch any drips and make cleanup effortless.
💧 Step 2: Mix and Pour the Resin
Measure 2 parts resin and 1 part hardener using the provided syringes for precision—uneven ratios create cloudy or sticky results. Pour the resin into a disposable mixing cup, then add the hardener slowly while stirring in circular motions for 2-3 minutes. This step is critical: stop stirring once the mixture turns clear and begins to thicken slightly—usually after 3-5 minutes. Pour the resin into your mold immediately, filling it ¾ full to prevent overflow when it expands.
Tap the mold gently on the work surface 5-10 times to release trapped air bubbles. If you see bubbles forming, use a heat gun on low setting to pop them before they set. Work quickly—resin begins curing in 15-30 minutes, so don’t dawdle. I cover my mold with a clear plastic sheet to protect it from dust while it cures.
☀️ Step 3: Cure and Demold with Precision
Allow the resin to cure for 24 hours in a dust-free environment. Resist the urge to demold early—premature removal causes cracks or warping. After 24 hours, gently flex the mold sides to release the edges. For stubborn sections, use a plastic putty knife to separate the resin without scratching. If you’re adding glitter or pigments, sprinkle them onto the still-tacky surface after 12 hours of curing, then press them in with a gloved finger before full hardening.
Once fully demolded, let the pieces cure for an additional 48 hours to ensure complete hardness. Place them on a silicone-coated tray to prevent sticking. Real talk: if your resin feels tacky after 48 hours, it didn’t cure properly—start over with fresh materials. Properly cured resin should feel smooth and cool to the touch.
✂️ Step 4: Seal and Weatherproof for Outdoor Use
Sand any rough edges with 220-grit sandpaper, then wipe away dust with a damp microfiber cloth. Apply a clear outdoor-rated polyurethane sealant in thin, even coats using a foam brush. This protects your resin from UV rays, moisture, and temperature fluctuations. Let each coat dry for 4-6 hours before applying a second—usually 2-3 coats suffice for durability. I test the seal by drizzling water on the surface; if it beads up, you’re good to go.
For added sparkle, embed UV-resistant glitter between sealant layers. Arrange your finished pieces along garden paths, borders, or as centerpieces. If you’re creating pathways, lay them in a sand bed for stability—this prevents shifting from foot traffic. Your decorations will stay vibrant for years with minimal maintenance.
Tips & tricks for perfect resin garden decorations
Here's what nobody tells you about achieving flawless, professional-quality resin garden decorations—details that separate stunning results from so-so attempts.
Temperature Matters: Maintain that 65-75°F range throughout the entire process, especially during the 30 minutes you prep your mold. Cold temperatures cause premature thickening, while heat above 75°F speeds up curing too quickly, trapping bubbles. I work near a heat vent in winter and use a small fan in summer to maintain consistency—your workspace temperature affects every step.
The Technique That Changed Everything: When mixing resin and hardener in Step 2, use a digital scale if possible for precise measurements—even slight deviations from the 2:1 ratio create cloudiness or stickiness. Stir vigorously in circular motions for the full 2-3 minutes until the mixture turns clear and begins to thicken (usually around 3-5 minutes). The moment it starts thickening is your cue to pour immediately—waiting even 30 seconds can ruin the batch.
Bubble Prevention: Those 5-10 taps on the work surface after pouring are non-negotiable, but for extra insurance, use a heat gun on low to gently pop any surface bubbles before they set. Work quickly during the 15-30 minute working window—resin loses its workability fast. I keep my heat gun at 200°F or below and wave it just above the surface to avoid overheating the resin.
Curing Wisdom: The 24-hour initial cure is critical, but don't rush demolding. I test readiness by gently pressing the edges—if they flex but don't crack, it's ready. For the additional 48-hour cure, I place pieces on a silicone-coated tray in a dust-free cabinet. If your resin feels tacky after 48 hours, humidity or temperature fluctuations likely interfered—start fresh with fresh materials.
Pro Tips for Resin Garden Decoration
- Here's what nobody tells you about achieving flawless, professional-quality resin garden decorations—details that separate stunning results from so-so attempts.
- Temperature Matters: Maintain that 65-75°F range throughout the entire process, especially during the 30 minutes you prep your mold.
- The Technique That Changed Everything: When mixing resin and hardener in Step 2, use a digital scale if possible for precise measurements—even slight deviations from the 2:1 ratio create cloudiness or stickiness.
Frequently asked questions
How long does resin garden decor take to cure fully?
Most resin projects need 24–72 hours to fully cure, depending on thickness and temperature. Thin layers (like pebbles or flowers) may cure in 24 hours, while thicker pieces (like benches or planters) can take up to 3 days. Always check the resin kit’s instructions for exact timing—patience is key!
Can I use resin outdoors if it rains?
Once fully cured, resin is waterproof and UV-resistant, so rain won’t harm it. However, apply it on a dry, clear day to prevent bubbles or uneven curing. If working near water (like a fountain), seal edges with a clear sealant for extra protection.
Is resin decor more expensive than other garden materials?
Cost depends on the project! Basic resin kits (for small decor) run $20–$50, while custom pieces (like resin stepping stones) can cost $50–$200+**. Compared to ceramic or metal, resin offers durability and creativity at a mid-range price—plus, you avoid labor costs by DIY-ing!
What’s the best alternative if I don’t want to use resin?
If resin isn’t your style, try these low-maintenance alternatives:
- Concrete stamps – Mimic stone or brick patterns.
- Powder-coated metal – Rust-proof and modern.
- Recycled glass – Adds color and eco-friendliness.
- Natural stone – Timeless but heavier.
My resin piece has bubbles—how do I fix it?
Don’t panic! Bubbles form from moisture, temperature shifts, or mixing too fast. For small bubbles:
- Use a heat gun (low setting) to pop them gently.
- Sand lightly after curing and reapply a thin resin layer.
- Work in a dust-free, 70°F+ space.
- Mix slowly with a silicon spatula.
- Let resin sit for 10–15 mins before pouring.
Wrapping up and next steps
Transforming your garden with resin decorations is a creative and durable way to add year-round charm without the fuss of seasonal swaps. Whether you’re crafting whimsical pathways, elegant planters, or sparkling accents, resin’s versatility makes it the perfect choice for both beginners and DIY enthusiasts. 🌿✨
Now that you’re inspired—and armed with answers to common questions—grab your tools and start pouring! Your garden’s next masterpiece is just a few steps away. Happy crafting!