Tools
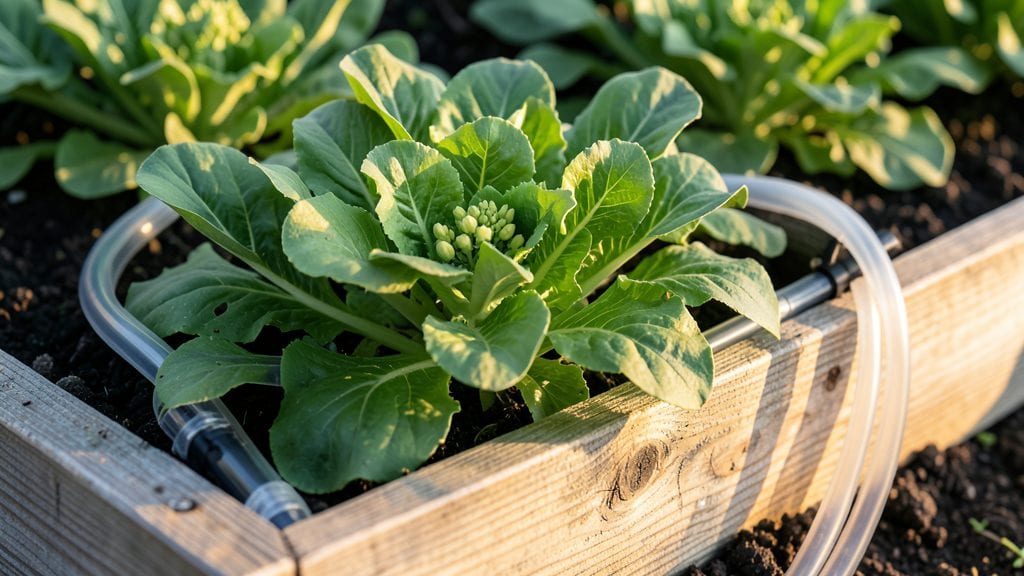
A rooftop vegetable garden turns unused space into a thriving harvest. ✨ I started mine on my city balcony with just three modular planters, and within weeks, I was picking fresh greens and tomatoes—something I never thought possible in a concrete jungle.
The trick isn’t fancy setups but smart plant choices and sturdy containers that handle wind and weight.
Modular planters solve the biggest challenges: weight limits, drainage, and space. Use lightweight materials like fabric grow bags or recycled plastic containers with drainage holes. Place heavier pots near the edges where the roof can support them, and group plants with similar water needs together.
My setup fits on a 6x8-foot deck, and I’ve grown everything from lettuce to cherry tomatoes.
You’ll harvest fresh herbs in weeks and full-sized vegetables by summer. The key is starting small—maybe one or two planters—and expanding as you gain confidence. The payoff?
Homegrown food without the garden plot. Plus, the view from your kitchen window changes from boring to breathtaking when your rooftop is alive with greenery.
This works for any rooftop, from tiny balconies to larger terraces. Whether you’re in an apartment or a house with a flat roof, modular planters make it possible. Let’s get those containers filled and growing!
📚 In This Guide
- What you need
- Instructions
- Tips and common mistakes
- Wrapping up and next steps
What you need
- ● Modular planters: 4–10 units (depending on space; 10"–12" deep, with drainage holes). Pro tip: 💡 Opt for lightweight materials like polypropylene or recycled plastic to reduce roof strain.
- ● High-quality potting soil: 2–3 cubic feet per planter (use a well-draining mix with compost).
- ● Seeds or seedlings: Choose fast-growing, compact varieties like cherry tomatoes, bush beans, lettuce, or herbs (basil, parsley).
- ● Watering system: Drip irrigation kit (recommended) or self-watering planters.
- ● Watering can with a spout (for smaller setups).
- ● Fertilizer: Slow-release organic granules or liquid fertilizer (e.g., fish emulsion).
- ● Pruning shears and gardening gloves.
- ● Rooftop assessment: Ensure your roof supports 20–30 lbs/sq ft (check with a structural engineer if unsure).
- ● Sunlight access: Confirm 6+ hours of direct sun daily (south-facing is ideal in the Northern Hemisphere).
- ○ Optional upgrades: Grow lights (for low-light rooftops).
- ● Weatherproof cover (for wind/rain protection).
- ● Vertical planters to maximize space.
Step-by-step instructions for building modular rooftop vegetable planters
Here's how to create a sturdy, productive rooftop garden using lightweight materials that won't overwhelm your space.
🪴 Step 1: Select and Assemble Planter Boxes
Choose 4 modular planter boxes with built-in drainage holes—each should be at least 12 inches deep to accommodate root growth. I like boxes with interlocking sides because they're easy to assemble and disassemble for cleaning or moving. Place the boxes on a flat, stable surface and connect them using the provided hardware.
For rooftop safety, distribute the weight evenly by spacing the boxes 12 inches apart. If your roof isn't perfectly level, use leveling feet or small cinder blocks under each corner to prevent water pooling. This ensures proper drainage and prevents structural stress on the roof.
🌱 Step 2: Prepare Lightweight Growing Medium
Fill each planter with 3 cubic feet of lightweight potting mix designed for containers. Avoid garden soil—it's too heavy and compacts easily. Mix in 1 cup of compost per planter to provide nutrients without adding excessive weight. Fluff the mix with your hands to create air pockets for roots.
Water the mix thoroughly until it's evenly moist but not soggy. You'll know it's right when water runs out the drainage holes without leaving puddles. This step is critical—too-heavy soil will make your planters top-heavy and unstable on the roof.
☀️ Step 3: Choose and Plant Rooftop-Friendly Vegetables
Select fast-growing, shallow-rooted vegetables like lettuce, kale, radishes, or bush beans for your first harvest. Plant 4-6 seeds per planter, spacing them 2-3 inches apart according to the seed packet. Press seeds into the soil to a depth of ¼ inch—no deeper, or they won't germinate.
Cover the seeds lightly with additional potting mix and water gently with a spray bottle. Place the planters where they'll receive 6-8 hours of sunlight daily. If your roof gets intense afternoon sun, consider using shade cloth to protect tender seedlings until they're established.
💧 Step 4: Establish a Watering Routine
Water deeply every 2-3 days until the top 1 inch of soil feels dry. Rooftop gardens dry out faster due to wind exposure, so check moisture levels daily during hot weather. Use a drip irrigation system or soaker hose to deliver water at the base—this prevents evaporation and keeps leaves dry, reducing disease risk.
I like to water in the early morning so plants have all day to absorb moisture before evening heat. Avoid overhead watering, which can wash away soil and disturb young plants. Mulch the surface with 1 inch of straw to retain moisture and suppress weeds.
✂️ Step 5: Maintain and Harvest Your Urban Harvest
Thin seedlings to 3-4 inches apart once they develop 2 true leaves—this gives remaining plants room to grow. Fertilize lightly every 4 weeks with a balanced organic fertilizer to keep nutrients up without overloading the soil. Watch for pests like aphids and treat with neem oil if needed.
Harvest leafy greens by cutting outer leaves when they reach 4-6 inches tall, leaving the inner leaves to keep growing. For radishes, pull when tops reach 1-2 inches wide. With proper care, your rooftop garden will produce fresh vegetables all season long—proof that urban spaces can grow food too!
Tips & tricks for perfect rooftop vegetable planters
A few key strategies will help you avoid common rooftop gardening mistakes and maximize your urban harvest.
Planter Stability: When positioning your 4 modular planter boxes on the roof, I recommend adding a layer of landscape fabric between the boxes and the roof surface. This creates a barrier that prevents soil from falling through gaps and keeps your rooftop clean. Also, consider using 12-inch spacing between boxes to allow for easy maintenance access and better airflow around plants.
Soil Weight Management: The 3 cubic feet of lightweight potting mix per planter is perfect, but here's the thing: if you're worried about weight, you can reduce the depth slightly to 10-11 inches while still accommodating most vegetables. Just make sure to choose shallow-rooted varieties like lettuce or radishes. I've also found that mixing in ½ cup of perlite per planter adds extra lightness without sacrificing drainage.
Sunlight Strategy: For the 6-8 hours of sunlight daily requirement, position your planters to catch morning sun first. This gives delicate seedlings time to acclimate rather than getting scorched by intense afternoon rays. If you notice leaves curling or wilting in the afternoon, it's time to add that shade cloth—especially during the first two weeks after planting.
Watering Wisdom: The 2-3 day watering schedule works well, but I've learned this the hard way: check moisture levels in the morning before watering. Rooftop plants often need water more frequently than ground-level gardens due to wind exposure. During extreme heat (above 90°F), I water every 1-2 days instead, always checking that top 1 inch of soil for dryness first.
Pro Tips for Rooftop Vegetable Garden
- A few key strategies will help you avoid common rooftop gardening mistakes and maximize your urban harvest.
- Planter Stability: When positioning your 4 modular planter boxes on the roof, I recommend adding a layer of landscape fabric between the boxes and the roof surface.
- Just make sure to choose shallow-rooted varieties like lettuce or radishes.
Frequently asked questions
Got questions about starting your own rooftop vegetable garden? You’re not alone! Here are some of the most common concerns—and their solutions—to help you grow with confidence.
What are the best vegetables to grow in a rooftop garden?
Opt for compact, heat-tolerant varieties like cherry tomatoes, leafy greens (kale, lettuce), herbs (basil, mint), and bush beans. Avoid sprawling plants like pumpkins unless you have deep planters. Dwarf or bush varieties are your best bet for small spaces!
When is the best time to start a rooftop garden?
Start in early spring (after the last frost) or late summer for a fall harvest. Check your USDA hardiness zone to time planting. If your roof gets scorching hot, use shade cloth or choose heat-resistant plants like okra or Swiss chard.
Are modular planters worth the investment?
Modular planters offer flexibility, drainage, and portability—perfect for rooftops. They’re also easier to maintain than in-ground beds. Look for lightweight, weather-resistant materials (like recycled plastic or cedar) and ensure they have drainage holes to prevent root rot.
How do I protect my plants from extreme heat or wind on a rooftop?
Use shade cloth (30-50% coverage) to shield plants from intense sun. Windbreaks like trellises or wind barriers can reduce gusts. Water deeply in the early morning to retain moisture, and mulch with straw to keep roots cool. Drought-tolerant varieties (like zucchini or peppers) also thrive in urban heat.
What’s the easiest way to deal with pests in a rooftop garden?
Prevent pests with companion planting (e.g., marigolds repel aphids) and neem oil sprays. Avoid chemical pesticides—they can harm pollinators and contaminate your harvest. Check leaves daily for early signs of damage, and introduce beneficial insects (like ladybugs) for natural control.
Wrapping up and next steps
A rooftop vegetable garden with modular planters isn’t just a trend—it’s a game-changer for urban living! 🌿 You’ve got the tools, answers to common questions, and the confidence to start small.
Whether you’re growing herbs, leafy greens, or even tomatoes, every bite will taste sweeter knowing it came from your own hands.
Ready to take the next step? Start with one planter—test the soil, experiment with sunlight, and watch your green thumb grow! Soon, you’ll be harvesting fresh, homegrown veggies while turning your rooftop into a thriving oasis. What are you waiting for? Let’s get planting! 🌱