
Tools
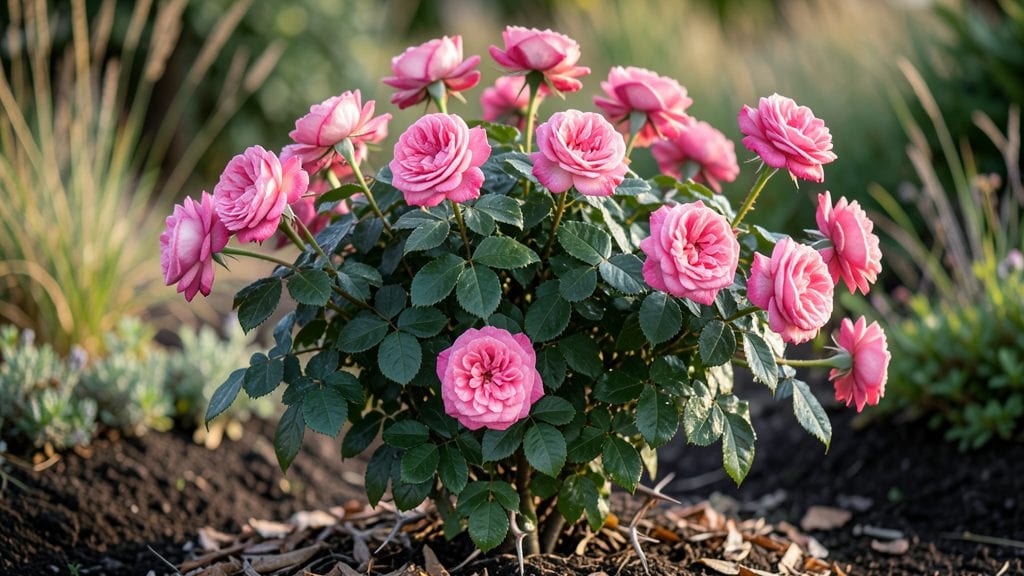
A rose garden circle transforms any backyard into a lush, fragrant sanctuary that blooms from spring through frost. 🌿 I designed mine after years of struggling with privacy screens that looked like construction zones—until I discovered how a carefully placed circle of roses could soften views, scent the air, and become the centerpiece of my outdoor space.
The secret lies in selecting the right varieties for your climate and sunlight, then arranging them in a way that creates natural layers.
Start with dwarf roses along the outer edge for clean lines, then add climbing roses on trellises for height, and fill the center with shrub roses for volume. The result is a living screen that never looks like a chore to maintain.
By midsummer, you’ll have a velvety green curtain of foliage that blooms in waves—pinks, reds, and whites that shift with the seasons. The fragrance alone makes it worth it, but the privacy?
That’s the real game-changer. Neighbors will ask how you did it, and you’ll just smile while snipping fresh blooms for the house.
Works in any yard size, from small urban backyards to sprawling estates. The key is starting small—even a 6-foot diameter circle makes a statement—and expanding as your confidence (and rose collection) grows. Ready to turn your view into a viewfinder?
📚 In This Guide
- What you need
- Instructions
- Tips and common mistakes
- Wrapping up and next steps
What you need
- ● Rose bushes – 12–15 climbing or shrub roses (e.g., 'New Dawn,' 'Blaze,' or 'Knock Out' roses for variety). Choose disease-resistant varieties for low maintenance.
- ● Privacy lattice or trellis panels – 3–4 panels (6–8 ft tall, 4 ft wide) made of powder-coated metal or PVC for durability.
- ● Garden soil – 2–3 cubic yards of well-draining, nutrient-rich soil (amend with compost for optimal growth).
- ● Mulch – 2–3 bags of wood chips or shredded bark to retain moisture and suppress weeds.
- ● Fertilizer – Slow-release rose fertilizer (e.g., 10-10-10 or organic options like fish emulsion).
- ● Measuring tape and stakes – For marking the circular layout (aim for a 10–12 ft diameter).
- ● Post-hole digger or auger – To plant trellis posts (4–6 ft deep).
- ● Shovel, spade, and garden fork – For digging and soil prep.
- ● Level – To ensure trellis panels are straight and even.
- ● Staple gun or heavy-duty zip ties – For securing rose canes to the lattice.
- ○ Garden hose with spray nozzle – For watering (drip irrigation is optional but ideal).
- ● Decorative edging – Stone, brick, or metal borders to define the circle.
- ● Outdoor lighting – Solar-powered path lights or string lights for ambiance.
- ● Arbor or pergola – Adds height and structure for climbing roses.
- ● Pruning shears – For year-round maintenance (essential for shaping and health!).
Step-by-Step instructions for designing a rose garden circle privacy screen
Here’s how to create a lush, ever-evolving rose garden circle that provides year-round privacy while adding timeless beauty to your landscape.
🌱 Step 1: Plan the Circle Layout and Select Rose Varieties
Start by marking a 10-15 foot diameter circle in your chosen location, ensuring it receives at least 6 hours of direct sunlight daily. Roses thrive in well-draining soil, so avoid low-lying areas where water pools. I like to sketch the design first—place 4-6 rose bushes evenly spaced along the circumference, with 3-4 feet between each plant to allow for mature growth and airflow.
Choose a mix of climbing, shrub, and hybrid tea roses for texture and seasonal interest. For example, plant climbing roses along a trellis or fence for vertical privacy, shrub roses like ‘Knock Out’ for dense foliage, and hybrid teas like ‘Double Delight’ for classic blooms. This combination ensures year-round coverage, with spring blooms transitioning into summer abundance and fall foliage.
🪴 Step 2: Prepare the Soil and Plant the Roses
Dig a hole for each rose twice as wide and deep as the root ball to encourage outward root growth. Amend the native soil with 2-3 inches of compost and a handful of slow-release rose fertilizer to provide essential nutrients without burning the roots. I always mix in a bit of perlite to improve drainage—roses despise soggy roots.
Place the rose in the hole, ensuring the graft union (the swollen area where the rose was attached to its rootstock) sits 2-3 inches below soil level. This protects the graft from freezing in winter and prevents suckering. Backfill the hole with the amended soil, pressing gently to remove air pockets. Water deeply to settle the soil and eliminate gaps.
☀️ Step 3: Install Support Structures and Mulch
If using climbing roses, install trellises, arbors, or wire cages immediately after planting to give vines something to grip as they grow. Secure the structure firmly—roses can become heavy with blooms, and a toppling trellis ruins the aesthetic. For shrub roses, plant them slightly closer to the circle’s edge, allowing their natural shape to fill in over time.
Spread 3-4 inches of mulch (like wood chips or shredded bark) around each plant, keeping it 2-3 inches away from the stem to prevent rot. Mulch conserves moisture, regulates soil temperature, and suppresses weeds—critical for roses, which are prone to stress. Replenish mulch annually in early spring to maintain its protective layer.
✂️ Step 4: Prune and Maintain for Year-Round Privacy
Prune roses twice a year: once in late winter or early spring (just as new growth begins) and again after the first flush of blooms in summer. Remove dead, diseased, or crossing branches, then cut back remaining canes by one-third to one-half to encourage bushier growth. For climbing roses, prune to shape the trellis and redirect energy toward upward growth.
Fertilize every 6-8 weeks during the growing season with a balanced rose fertilizer (10-10-10 or similar). Water deeply 1-2 times per week, aiming for 1-1.5 inches of water per session. Watch for yellowing leaves (a sign of overwatering) or wilting flowers (a sign of underwatering). Deadhead spent blooms regularly to prolong flowering and maintain a tidy appearance.
🌿 Step 5: Add Companion Plants for Texture and Seasonal Interest
Fill the center of the circle with low-growing perennials like lavender, salvia, or ornamental grasses to soften the space and provide year-round interest. These companions deter pests, improve soil health, and create a layered look. I also plant spring bulbs like daffodils or tulips beneath the roses—they’ll bloom early, then fade away as the roses take over.
Incorporate evergreen shrubs** like boxwood or holly along the outer edge of the circle to fill gaps between rose blooms. This ensures your privacy screen remains effective even in winter. Group plants with similar water and sunlight needs together to simplify maintenance. With this setup, your rose garden circle will evolve from a spring spectacle into a summer paradise and a winter sanctuary.
Tips & tricks for perfect rose garden circle privacy screens
A few strategic moves will help your rose garden circle thrive year-round while maximizing privacy and beauty.
Sunlight Strategy: The 6 hours of direct sunlight mentioned in Step 1 is non-negotiable for roses, but I've found that morning sun (east-facing) with afternoon shade works best in hot climates. If your location gets intense afternoon sun, consider planting taller shrub roses on the west side to provide natural shade for the more delicate hybrid teas. This creates a microclimate that protects blooms from scorching while maintaining that lush appearance.
Planting Precision: When placing your 4-6 rose bushes, I recommend using a garden hose to mark the exact circle first. This ensures perfect spacing and helps visualize the mature size. For the 3-4 feet between plants, think of it as creating a "breathing room" - this airflow prevents fungal diseases like black spot, which can ruin your privacy screen's health. Trust me on this: crowded roses invite problems.
Soil Science: The 2-3 inches of compost and perlite in Step 2 is a great start, but don't stop there. I always add a handful of mycorrhizal fungi to the planting hole - these beneficial microbes help roots absorb water and nutrients more efficiently. This small addition can make the difference between roses that struggle and ones that thrive, especially in the first critical growing season. Think of it as giving your roses a health boost from day one.
Companion Planting: For the center of your circle, consider adding catmint alongside lavender - it has silvery foliage that complements roses beautifully and deters pests naturally. When planting spring bulbs like daffodils, place them 4-6 inches deep and 4-6 inches apart. This creates a natural layering effect that softens the rose circle's edges while providing early-season color before the roses take over. The bulbs will fade away naturally as the roses mature, creating a seamless transition.
Pro Tips for Rose Garden Circle
- A few strategic moves will help your rose garden circle thrive year-round while maximizing privacy and beauty.
- Sunlight Strategy: The 6 hours of direct sunlight mentioned in Step 1 is non-negotiable for roses, but I've found that morning sun (east-facing) with afternoon shade works best in hot climates.
- Planting Precision: When placing your 4-6 rose bushes, I recommend using a garden hose to mark the exact circle first.
Frequently asked questions
Got questions about creating your own Rose Garden Circle privacy screen? We’ve got answers! Here are some of the most common queries to help you plan with confidence.
What’s the best time of year to plant a Rose Garden Circle?
For most climates, late winter or early spring (just before the last frost) is ideal. This gives roots time to establish before summer heat. If you’re in a mild zone, fall planting can also work—just ensure the soil isn’t frozen. Pro tip: Bare-root roses thrive when planted dormant!
How long does it take for a Rose Garden Circle to provide full privacy?
With proper care, expect partial privacy in 1–2 years and full coverage in 3–5 years, depending on rose variety and growing conditions. Climbing roses grow faster (up to 2 feet/year), while shrub roses may take longer. Prune regularly to encourage bushier growth!
Do roses need special soil for a privacy screen?
Roses prefer well-draining, slightly acidic soil (pH 6.0–6.5). Amend heavy clay with compost or sand, and avoid soggy spots. A 50/50 mix of native soil and organic matter works well. Mulch annually to retain moisture and suppress weeds—just keep mulch 3 inches away from stems.
How do I protect my Rose Garden Circle in winter?
Most roses are hardy, but young plants or tender varieties need help. Mulch heavily (4–6 inches) around the base, and wrap canes in burlap if temps drop below 10°F. Prune dead wood in early spring, but wait until after the last frost to avoid damaging new growth.
Are there low-maintenance alternatives to roses for a privacy screen?
Consider evergreen shrubs (like boxwood or holly), ornamental grasses (for texture), or fast-growing vines (e.g., clematis or ivy). For year-round color, mix roses with hydrangeas or camellias. Just ensure your choices match your climate and sunlight needs!
Will roses attract pests or diseases in a privacy screen?
Roses can draw aphids, Japanese beetles, or fungal issues (like black spot) if overcrowded. Prevent problems by spacing plants 3–5 feet apart, pruning for airflow, and spraying neem oil preventatively. Choose disease-resistant varieties (e.g., ‘Knock Out’ roses) to minimize hassle.
Can I add lighting or trellises to my Rose Garden Circle?
Yes! Solar-powered path lights highlight roses at night, while arching trellises or obelisks guide climbing varieties upward. Install trellises before planting for best support. Avoid heavy ornaments—roses need to sway naturally for airflow!
Wrapping up and next steps
Creating a rose garden circle as your year-round privacy screen is a rewarding project that blends beauty and functionality. Whether you’re drawn to the classic romance of roses or the practicality of a lush, evergreen hedge, this design offers both charm and seclusion. 🌹
Now that you’re armed with materials, tips, and answers to common questions, it’s time to roll up your sleeves and get growing! Start by sketching your design, gathering your supplies, and—most importantly—enjoy the process.
Every trimmed branch and blooming rose will bring you one step closer to your dream private oasis.
Next step: Pick a sunny day, grab your tools, and let your rose garden circle flourish! 🌱