
Tools
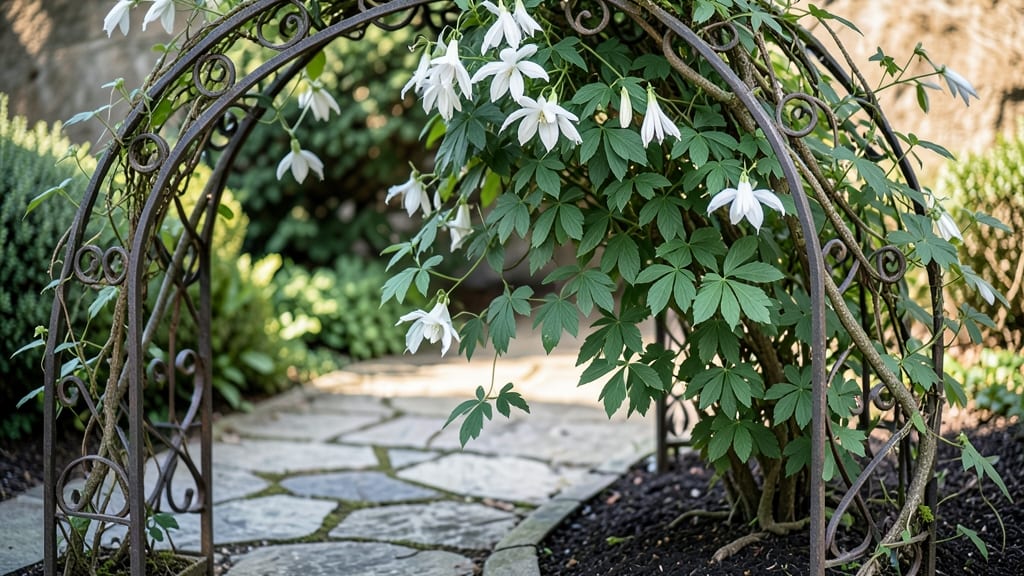
Creating secret garden vibes in tight spaces is all about layering lush textures and hidden charm. ✨ I stumbled upon this approach after transforming my tiny balcony into a fragrant, leafy retreat—no yard required. The trick lies in vertical growth and unexpected containers that turn ordinary corners into magical nooks.
Think cascading ivy in vintage tin buckets, trailing roses in macramé hangers, and ferns tucked into repurposed teacups. These whimsical planters don’t just hold plants—they create stories.
Add a tiny fairy light or two, and suddenly your space feels like a hidden fairy glade, even if it’s just 4 feet wide.
By summer’s end, you’ll have a space that smells like crushed mint and old books, where sunlight filters through delicate foliage. The best part? Every time you walk by, it’ll feel like stepping into another world—one you built with your own hands. Ready to start layering the magic?
This works for balconies, windowsills, or even indoor corners—anywhere you can hang or stack. The key is playing with heights and mixing materials for that "found in a storybook" feel. Let’s get those planters filled!
📚 In This Guide
- What you need
- Instructions
- Tips and common mistakes
- Wrapping up and next steps
What you need
- ● Planters: 2–4 small to medium-sized containers (6–12 inches in diameter)
- ● Options: Terracotta pots, wooden crates, vintage teacups, or repurposed containers (e.g., colanders, tins)
- ● Potting Soil: 1–2 bags of high-quality, well-draining potting mix (1–2 cubic feet per planter)
- ● Drainage: Small rocks (pebbles or gravel) or broken pottery shards (1 cup per planter)
- ● Plants: 1–2 trailing or cascading plants (e.g., string of pearls, pothos, or fuchsia)
- ● 1–2 small upright plants (e.g., succulents, miniature roses, or herbs like thyme)
- ● Decorative Touches (Pick 2–3): Fairy lights (battery-operated or solar)
- ● Miniature garden stakes or painted wooden picks
- ● Moss sheets (for a lush, forest-like look)
- ● Paint or chalk (for customizing planters)
- ● Basic Tools: Scissors or pruning shears (for trimming plants)
- ● Spray bottle (for misting)
- ● Small trowel or spoon (for planting)
- ○ Optional Upgrades: Self-watering planter inserts (for low-maintenance care)
- ● Chalkboard paint + markers (to label plants)
- ● Miniature garden figurines (gnomes, mushrooms, or toadstools)
- ● Twine or ribbon (to hang planters or add charm)
- ● A sunny or partially shaded spot (6+ hours of light for most plants)
- ● Access to water (a small watering can or spray bottle works)
- ● Patience! Let plants settle in for 1–2 weeks before full blooming magic happens. 🌟
Step-by-Step instructions for crafting whimsical planters
Here's how to transform ordinary containers into enchanting planters that spark joy in any corner.
🪴 Step 1: Choose and Prep Your Base Containers
Pick 4 containers that vary in size and texture—think vintage teacups, terracotta pots, or even hollowed-out logs. I love mixing materials like ceramic, metal, and wood for visual interest. Before planting, clean each container thoroughly with mild soap and water to remove any dust or residue that could harm roots.
For containers without drainage holes, drill 2-3 small holes in the bottom using a nail or drill bit. Line the bottom with a layer of pebbles or broken pottery shards to create a natural drainage layer. This prevents waterlogging, which can rot delicate roots and ruin your magical display.
🌱 Step 2: Layer Soil and Add Whimsical Elements
Fill each container about halfway with potting mix, pressing it down lightly to create a firm base for your plants. For extra charm, add a layer of moss or small pebbles on top of the soil in one or two containers. This creates a dreamy, layered look that feels straight out of a storybook.
Here's the thing—buried surprises make these planters magical. Tuck in tiny trinkets like miniature garden gnomes, painted stones, or even small mirrors (for a fairy-tale touch). Just make sure they're buried deep enough that they won't interfere with root growth. Think of them as hidden treasures waiting to be discovered.
☀️ Step 3: Plant Your Whimsical Selection
Choose plants that thrive in containers and complement each other. I like to mix trailing plants like sweet potato vine with upright varieties such as ferns or small succulents. For a truly enchanting look, add a few air plants or mosses that don't need soil—just tuck them into crevices or hang them from the edges.
Plant carefully, leaving space for growth. You'll want to arrange them so that taller plants don't block the view of the smaller, more delicate ones. Water gently after planting to settle the soil around the roots. Watch for the first signs of new growth—those tiny leaves popping through the soil are your reward for creating something special.
💧 Step 4: Arrange and Maintain Your Secret Garden
Place your planters in a way that creates a cozy, inviting corner. Group them together on a table, hang them at varying heights, or nest them in a larger container for a cascading effect. I like to add fairy lights or solar-powered garden stakes to enhance the magical atmosphere, especially in the evening.
Water your planters consistently, but don't overdo it. Stick your finger about 1 inch into the soil—if it feels dry, it's time to water. Avoid getting water on the leaves of your plants, especially if they're delicate. Instead, water at the base to keep everything looking fresh and vibrant.
✂️ Step 5: Keep the Magic Alive with Regular Care
Every few weeks, give your planters a little TLC. Trim any leggy or overgrown plants to maintain their shape and encourage bushier growth. Remove any dead leaves or spent flowers to keep things looking neat and inviting. This is also a great time to check for any hidden treasures that might need repositioning.
Rotate your planters occasionally so all sides get equal light. You'll notice a difference in how evenly your plants grow—no more lopsided or sun-starved leaves. If you notice any pests, like aphids or spider mites, treat them gently with a spray of soapy water or neem oil. A little prevention goes a long way in keeping your secret garden thriving.
Tips & tricks for perfect whimsical planters
Creating enchanting planters isn't just about plants—it's about the little details that make them feel magical. Here are my go-to tricks to elevate your secret garden from ordinary to extraordinary.
Container Selection: Don't limit yourself to traditional pots! Think outside the box with containers like vintage teacups, old boots, or even hollowed-out books. The key is to choose containers that tell a story—each one should feel like it has its own personality. I always look for pieces with interesting textures or shapes that can become focal points in your garden display.
Drainage Hack: When drilling drainage holes in Step 1, use a nail or drill bit that's slightly smaller than you think you need. The holes should be small enough to prevent soil from washing out, but large enough to allow proper drainage. For extra security, place a small piece of mesh or a coffee filter over the holes before adding your pebbles—this keeps the drainage layer in place while still allowing water to flow freely.
Plant Layering: In Step 2, when adding your whimsical elements, consider creating a "story" with each planter. For example, place a tiny mirror in one container to reflect light and create a magical glow, or tuck a miniature garden gnome at the base of a trailing plant to make it look like it's climbing out of a fairy tale. The deeper you bury these treasures, the more they'll feel like hidden surprises waiting to be discovered. Think of each planter as a tiny world with its own secret story.
Lighting Magic: For that extra enchanting touch in Step 4, consider using solar-powered fairy lights or even battery-operated tea lights. The warm glow they create in the evening transforms your planters into a cozy, inviting corner. If you're using fairy lights, wrap them around the planters or tuck them into the soil for a subtle, magical effect. Just make sure they're waterproof if you're placing them near the base of your containers.
Pro Tips for Secret Garden Vibes
- Creating enchanting planters isn't just about plants—it's about the little details that make them feel magical.
- Container Selection: Don't limit yourself to traditional pots!
- Drainage Hack: When drilling drainage holes in Step 1, use a nail or drill bit that's slightly smaller than you think you need.
Frequently asked questions
Got questions about creating your own secret garden vibes with whimsical planters?
Here are some of the most common ones—and their answers!
What are the best small-space plants for whimsical planters?
Think trailing plants like string of pearls or pothos for cascading magic. Air plants (tillandsias) and miniature succulents thrive in tiny pots with big personality. For color, try petunias or bromeliads—they’re playful and low-maintenance!
How often should I water whimsical planters?
Most whimsical planters (especially with succulents or air plants) need water every 1–2 weeks, but check soil moisture first—stick your finger in! Trailing plants may need more frequent watering (weekly). Pro tip: Use self-watering planters or wicking systems to keep things effortless.
Can I customize my planters with paint or decorations?
Matte or chalk paint
hides imperfections, while gold leaf, glitter, or mosaic tiles add enchantment. Seal with outdoor varnish for durability. For a secret garden feel, try fairy lights inside translucent pots or tiny terracotta charms glued to the sides.
What if my whimsical planter looks dull after a few weeks?
Revive it with a DIY refresh! Trim overgrown vines, swap out faded plants for fresh ones, or add pebbles, moss, or tiny figurines for texture. A quick vinegar rinse (1:1 with water) removes grime from painted surfaces. Think of it as a mini makeover—your garden deserves a glow-up!
Are there budget-friendly alternatives to expensive planters?
Yes! Upcycle old teapots, tin cans, or even shoes with drainage holes drilled in. Thrifted ceramic bowls or repurposed glass jars (like mason jars) work too. For free finds, check curb alerts or ask neighbors—hidden gems are everywhere!
Wrapping up and next steps
Transforming your tiny space into a secret garden oasis is all about creativity and a touch of magic! 🌿✨ Whether you’re using repurposed containers, lush greenery, or whimsical decor, these planters prove that small spaces can feel just as enchanting as a sprawling backyard.
The key is to play with textures, colors, and unexpected elements—let your personality shine through every detail.
Ready to dive in? Start with just one corner—a windowsill, balcony, or even a cozy nook—and watch your space bloom into a hidden sanctuary. Which planter will you try first? 🌱