Companion Plants
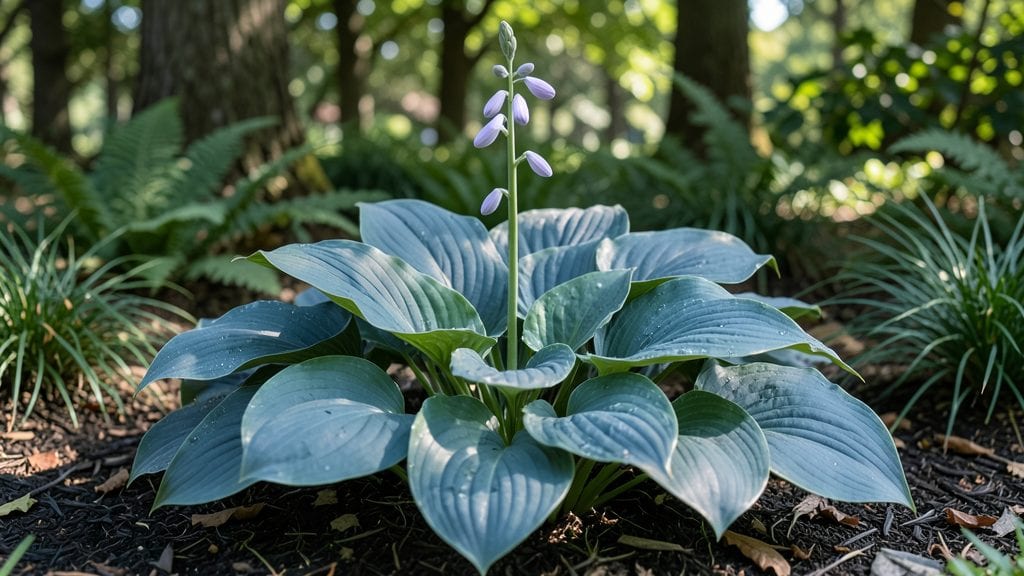
Shady garden plants don’t have to mean dull greenery—some of the most lush, vibrant plants thrive where others struggle. 🌿 I’ve transformed my own shady corner into a lush retreat by choosing the right plants, and the key is understanding which species naturally love low light and moisture-retentive soil.
Start with hostas for bold foliage, heucheras for jewel-toned leaves, and astilbes for feathery plumes that dance in the breeze. These perennials handle shade like champions, while shrubs like hydrangeas and azaleas add height and seasonal color.
The secret? Amending clay-heavy or compacted soil with 3-4 inches of compost to improve drainage and root health.
Layering creates magic—tall ferns in back, mid-height astilbes in the middle, and creeping ajuga or sweet woodruff up front. The result? A textured, ever-changing tapestry that feels alive year-round. Even in deep shade, you’ll get blooms, fragrance, and foliage that turns heads.
Works for woodland gardens, city courtyards, or that forgotten corner under a tree. The best part? These plants need less watering once established and attract pollinators even in shady spots. Let’s bring your low-light garden to life!
📚 In This Guide
- What you need
- Instructions
- Tips and common mistakes
- Wrapping up and next steps
What you need
- ● Shady garden plants: Choose from hostas, ferns, astilbes, impatiens, or heucheras (3–5 plants per square yard, depending on size). Opt for native or shade-tolerant varieties for best results.
- ● High-quality potting soil or compost: 1–2 bags (5–10 cubic feet) per plant, enriched with organic matter for moisture retention.
- ● Mulch (shredded bark or pine straw): 2–3 inches thick to suppress weeds and retain moisture.
- ● Garden gloves & knee pads: Protect your hands and knees during planting!
- ● Watering can or hose with a gentle spray nozzle: Shady plants need consistent moisture—aim for 1–1.5 inches per week.
- ● Pruners or shears: Sharp, clean tools for trimming dead foliage or shaping plants.
- ● Garden trowels or a small shovel: For digging holes (size depends on root ball—2x wider and deep as the container).
- ● Slow-release fertilizer: A balanced 10-10-10 or organic option (like fish emulsion) to give plants a nutrient boost.
- ● Shade cloth or lattice: For areas with partial shade that need extra protection from direct sunlight.
- ● Decorative stones or pebbles: To add texture and define planting areas.
- ● Plant labels: Waterproof markers to track varieties and care needs.
- ● Drip irrigation system: Automates watering for busy gardeners!
- ● Test your soil: Use a DIY kit or send a sample to your local extension office to check pH (ideal: 6.0–7.0) and amend if needed.
- ● Assess sunlight levels: Observe your space for 2+ hours of shade daily—full shade (no direct sun) or partial shade (dappled light).
- ● Plan your layout: Group plants by water needs and height (tallest in back, smallest in front) for a cohesive look.
Step-by-Step guide to designing a thriving shady garden
Here’s how to transform dim corners into lush, vibrant spaces—no sunlight required.
🌿 Step 1: Select the Right Plants for Your Shade Level
Not all shade is equal. First, determine whether your space gets dappled shade (filtered light) or deep shade (less than 3 hours of sunlight). Hostas, ferns, and astilbes thrive in deep shade, while impatiens and begonias prefer dappled light. I always match plants to the specific shade conditions—I’ve learned the hard way that forcing sun-lovers into shade leads to leggy, weak growth.
Check the light requirements on plant tags or labels. For example, heucheras tolerate deep shade but still need some indirect light to prevent dull foliage. Group plants with similar light needs together to create cohesive, low-maintenance pockets of greenery. This ensures your garden stays vibrant without constant adjustments.
🪴 Step 2: Prepare the Soil for Moisture-Retentive Growth
Shady gardens often have dense, compacted soil that drains poorly. Amend the soil with 3-4 inches of organic matter like compost or well-rotted leaf mold before planting. This improves aeration and moisture retention, which is critical for shade-loving plants that rely on consistent dampness. I mix in a slow-release fertilizer at planting time to give roots a nutrient boost without risking burn from over-fertilizing.
Test the soil’s moisture level by pressing your finger 1 inch deep. If it feels dry, water deeply until moisture reaches 4-6 inches down. Shady plants signal thirst by wilting or developing crispy leaf edges—don’t wait until then. A 1-2 inch layer of mulch (like shredded bark or wood chips) helps retain moisture and suppresses weeds, which compete for resources in low-light conditions.
☀️ Step 3: Plant Strategically for Layered Depth
Create visual interest by layering plants of varying heights and textures. Start with tall specimens like Japanese painted ferns or foxgloves at the back, then add mid-height plants such as heucheras or astilbes in the middle. Fill gaps with ground covers like sweet woodruff or ajuga to prevent soil erosion and suppress weeds. I always stagger plants slightly to avoid a flat, uniform look—this mimics natural woodland understories.
Dig holes twice as wide as the root ball but only as deep as the container. Gently loosen roots if they’re circling and place the plant so the top of the root ball sits flush with the soil line. Backfill with native soil mixed with compost, then water thoroughly to eliminate air pockets. Avoid burying stems too deeply—this can cause rot in moisture-loving shade plants.
💧 Step 4: Water and Maintain for Long-Term Success
Shady gardens stay moist longer, but that doesn’t mean they’re low-maintenance. Water deeply once a week (or more in extreme heat) to encourage deep root growth. Shallow watering leads to weak, surface roots that struggle in low-light conditions. You’ll know you’re watering correctly when the top 2 inches of soil feel damp but not soggy—shady plants hate waterlogged roots just as much as dry ones.
Fertilize lightly in early spring with a balanced, slow-release formula (like 10-10-10). Over-fertilizing in shade can cause leaf burn or excessive foliage growth at the expense of flowers. Prune dead or yellowing leaves regularly to improve airflow and reduce disease risk. I also remove spent blooms from perennials like bleeding heart to encourage a second flush of flowers later in the season.
⏰ Step 5: Monitor and Adjust Seasonally
Shade conditions change with the seasons—what’s deep shade in summer might get morning sun in winter. Observe your garden monthly and adjust care accordingly. For example, ferns may need slightly more water in winter if rainfall drops, while heucheras might appreciate a light top-dressing of compost in early spring to replenish nutrients. I keep a small notebook nearby to jot down notes on plant performance—this helps me fine-tune care over time.
If a plant struggles (e.g., yellowing leaves or stunted growth), it might need more light, better drainage, or a different spot. Don’t hesitate to relocate struggling plants—shady gardens are flexible, and a little experimentation leads to better results. With the right choices, your low-light space will become a lush, thriving oasis that rivals sun-drenched gardens.
Tips & tricks for perfect shady garden design
Creating a thriving shady garden takes more than just choosing the right plants—it’s about understanding how to optimize their environment for maximum growth. Here are my go-to strategies for turning dim corners into vibrant, low-maintenance spaces.
Plant Selection Precision: When selecting plants in Step 1, pay special attention to the specific shade conditions of your space. For example, heucheras and hostas can handle deep shade but will develop dull foliage if completely deprived of indirect light. I always test a small area by temporarily placing plants for a week to observe their response before committing to permanent placement. This trial period helps you avoid costly mistakes when establishing your full garden design.
Soil Preparation Strategy: The 3-4 inches of organic matter mentioned in Step 2 should be thoroughly mixed into the top 6-8 inches of soil, not just spread on the surface. I use a broadfork to loosen compacted soil before adding compost—this creates better root penetration pathways. For clay-heavy soils, incorporate sand or perlite to improve drainage while maintaining moisture retention. This pre-planting effort makes all the difference in preventing waterlogged roots that can suffocate shade-loving plants.
Layering Technique: When implementing the layered approach in Step 3, consider the mature height of each plant rather than their current size. For instance, a foxglove might be small when planted but will eventually reach 4-5 feet tall. I sketch a rough layout first, marking mature heights with colored pencils to visualize the final composition. This prevents overcrowding and ensures each plant gets adequate air circulation—critical for preventing fungal diseases in shady conditions.
Watering Wisdom: The once-weekly deep watering guideline in Step 4 works best when paired with a moisture meter. I check soil moisture at the 2-inch depth mentioned, but I also verify moisture at 4-6 inches to ensure roots are developing properly. In extreme heat, I increase frequency to twice weekly while maintaining the same deep watering approach. This consistent moisture pattern is what helps shade plants establish strong root systems that can access nutrients efficiently.
Pro Tips for Shady Garden Plants
- Creating a thriving shady garden takes more than just choosing the right plants—it’s about understanding how to optimize their environment for maximum growth.
- Plant Selection Precision: When selecting plants in Step 1, pay special attention to the specific shade conditions of your space.
- Soil Preparation Strategy: The 3-4 inches of organic matter mentioned in Step 2 should be thoroughly mixed into the top 6-8 inches of soil, not just spread on the surface.
Frequently asked questions
Got questions about shady garden plants? You’re not alone!
Here are some of the most common concerns—and their easy solutions—to help you cultivate a lush, low-light garden with confidence.
What are the best fast-growing plants for shady spots?
Look for hostas, ferns, and astilbes—they thrive in shade and grow quickly. For instant impact, try caladiums or impatiens (annuals) for vibrant color in just a few weeks. Pro tip: Check the plant tag for "partial shade" labels to avoid disappointment!
How long does it take for shady plants to establish?
Most shade-loving perennials (like heucheras or foxgloves) take 1–2 growing seasons to fully root and flourish. Annuals (e.g., begonias) bloom in 6–8 weeks but may need replanting yearly. Patience pays off!
Can I grow vegetables in full shade?
Yes, but limit your options to leafy greens (lettuce, spinach), radishes, and bush beans—they tolerate low light better than tomatoes or peppers. For deeper shade, try microgreens or herbs like parsley. Boost growth: Use reflective mulch or grow lights if natural light is minimal.
Why are my shade plants wilting or yellowing?
Common culprits: overwatering (shady soil stays soggy), nutrient deficiency (use slow-release fertilizer), or root rot (ensure pots have drainage). Quick fix: Trim yellow leaves, check soil moisture, and repot if roots look mushy.
What’s a low-maintenance alternative to ferns?
Try Hosta ‘Blue Angel’ (drought-tolerant once established) or Japanese painted ferns (hardy and pest-resistant). For ground cover, creeping Jenny or sweet woodruff spread effortlessly with minimal care. Bonus: They suppress weeds naturally!
Wrapping up and next steps
Transforming your shady garden into a lush, vibrant space is easier than you think! 🌿 From hardy ferns to elegant hostas, these low-light-loving plants prove that shade doesn’t mean dull—it just means different.
Whether you’re a seasoned gardener or a beginner, there’s a perfect plant waiting to thrive in your corner of the world.
Ready to take the next step? Start small—pick one or two plants from this guide, give them the care they crave, and watch your garden flourish. Soon, you’ll be the envy of the neighborhood with a thriving shady oasis! 🌱