Planting
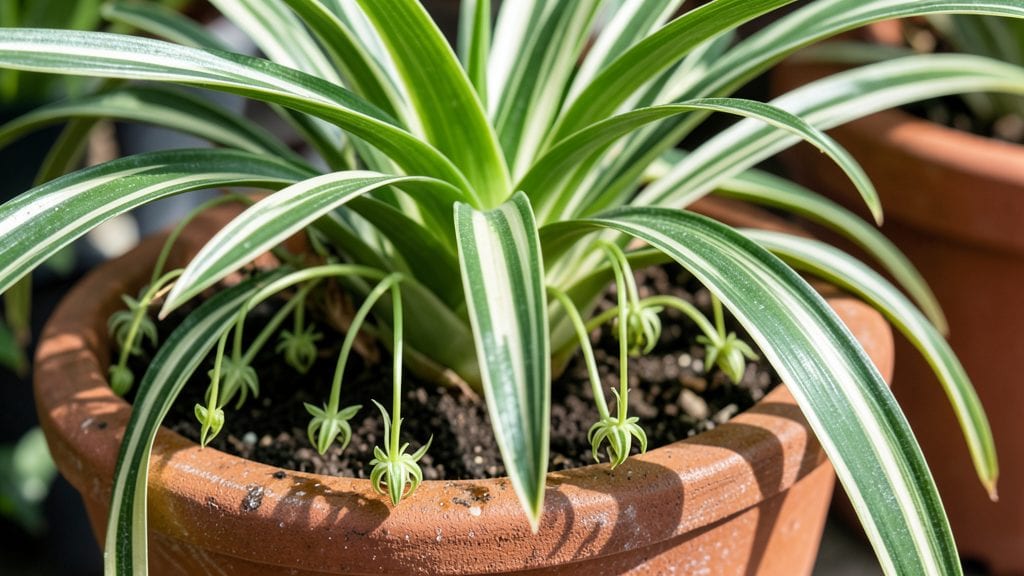
A spider plant garden brings playful energy to any space with its arching, grassy foliage and easygoing nature. 🌿 I’ve designed mine around their natural trailing habit, letting them spill over shelves and hang from macramé planters to create a lush, layered look that never feels fussy.
The key is pairing them with plants that complement their airy charm—think trailing pothos, dusty miller, or even small ferns—while keeping the overall vibe light and breezy.
You don’t need a green thumb to make this work—spider plants thrive in indirect light and only need water when the soil feels dry to the touch. For a foolproof setup, group them in clusters with other low-maintenance plants to create visual depth without extra effort.
Hanging baskets, wall-mounted planters, or even a simple shelf arrangement can turn a corner into a whimsical green nook that feels alive year-round.
The payoff is a garden that feels effortlessly stylish yet stays shockingly lush with minimal care. Their variegated stripes add texture, while the trailing stems create movement that catches the eye.
Plus, they’re one of nature’s best air purifiers, making your space feel fresher and more vibrant with every passing day.
Works just as well indoors near a sunny window or outdoors in partial shade, so you can adapt this look to any climate. Let’s bring that playful, layered energy to your space—without the upkeep headache.
📚 In This Guide
- What you need
- Instructions
- Tips and common mistakes
- Wrapping up and next steps
What you need
- ● Spider plants (Chlorophytum comosum) – 3 to 5 mature plants (variegated or solid green varieties work best for visual contrast).
- ● Well-draining potting mix – 5 to 10 gallons (depending on container size), preferably a blend for indoor plants or a mix of peat, perlite, and compost.
- ● Containers or garden bed: Hanging baskets – 10 to 12 inches in diameter (minimum 2 per plant for airflow).
- ● Pot or planter – 6 to 8 inches deep with drainage holes (1 pot per plant or shared trays for grouping).
- ○ Garden bed (optional for layered designs) – Raised beds or in-ground spaces with loose, fertile soil.
- ● Drainage materials – Small rocks (1–2 inches) or gravel for pots to prevent root rot.
- ● Watering can or spray bottle – For gentle hydration (avoid soggy soil!).
- ● Trowel or small shovel – For transplanting or mixing soil.
- ○ Gloves (optional) – To protect hands from soil or sharp pot edges.
- ● Pruning shears – For trimming long stems or removing brown tips.
- ● Measuring tape or ruler – To ensure proper spacing (12–18 inches between plants).
- ● Fertilizer – Balanced liquid fertilizer (diluted to half-strength) for a nutrient boost every 4–6 weeks.
- ● Mulch or decorative stones – To enhance the garden’s aesthetic and retain moisture.
- ● Grow lights (for indoor setups) – LED grow bulbs if natural light is limited.
- ● Spider plant propagules (pups) – To expand your garden naturally!
How to create a thriving spider plant garden
Here’s how to build a lush, layered spider plant display that stays vibrant all year.
🪴 Step 1: Choose Containers and Arrange Your Design
Spider plants thrive in 6-8 inch pots with drainage holes—terracotta is ideal because it wicks away excess moisture. For a whimsical look, mix pot sizes: a 10-inch planter as your centerpiece surrounded by 4-6 inch pots for trailing plants. Place the largest pot at the back of your arrangement and smaller ones in front to create depth.
I like to group odd numbers of plants—three spider plants in the center pot and two in each side pot—because it feels more natural. Arrange pots so the arching fronds spill over edges, creating movement. If using a hanging planter, ensure it’s 12-18 inches off the ground so the long, graceful leaves cascade beautifully.
🌱 Step 2: Prepare Soil and Plant Your Spider Plants
Fill each pot with well-draining potting mix—never garden soil, as it compacts and suffocates roots. Mix in a handful of perlite or orchid bark to improve aeration. Wet the soil until it’s moist but not soggy; you’ll know it’s right when a handful clumps together but doesn’t drip.
Remove the spider plant from its nursery pot and gently tease apart the roots if they’re crowded. Plant it at the same depth it was growing before—burying the base stem too deep can rot it. Press the soil lightly around the roots to secure the plant, then water thoroughly. You’ll see the striped, arching leaves bounce back within a day or two as they settle in.
☀️ Step 3: Position for Bright, Indirect Light
Spider plants love bright, indirect light—think east or north-facing windows, or 6-10 feet from a south window. Direct sun will scorch the leaves, turning them yellow or brown. If your space is low-light, place the plants 3-4 feet from a grow light for 12-14 hours daily.
Rotate the pots a quarter turn weekly so all sides of the plant get even light. You’ll notice the leaves growing toward the light—this is normal, but consistent rotation keeps the plant balanced. If the tips turn brown, it’s a sign of too much fluoride in your water; switch to rainwater or filtered water instead.
💧 Step 4: Water and Fertilize for Year-Round Growth
Water when the top inch of soil feels dry—stick your finger in to check. Spider plants are drought-tolerant but hate soggy roots, so always use pots with drainage. Water thoroughly until it runs out the bottom, then empty the saucer to prevent root rot. In winter, water every 2-3 weeks since growth slows.
Feed with a balanced liquid fertilizer (10-10-10) every 4-6 weeks in spring and summer. Dilute it to half-strength to avoid burning the roots. You’ll see new pups (baby plants) sprout at the base in spring—a sure sign your spider plant is happy and thriving.
✂️ Step 5: Prune and Propagate for a Full Garden
Trim any brown or yellow leaves at the base with clean scissors. Spider plants are forgiving, so don’t stress over a few damaged leaves—new growth will fill in quickly. When the pups grow 4-6 inches long, gently twist them off the mother plant and pot them in their own 4-inch containers.
Here’s the thing—these pups grow fast, so propagate them every 3-4 months to keep your garden full. Place the new plants in bright, indirect light and water lightly until they establish roots. Within 4-6 weeks, you’ll have a fresh spider plant ready to add to your collection or share with friends.
Tips & tricks for perfect spider plant gardens
Here's what I've learned after years of growing these resilient beauties—small details make all the difference.
Container Selection: Terracotta pots are my top pick because they breathe better than plastic, but if you love the look of ceramic, just make sure it has drainage holes. For hanging planters, choose ones with sturdy hooks that can support the weight—those delicate leaves add up! I've found that 10-inch center pots paired with 4-6 inch side pots create the perfect layered look while keeping maintenance manageable.
Light Rotation Strategy: That weekly quarter-turn rotation in Step 3 isn't just about even growth—it's about preventing your spider plants from growing lopsided. I like to set a reminder on my phone for this because it's easy to forget. Pro tip: If you notice leaves leaning dramatically toward one window, that's your cue to rotate immediately. The plants will thank you with fuller, more symmetrical growth.
Watering Wisdom: The "top inch dry" rule works, but I've found a better test: lift the pot—if it feels light, it's time to water. Spider plants are forgiving, but soggy soil is their kryptonite. In winter, I cut back to watering every 2-3 weeks and let the soil dry out more completely between waterings. This prevents those pesky brown leaf tips that everyone struggles with.
Propagation Hack: Those pups you'll see sprouting in spring are nature's way of saying "I'm thriving!" Here's my secret: When they reach 4-6 inches, I pot them up in 4-inch containers with the same well-draining mix. The key is to keep them in bright, indirect light and water lightly—just enough to keep the soil moist but not soggy. Within 4-6 weeks, you'll have brand-new plants ready to expand your garden or share with plant-loving friends.
Pro Tips for Spider Plant Garden
- Here's what I've learned after years of growing these resilient beauties—small details make all the difference.
- Container Selection: Terracotta pots are my top pick because they breathe better than plastic, but if you love the lo...
- Light Rotation Strategy: That weekly quarter-turn rotation in Step 3 isn't just about even growth—it's about preventi...
Frequently asked questions
Got questions about keeping your spider plant garden thriving? You're not alone!
Here are answers to the most common queries—from care basics to troubleshooting—so you can enjoy these air-purifying beauties year-round.
How often should I water my spider plants?
Water your spider plants when the top 1–2 inches of soil feel dry. Typically, this means every 1–2 weeks, but adjust based on humidity and light. Overwatering is the #1 killer—always use pots with drainage holes!
When is the best time to propagate spider plant pups?
Propagate spider plant "pups" (baby plants) when they’re 4–6 inches tall, usually in spring or early summer. This gives them time to root before cooler weather. Snip with clean scissors, place in water or moist soil, and keep them bright (but not direct sun) until established.
Why are my spider plant leaves turning brown or yellow?
Brown tips often mean fluoride buildup (tap water issue) or low humidity. Yellow leaves? Likely overwatering or poor drainage. Try distilled water, trim dead tips, and ensure pots aren’t soggy. A quick misting can boost humidity too!
Can spider plants thrive indoors year-round, or do they need outdoor space?
Spider plants are indoor superstars—they tolerate low light (though they’ll grow faster in bright, indirect light). Just avoid cold drafts (below 55°F) and keep them away from heating/AC vents. For outdoor gardens, move them inside before frost hits.
What’s the best way to revive a leggy or sparse spider plant?
Leggy or sparse growth? Your plant likely needs more light! Move it to a bright, indirect spot (like an east-facing window) and avoid fertilizing until it adjusts. Rotate the pot occasionally for even growth. With better light, it’ll bounce back in 4–6 weeks!
Wrapping up and next steps
Creating a whimsical spider plant garden is a rewarding way to bring life and charm to your space—year-round! 🌿 These hardy plants thrive with minimal fuss, making them perfect for beginners and green thumbs alike.
Whether you’re layering them in hanging baskets, terrariums, or mixed containers, their arching foliage and air-purifying benefits are a win-win.
Now that you’re armed with tips and tricks, why not take the next step? Start small with a single pot or go bold with a full-themed corner. Your spider plant garden will not only flourish but also spark joy every time you walk by—happy planting! 🌱✨