Tools
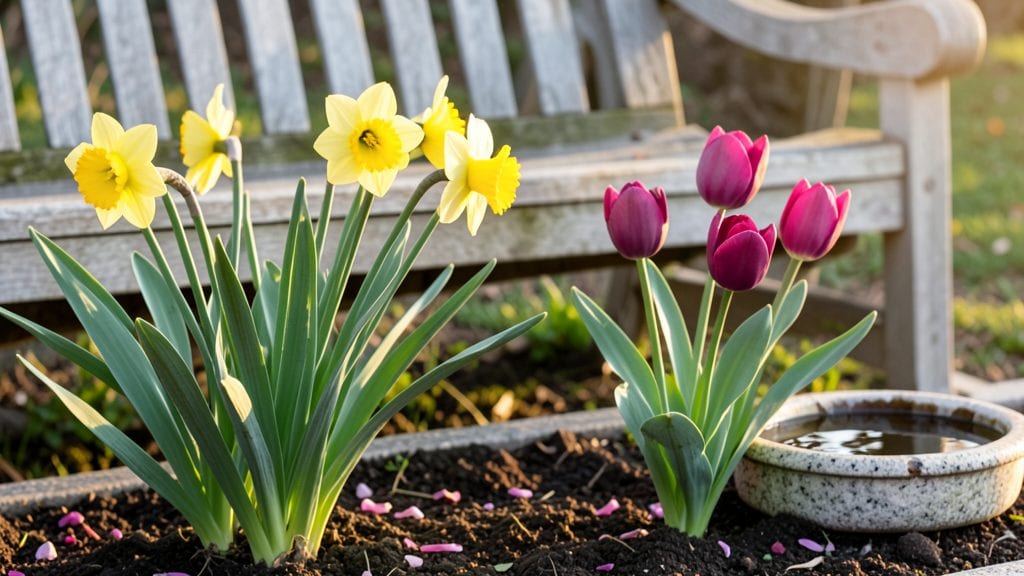
Spring garden pics transform a simple yard into a living postcard—bright pops of color that make neighbors pause and ask for your secret. 🌸 I’ve spent years perfecting the art of capturing (and creating) these eye-catching scenes, and the best part?
You don’t need a fancy camera or rare plants to pull it off. The magic comes from layering textures, playing with heights, and choosing plants that bloom early and long.
Start with bold planters in unexpected colors—think terracotta, cobalt blue, or even weathered galvanized metal. Fill them with a mix of annuals like pansies and violas for instant color, plus a few perennials like hellebores or bleeding hearts for structure.
Add a few spring-blooming bulbs like daffodils or tulips for height, and you’ve got a combo that looks polished from March through May.
What you’ll end up with is a garden that feels like a curated gallery—every corner photogenic, every season brighter. The key is repetition: use the same planter style or color palette throughout, and your space will feel intentional.
Even a small balcony can become a showstopper with the right plant choices and a little strategic staging.
This approach works for any space, from courtyard patios to front-yard displays. The tips I’ll share next will help you capture those moments naturally—no filters needed. Let’s make your garden the star of the season.
📚 In This Guide
- What you need
- Instructions
- Tips and common mistakes
- Wrapping up and next steps
What you need
- ○ Camera or Smartphone: A DSLR/mirrorless camera with manual settings (optional) or a modern smartphone with a high-resolution lens (e.g., iPhone 13+, Samsung Galaxy S22+).
- ● Tripod or Stabilizer: A lightweight tripod (e.g., JOBY GorillaPod) or a smartphone stabilizer (e.g., Osmo Mobile) for steady shots.
- ● Natural Lighting: Soft, diffused sunlight (early morning or late afternoon).
- ○ Optional: A 5-in-1 reflector (e.g., Neewer 43-inch) to bounce light onto shadows.
- ● Backdrop: Required: Lush greenery, a blank wall, or a wooden fence.
- ○ Optional: A neutral-colored fabric backdrop (e.g., white or light gray) for studio-style shots.
- ● Props: Small garden decor (e.g., terracotta pots, vintage spoons, or wooden crates).
- ● Fresh flowers or foliage for texture (e.g., pansies, ferns, or ivy).
- ● Editing Tools: Free apps like Snapseed or VSCO for quick enhancements (brightness, contrast, filters).
- ● Macro Lens: A 10x or 20x magnifying lens (e.g., iPhone Lens Kit) for close-up shots of blooms.
- ● Weather Protection: A clear umbrella or rain cover if shooting outdoors in unpredictable weather.
- ● Portable Power Bank: A 10,000mAh+ battery pack (e.g., Anker PowerCore) for long shoots.
Step-by-Step instructions for creating vibrant spring planters
Here's how to assemble striking seasonal displays that bring color and life to patios, porches, or entryways.
🪴 Step 1: Select and Prepare Your Containers
Choose containers with drainage holes—terracotta pots, wooden crates, or even repurposed buckets work beautifully. I like to mix textures for visual interest, pairing smooth ceramic with rustic wood. Clean each container thoroughly with a 10% bleach solution to prevent disease, then rinse well. Let them dry completely before adding soil.
For a cohesive look, group containers by size—tall, medium, and shallow creates natural depth. Place them on saucers or trays to catch overflow and protect surfaces. If using lightweight materials like plastic, add a layer of small stones at the bottom to improve stability and drainage.
🌱 Step 2: Layer Soil and Add Slow-Release Fertilizer
Fill each container halfway with the 3 gallons of potting mix, pressing down gently to remove air pockets. Sprinkle 1 tablespoon of slow-release fertilizer evenly over the surface—this feeds roots steadily without risk of burning. Mix the fertilizer into the top 2 inches of soil using your fingers or a small trowel.
This layering ensures roots have immediate access to nutrients while preventing compaction. For containers deeper than 6 inches, add a second 1-inch layer of potting mix later to maintain consistent moisture levels. Avoid garden soil—it compacts and blocks drainage, which is deadly for container plants.
🌿 Step 3: Plant Thriller, Filler, and Spiller Combinations
Start with one thriller plant—something bold like a black mondo grass or dwarf ornamental pepper—placed centrally. Next, add two filler plants (like sweet potato vine or coleus) around it, spacing them 3-4 inches apart. Finish with three spiller plants (such as trailing lobelia or petunias) at the edges.
Dig holes slightly deeper than the root ball but no deeper than the plant's original soil line. Gently tease apart crowded roots before placing them in the hole. Water each plant immediately after setting it in the soil to eliminate air pockets. This thriller-filler-spiller formula creates instant visual impact and balances growth patterns.
☀️ Step 4: Water and Position for Maximum Impact
Water each planter until water runs freely from the drainage holes—this ensures the entire root zone is hydrated. I use a watering can with a fine rose to avoid disturbing the soil surface. Add a 1-inch layer of decorative mulch (like orchid bark) on top to retain moisture and suppress weeds.
Place your planters where they'll receive 4-6 hours of morning sun—this prevents afternoon heat stress while allowing vibrant foliage to shine. Group containers at varying heights to create a dynamic display. Rotate planters quarter-turn weekly so all sides receive even light, preventing lopsided growth.
✂️ Step 5: Maintain with Regular Care
Check soil moisture daily during warm spells—containers dry out faster than in-ground beds. Water in the early morning to reduce evaporation and fungal risks. Fertilize monthly with a balanced liquid fertilizer (like 10-10-10) to sustain color and growth.
Deadhead spent blooms weekly to encourage continuous flowering. Prune leggy stems back by one-third to maintain shape and density. By mid-summer, refresh planters by replacing half the potting mix with fresh soil and adding new plants—this rejuvenates the display for another season.
Tips & tricks for perfect spring planters
Creating stunning spring planters isn't just about following steps—it's about the little details that make all the difference. Here's what I've learned after designing dozens of seasonal displays that actually wow.
Container Selection Wisdom: Don't overlook the importance of container weight and material in Step 1. Terracotta pots may look charming but dry out faster—great for drought-tolerant plants like ornamental peppers, but less ideal for moisture-loving fillers like sweet potato vine. For mixed plantings, opt for lightweight plastic or fiberglass containers that won't tip over when full of water. Pro tip: Place heavier containers on saucers with non-slip pads to prevent accidents during watering.
The Soil Layering Technique: When you're adding that second 1-inch layer of potting mix for deeper containers in Step 2, here's a game-changer: mix a handful of perlite or vermiculite into the top layer. This creates tiny air pockets that improve drainage while preventing compaction. I like to sprinkle it over the fertilizer layer before mixing—it distributes evenly and gives roots room to breathe from day one.
Plant Placement Strategy: For that perfect thriller-filler-spiller arrangement in Step 3, visualize the mature size of each plant before placing them. The thriller should be the tallest when fully grown, while spillers should cascade just beyond the container's edge. A simple trick: place your hand on the soil where each plant will go and imagine it at its maximum height. This prevents that awkward "too big for the pot" look down the road.
Sunlight Management: That 4-6 hours of morning sun recommendation in Step 4 is non-negotiable for most spring planters, but here's the secret: position your tallest containers to cast gentle shade on smaller ones during peak afternoon sun. This creates natural microclimates that protect delicate fillers while letting thrillers thrive. And remember—rotate those quarter-turns weekly to prevent leggy growth toward the light.
Pro Tips for Spring Garden Pics
- Creating stunning spring planters isn't just about following steps—it's about the little details that make all the difference.
- Container Selection Wisdom: Don't overlook the importance of container weight and material in Step 1.
- The Soil Layering Technique: When you're adding that second 1-inch layer of potting mix for deeper containers in Step 2, here's a game-changer: mix a handful of perlite or vermiculite into the top layer.
Frequently asked questions
When is the best time to take spring garden planter photos?
The golden hours—right after sunrise or just before sunset—are ideal for soft lighting and vibrant colors. Overcast mornings also work well, as they reduce harsh shadows. Aim for late March to early May when blooms are at their peak, but don’t wait for perfect weather; even a light drizzle can add a dreamy effect to your shots!
What’s the easiest way to make my planter photos look professional?
Start with a clean, clutter-free background (a wooden fence or garden path works great). Use a tripod or stack of books to stabilize your phone/camera, and snap shots from a slightly elevated angle (kneel or use a step stool). For extra pizzazz, add a shallow depth of field (blurry background) by moving closer to your subject or using portrait mode.
Can I use regular pots, or do I need special planters for good photos?
Not at all! While terracotta, woven seagrass, or painted ceramic planters add charm, any container works if it’s clean and well-maintained. Pro tip: Add a layer of moss or pebbles to hide soil edges, and consider a monochromatic color scheme (e.g., all white or pastel) for a cohesive look. DIY paint or stencils can also elevate thrifted pots!
What if my garden isn’t blooming yet? How can I still get pretty planter pics?
No blooms? No problem! Focus on texture and color contrast—think lush ferns, variegated foliage, or even evergreen shrubs. Add seasonal accents like painted eggs, pastel ribbons, or tiny wind chimes for a festive touch. Early spring is also perfect for moisture shots—dewdrops on leaves or morning mist create a serene, dreamy vibe.
How do I fix blurry or dull spring garden photos?
Blurry shots often mean slow shutter speed—try bracing your elbows against a surface or using a remote shutter. For dull colors, shoot in RAW format (if possible) and boost vibrancy in editing. Overcast days can mute colors, so if you must shoot then, add a reflector (even a white poster board) to bounce light onto your planters. Last resort? Edit with a vintage or warm filter to enhance spring’s natural hues.
What’s the best free app to edit spring garden planter photos?
For quick fixes, try Snapseed (adjust brightness/contrast) or VSCO (for soft, natural filters like "A6" or "HB2"). Need a spring-specific glow? Lightroom Mobile lets you tweak white balance to make greens pop. Pro tip: Use the "Selective Adjustment" tool to brighten blooms without overdoing it on the background!
Wrapping up and next steps
Spring garden planters are more than just decor—they’re a burst of joy that transforms any space into a lively, inviting retreat. Whether you’re a seasoned gardener or just starting, these vibrant setups prove that a little creativity and greenery can work wonders. Now’s your chance to dive in!
Ready to bring your vision to life? Start small—pick a planter, gather your supplies, and let your green thumb shine. 🌱 Snap those stunning spring garden pics and share your progress with the gardening community!