Pests and Diseases
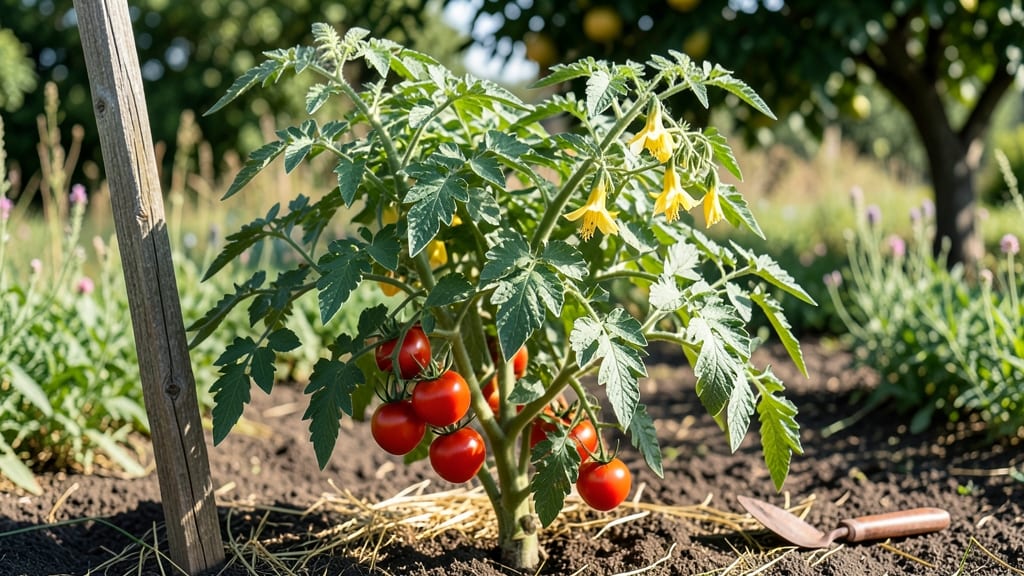
Here are my tomato gardening tips—where the real magic happens, and I’ve learned the exact tricks to turn good harvests into jaw-dropping ones. 🌱 The difference between a few sad tomatoes and a vine bursting with fruit comes down to timing, technique, and a few unexpected tweaks most gardeners miss.
Start with well-draining soil rich in compost, stake your plants early to avoid sunscald, and water consistently at the base—never overhead. Prune suckers aggressively (yes, really) to focus energy on fruit production, and watch for early signs of blight or pests.
My biggest breakthrough? Using a 5-10-10 fertilizer every 3 weeks after flowering—it’s the secret to plump, sweet tomatoes that beat store-bought every time.
By mid-summer, you’ll be snipping ripe fruit straight off the vine, their scent filling the air like a summer memory. The key is staying ahead of problems: shade cloth for heatwaves, mulch to keep roots cool, and regular checks for hornworms (they’ll decimate a plant overnight if you’re not watching).
These tricks work whether you’re growing in containers or a full garden bed, in hot climates or cooler zones. The payoff? Tomatoes so flavorful they’ll make you question why you ever bought them. Let’s get those vines loaded with fruit!
📚 In This Guide
- What you need
- Instructions
- Tips and common mistakes
- Wrapping up and next steps
What you need
- ● Tomato Seeds or Seedlings: Choose disease-resistant varieties (e.g., Celebrity, Roma, or Cherry Tomatoes). Start with 5–10 seeds if sowing indoors or 3–5 seedlings per plant if buying.
- ● Containers or Garden Bed: Containers: 5-gallon pots or larger (minimum 12–18 inches deep) with drainage holes. 1–2 plants per container.
- ● Garden Bed: Well-draining soil, 6–8 hours of sunlight daily, and space 18–24 inches apart for indeterminate varieties or 12–18 inches for determinate.
- ● Soil: 1 part compost + 2 parts potting mix (or store-bought tomato-specific soil). Aim for a pH of 6.0–6.8.
- ● Fertilizer: Balanced fertilizer (10-10-10) at planting.
- ● High-phosphorus (5-10-10) fertilizer when flowers appear.
- ● Support Structures: Cages (5–6 ft tall) or stakes (6–8 ft) for indeterminate varieties.
- ● Trellis or strings for vining types.
- ● Hand Trowel for planting and soil amendments.
- ● Pruning Shears to remove suckers and dead leaves.
- ○ Watering Can or Hose with Adjustable Nozzle (drip irrigation is optional but ideal).
- ● Gloves (gardening or nitrile for chemical-free gardening).
- ● Mulch (Straw or Black Plastic) to retain moisture and suppress weeds.
- ● Epsom Salt (1 tbsp per plant monthly for magnesium boost).
- ● Café Grounds (mixed into soil for nitrogen).
- ● Row Covers for early-season frost protection.
- ● Pest/Disease Sprays: Neem oil, copper fungicide, or insecticidal soap.
- ● pH Test Kit to monitor soil health.
Step-by-Step instructions for growing tomatoes like a pro
Here’s how I turn struggling tomato plants into heavy producers—no fancy tricks, just proven methods.
🌱 Step 1: Prepare the Soil for Strong Roots
Tomatoes thrive in loose, nutrient-rich soil that drains well. Work in 2-3 inches of compost into the top 12 inches of soil before planting. I always mix in a handful of balanced fertilizer (10-10-10) at planting time to give roots a strong start. If your soil feels heavy or clumps when squeezed, add 1-2 inches of perlite or coarse sand to improve drainage.
Test soil moisture by pressing your finger 1 inch deep—it should feel damp but not soggy. Overly wet soil invites root rot, while dry soil stresses plants before they even sprout. Amend the soil until it holds moisture like a damp sponge but doesn’t stay clumpy.
☀️ Step 2: Plant at the Right Depth and Stake Early
Dig a hole twice as wide as the root ball but only as deep as the plant’s first set of leaves. Burying stems too deep encourages disease, while planting too shallow leaves roots exposed. Gently tease out tangled roots before placing the plant in the hole and backfill with soil, pressing lightly to remove air pockets.
Install a 5-6 foot stake or cage right after planting—waiting until later means disturbing roots. Tie the main stem loosely to the stake with soft plant ties (never wire or twine that can cut into the stem). This prevents wind damage and keeps plants upright as they grow.
💧 Step 3: Water Deeply and Consistently
Water deeply 1-2 times per week—not daily light sprinkles. Aim for 1-1.5 gallons per plant each session, soaking the soil 6-8 inches deep. You’ll know it’s right when water runs out the drainage holes if planted in containers, or when the top 2 inches of soil feel moist.
Water at the base of the plant in the morning to reduce evaporation and fungal risks. Avoid wetting leaves, which can lead to early blight or powdery mildew. Mulch with 2-3 inches of straw or shredded leaves to lock in moisture and keep soil temps steady.
🌿 Step 4: Prune and Fertilize for Maximum Fruit
When plants reach 18-24 inches tall, start pruning suckers—the small shoots that grow in the leaf axils. Remove these weekly to redirect energy to fruit production. Leave 2-3 main stems on indeterminate varieties (like ‘Sungold’) and 1-2 stems on determinate types (like ‘Roma’).
Fertilize again when first flowers appear, using a low-nitrogen, high-phosphorus formula (like 5-10-10). Split the remaining fertilizer into 2-3 doses over the season—too much at once burns roots. Watch for yellowing lower leaves, which often signals a nitrogen deficiency or overwatering.
✂️ Step 5: Harvest at Peak Ripeness
Pick tomatoes when they’re fully colored and slightly soft to the touch. For heirlooms, this means deep red, orange, or yellow with a slight give when gently squeezed. Green tomatoes can ripen off the vine in a paper bag with a banana for 3-5 days—ethylene gas from the banana speeds up ripening.
Harvest in the morning after dew dries to preserve quality. Use pruning shears or a sharp knife to cut stems cleanly, leaving a small stub. This prevents disease entry points and encourages more fruit to set. Store ripe tomatoes at room temperature—never in the fridge, or they’ll lose flavor.
Tips & tricks for perfect tomato gardening
Here's what I've learned after years of trial and error to help you grow tomatoes that actually produce like crazy.
Soil Prep Secret: In Step 1, don't just add compost—mix in a handful of egg shells (crushed) with your 2-3 inches of compost. The calcium prevents blossom end rot, a common problem that ruins tomatoes before they ripen. I crush them into tiny pieces so they blend right in with the soil.
Staking Strategy: When you install your 5-6 foot stake in Step 2, bury it halfway up into the soil before planting. This gives you a built-in support system that won't topple when you tie the plant later. I've seen too many stakes lean over when plants get heavy with fruit.
Watering Wisdom: For Step 3, I use a soaker hose buried 2 inches deep near the base of plants to deliver that 1-1.5 gallons per plant. This keeps water right where the roots need it and prevents those pesky fungal diseases from splashing onto leaves. The slow release also helps maintain that perfect 6-8 inch deep moisture level.
Pruning Pro Tip: In Step 4, when you're pruning those weekly suckers, save a few of the smaller ones to use as cuttings. Place them in water for 2 weeks—they'll root perfectly and you can transplant them later! This gives you free plants for next season while keeping your main plant focused on fruit production.
Pro Tips for Tomato Gardening Tips
- Here's what I've learned after years of trial and error to help you grow tomatoes that actually produce like crazy.
- Soil Prep Secret: In Step 1, don't just add compost—mix in a handful of egg shells (crushed) with your 2-3 inches of ...
- Staking Strategy: When you install your 5-6 foot stake in Step 2, bury it halfway up into the soil before planting. T...
Frequently asked questions
Got questions about growing tomatoes?
You’re not alone! Here are answers to the most common tomato gardening dilemmas to keep your plants thriving from blossom to harvest.
When is the best time to plant tomatoes?
Tomatoes thrive in warm soil—plant them after the last frost when nighttime temps stay above 50°F (10°C). Start seeds indoors 6–8 weeks before transplanting, or buy sturdy seedlings from a nursery. Pro tip: Use black plastic mulch to warm the soil faster!
Why are my tomato leaves turning yellow?
Yellow leaves often signal overwatering, nutrient deficiency (like nitrogen), or fungal diseases (e.g., early blight). Check the soil—it should be moist but not soggy. Prune affected leaves and treat with copper fungicide if needed. Pro tip: Test your soil pH (6.0–6.8 is ideal)!
How do I prevent blossom end rot?
This calcium deficiency causes sunken, dark spots on fruit. Keep soil consistently moist (not dry), add crushed eggshells or lime for calcium, and mulch to retain humidity. Avoid heavy fertilizers high in nitrogen—balance with phosphorus and potassium. Pro tip: A 1-inch layer of mulch works wonders!
How long does it take for tomatoes to ripen after flowering?
Most varieties take 60–85 days from flower to ripe fruit, depending on the type (e.g., cherry tomatoes ripen faster than beefsteaks). Warmth speeds ripening—harvest green tomatoes early if frost threatens and ripen indoors with a paper bag (add a banana for ethylene gas!).
Can I grow tomatoes in containers? What size pot do I need?
Use pots at least 5 gallons for dwarf varieties and 10+ gallons for larger types. Ensure pots have drainage holes and fill with well-draining potting mix. Pro tip: Add a tomato cage or trellis to save space and improve air circulation!
Are there any natural pest repellents for tomato plants?
Yes! Spray neem oil or soapy water (1 tbsp mild soap per quart of water) to deter aphids and whiteflies. Plant basil, marigolds, or nasturtiums nearby to repel pests naturally. For hornworms, handpick them (they’re huge but harmless to squish!).
Wrapping up and next steps
Growing tomatoes from blossom to ripe fruit is a rewarding journey—one that starts with prevention and ends with a bountiful harvest. By mastering proper spacing, organic sprays, and early detection, you’ll keep pests and diseases at bay while nurturing healthier plants.
Remember, consistency is key: inspect weekly, act swiftly, and celebrate small wins!
Ready to put these tips into action? Start small—whether it’s a single plant in a pot or a row in your garden—and watch your confidence (and tomatoes!) grow. Happy gardening! 🌱🍅