Landscaping
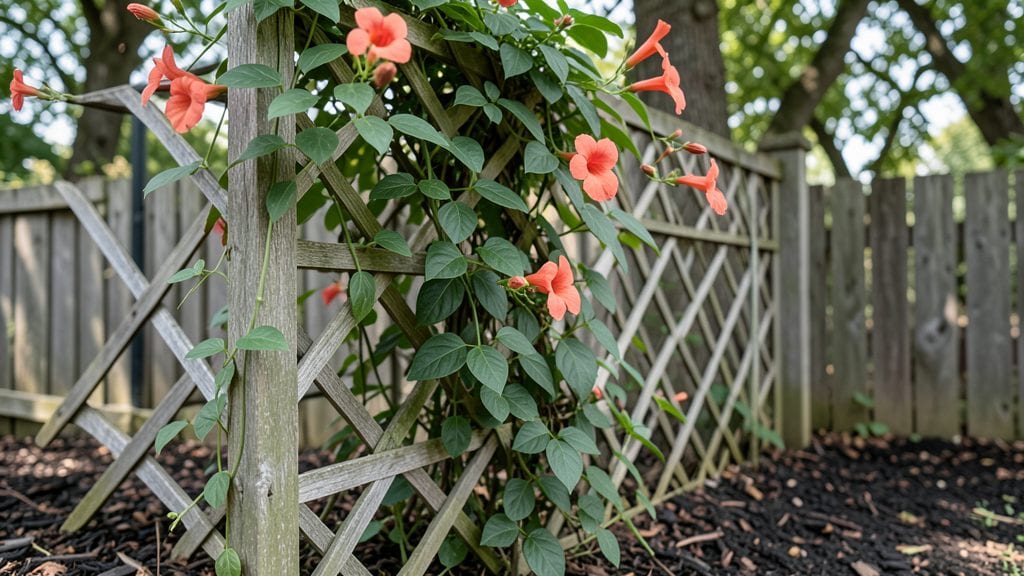
A vertical garden fence turns your backyard into a living privacy screen while reclaiming every square foot of space. 🌿 I installed mine along a noisy street, and the difference in both aesthetics and noise reduction has been shocking.
Instead of a plain wooden fence, we now have a thriving green wall that changes with the seasons—spring blooms, summer foliage, and even winter interest.
The beauty is that you don’t need fancy materials or expensive panels. Repurposed pallets, sturdy trellis panels, or even stacked cinder blocks with wire mesh work perfectly.
For plants, go with fast-growing climbers like morning glories or clematis for quick coverage, or mix in herbs and succulents for texture and fragrance. My setup cost under $150 and took a weekend to assemble—no contractor needed.
By summer, you’ll have a lush, fragrant barrier that blocks noise, filters air, and adds value to your home. The best part? It grows with you—prune back in early spring, add new plants as you wish, and watch your fence transform into a year-round green masterpiece.
Ready to turn that boring fence line into a showstopper?
Works for small urban yards, large suburban plots, or even rental properties where permanent changes aren’t allowed. The key is starting small—one section at a time—and letting nature do the rest. Let’s get growing!
📚 In This Guide
- What you need
- Instructions
- Tips and common mistakes
- Wrapping up and next steps
What you need
- ● Fence panels or frames: Pre-made vertical garden fence panels (check dimensions for your space) OR wooden/pvc frames (2x4s or 4x4s, 6–8 ft tall, quantity depends on fence length).
- ● Growing pockets or planters: Fabric pockets (12–24" deep, 6–12" wide, 1–2 per square foot of fence).
- ● OR modular plastic/terra-cotta planters (hanging or clip-on, 1–2 per pocket size).
- ● Irrigation system: Drip irrigation kit (with emitters, tubing, and connectors).
- ● OR self-watering reservoir (for bottom-fed systems).
- ● Soil: Lightweight potting mix (1–2 cubic feet per panel, depending on plant types).
- ● Plants: Choose drought-tolerant varieties like succulents, ferns, herbs, or trailing vines (e.g., ivy, bougainvillea).
- ● Measuring tape & level.
- ● Drill/driver + screws (deck screws or galvanized nails for frames).
- ● Staple gun (for securing fabric pockets).
- ● Scissors or utility knife (for cutting fabric/planters).
- ● Post hole digger (if installing freestanding frames).
- ○ Optional: Paint/stain (for wooden frames) + brush.
- ● Space prep: Clear debris from your fence line and ensure it’s structurally sound (replace rotted sections if needed).
- ● Sunlight check: Note your fence’s sunlight exposure to pick shade-loving or sun-happy plants.
- ● Drainage plan: Ensure your fence has drainage holes (or add them) to prevent waterlogging.
Instructions: build a vertical garden fence for privacy and greenery
Here’s how to transform a plain fence into a living, lush privacy screen—no green thumb required.
🪴 Step 1: Prepare the Fence and Install the Frame
Start by cleaning your existing fence thoroughly with a wire brush to remove dirt, mold, or debris. If your fence has gaps larger than 2 inches, cover them with landscape fabric stapled in place to prevent weeds from growing behind the plants. This keeps your vertical garden neat and weed-free.
Next, attach a wooden or metal frame to the fence using L-brackets and deck screws. The frame should run horizontally across the fence, spaced 12-18 inches apart vertically. This creates shelves for planting pockets or containers. I like to use 2x4 lumber for stability—it’s sturdy enough to hold weight but light enough to work with. Pre-drill holes to avoid splitting the wood.
Double-check that the frame is level before securing it. Uneven shelves will cause water to pool in one corner, leading to root rot. A quick check with a level tool ensures everything stays balanced.
🌱 Step 2: Attach Planting Pockets or Containers
Choose fabric planting pockets or hanging planters designed for vertical gardens. For a 4-foot section of fence, you’ll need about 12-15 pockets spaced evenly along the frame. If using pockets, secure them with landscape staples or zip ties to the frame, ensuring they’re snug but not stretched tight.
Fill each pocket or container with moistened potting mix—never garden soil, as it compacts too much and drains poorly. Press the mix down lightly to eliminate air pockets, but don’t pack it down like tamping dirt. The goal is a fluffy, aerated medium that roots can easily penetrate.
Leave about ½ inch of space at the top of each pocket to prevent spillage when watering. Overfilling leads to messes and uneven moisture distribution. I like to add a slow-release fertilizer to the mix at this stage—it feeds plants steadily for 3-4 months without extra effort.
☀️ Step 3: Select and Plant Drought-Tolerant, Trailing Plants
Pick plants that thrive in partial shade to full sun and have trailing or cascading habits. Great choices include ivy, creeping jenkins, ferns, or ornamental grasses. Avoid heavy feeders like tomatoes or peppers—they’ll drain the pockets too quickly and require constant watering.
Plant 1-2 small starter plants per pocket, spacing them evenly. If using seeds, sow them ¼ inch deep and keep the soil moist until germination. Water gently with a spray bottle to avoid displacing seeds. Once seedlings emerge, thin them to the strongest 1-2 per pocket to give roots room to grow.
Here’s the thing—mulch is your secret weapon. Spread a thin layer of shredded bark mulch over the soil surface in each pocket. It retains moisture, suppresses weeds, and keeps roots cool in summer. Just ½ inch is enough—too much can smother plants.
💧 Step 4: Water and Maintain for Year-Round Growth
Water deeply 2-3 times per week during the first 4 weeks to help roots establish. After that, adjust based on weather—drought-tolerant plants need less once established, but trailing varieties like ivy may require weekly watering in hot, dry spells. The key is to keep the soil evenly moist but not soggy. Stick your finger 1 inch into the soil—if it’s dry, it’s time to water.
Fertilize lightly every 6-8 weeks with a balanced liquid fertilizer (10-10-10 ratio). Over-fertilizing burns roots and encourages leggy, weak growth. I mix it at half-strength to avoid shocking the plants. Also, prune back overgrown stems in early spring to encourage bushier, denser growth.
Watch for pests like aphids or spider mites, especially on tender new growth. A neem oil spray applied in the evening keeps them at bay without harming your plants. Most issues stem from overwatering or poor drainage, so always check the pockets for standing water after heavy rains.
✂️ Step 5: Prune and Refresh Seasonally
In early spring, trim back any dead or yellowed foliage with clean, sharp pruners. This encourages fresh growth and keeps the garden looking tidy. For trailing plants, gently weave stems through the pockets to create a fuller, layered look. If any pockets become bare, replace plants with new starters to maintain density.
By late fall, reduce watering as growth slows. Most vertical garden plants are perennial and will return next year, but a light winter mulch (like straw) protects roots from freezing temperatures. I also add a handful of compost to each pocket in early spring to replenish nutrients.
This is the moment that matters: consistency. A vertical garden fence thrives with regular but low-maintenance care. Spend 10 minutes weekly checking moisture, pruning, and removing weeds, and you’ll have a privacy screen that’s alive, lush, and full of life—no matter the season.
Tips & tricks for perfect vertical garden fences
A few simple tricks will help you create a thriving vertical garden fence that looks stunning and lasts for years. Here's what I've learned from building my own—and fixing the mistakes that came with it.
Frame Stability is Everything: When installing your 2x4 lumber frame in Step 1, don't skimp on securing the L-brackets. Use 3-inch deck screws instead of the basic 2-inch ones—the extra length prevents wobbling. I've seen frames sag after heavy rains when screws weren't long enough. Also, consider adding a horizontal support beam halfway up for extra stability on taller fences. This hidden reinforcement prevents the frame from bowing under plant weight as they grow.
Pocket Placement Matters: In Step 2, space those 12-15 planting pockets evenly along your 4-foot section—about 3-4 inches apart between pockets. This spacing prevents overcrowding and allows air circulation, which reduces fungal diseases. I made the mistake of clustering pockets too close together, and my ivy plants developed powdery mildew. For a more dramatic look, stagger the pockets in a zigzag pattern rather than straight lines. This creates visual interest while maintaining proper spacing.
Soil Science for Success: That ½ inch of space at the top of each pocket in Step 2 isn't just about preventing spills—it's about drainage. Pack your potting mix firmly but don't compress it like garden soil. I learned this the hard way when my first attempt resulted in water pooling at the bottom of pockets. To test your soil mix, invert a pocket and let water drain freely—if it takes more than 10 minutes to drain completely, add perlite or vermiculite to improve aeration. This simple test prevents root rot before it starts.
Seasonal Plant Rotation: While the instructions suggest perennial plants, consider a seasonal rotation for maximum impact. In spring, plant fast-growing nasturtiums or lobelia for vibrant color, then transition to creeping thyme or sedum in summer for drought resistance. In fall, add heuchera for striking foliage. The key is to maintain the same 1-2 plants per pocket guideline to avoid overcrowding. This approach gives you year-round interest without sacrificing the vertical garden's structural integrity.
Pro Tips for Vertical Garden Fence
- A few simple tricks will help you create a thriving vertical garden fence that looks stunning and lasts for years.
- Frame Stability is Everything: When installing your 2x4 lumber frame in Step 1, don't skimp on securing the L-brackets.
- Pocket Placement Matters: In Step 2, space those 12-15 planting pockets evenly along your 4-foot section—about 3-4 inches apart between pockets.
Frequently asked questions
Got questions about transforming your space with a vertical garden fence? You’re not alone! Here are answers to the most common concerns—so you can dive in with confidence.
How much sunlight does a vertical garden fence need?
A vertical garden fence thrives with at least 4–6 hours of sunlight daily, but many plants (like ferns, ivy, or succulents) adapt to partial shade. Assess your space first—south- or west-facing walls get the most light. For shady spots, opt for shade-tolerant plants like Pothos or Hosta.
How often should I water a vertical garden fence?
Watering depends on your climate and plant types, but daily checks are key for the first 2 weeks. Most vertical gardens need watering every 2–3 days (more in hot/dry weather). Use a drip irrigation system or spray nozzle to ensure even moisture—roots in pockets dry out faster than in-ground plants!
Can I build a vertical garden fence without drilling holes?
Skip the drill with no-hole alternatives like:
- Modular panels (clip-on systems, e.g., GreenStalk or Plant Wall)
- Fabric pockets sewn into a freestanding frame
- Hanging planters attached to a trellis or fence with hooks
How do I keep pests away from my vertical garden fence?
Pests like aphids or slugs can target vertical gardens, but prevention is simple:
- Use neem oil spray (natural repellent)
- Space plants 3–4 inches apart for airflow (pests hate crowded, dry spots)
- Add copper tape at the base to deter slugs
- Introduce beneficial insects like ladybugs or lacewings
Will a vertical garden fence survive winter?
Yes! Most vertical gardens handle winter with proper prep:
- Choose cold-hardy plants (e.g., Winter Jasmine, Holly, or Boxwood)
- Wrap the fence in burlap or use frost cloth for extra protection
- Reduce watering in freezing temps (overwatering can damage roots)
- Prune dead foliage in early spring to encourage new growth
Wrapping up and next steps
Transforming your outdoor space with a vertical garden fence isn’t just about aesthetics—it’s a game-changer for privacy, sustainability, and curb appeal! 🌿 Whether you’re a green thumb or a beginner, this project lets you grow lush plants while maximizing every inch of your yard.
The best part? You’ll enjoy year-round greenery with minimal hassle.
Ready to dive in? Start by sketching your design, gathering supplies, and picking your favorite plants. Your dream garden fence is just a few steps away—let’s make it happen! 🌱