Watering
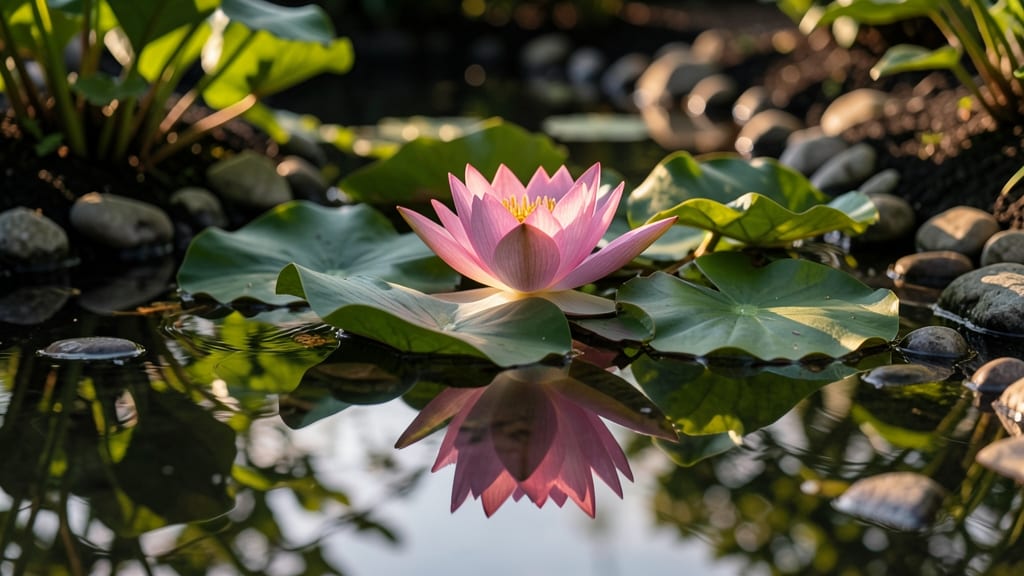
A water lily garden transforms any pond into a tranquil oasis where nature takes center stage. 🌿 I’ve watched my own lily pads spread like floating green carpets, their velvety leaves cradling dragonflies and reflecting sunlight in shimmering patterns.
The key isn’t just dropping plants in water—it’s designing a space where they thrive year-round, from delicate white blooms in spring to deep purple blooms in summer.
Start with a pond at least 18 inches deep—water lilies need space to anchor roots and float leaves without crowding. Pair them with cattails or rushes along the edges for texture, or let them stand alone for a minimalist look.
The right companions can turn your pond into a layered aquatic tapestry, where every season brings new colors and movement.
By late summer, your garden will burst with blooms that open at dawn and close by afternoon, their fragrance drawing hummingbirds. The leaves filter pond water naturally, reducing algae while creating a serene focal point. Even in winter, the skeletal stems add quiet beauty to frosty landscapes.
This works for small backyard ponds or large garden lakes—just adjust spacing and depth. The magic happens when you let the plants lead, not force them into rigid designs. Ready to create your own floating sanctuary?
📚 In This Guide
- What you need
- Instructions
- Tips and common mistakes
- Wrapping up and next steps
What you need
- ● Water lilies: Choose hardy varieties like Nymphaea odorata (fragrant water lily) or Nymphaea 'James Brydon' (large, vibrant blooms). Start with 3-5 plants per 100 sq. ft. of water surface for full coverage.
- ● Pond or container: A minimum depth of 12–18 inches (deeper for tropical varieties). Use a pre-formed pond liner (e.g., EPDM rubber liner, 45-mil thickness) or a sturdy plastic/koi pond.
- ● Gravel or substrate: 1–2 inches of washed river gravel (¼"–½" size) to anchor plants and prevent root rot.
- ● Fertilizer: Slow-release aquatic plant tabs (e.g., Aquascape Plant Tabs) or liquid fertilizer (diluted to ½ strength).
- ○ Pond thermometer: Optional but helpful for tropical varieties (ideal range: 60–85°F).
- ● Garden trowel or pond plant scoop for gentle planting.
- ● Gloves (waterproof or nitrile) to protect hands.
- ● Pond net (for debris removal) and gravel rake (to level substrate).
- ● Water testing kit (check pH: 6.5–7.5; ammonia/nitrites: 0 ppm).
- ○ Solar fountain or aerator (optional, to improve oxygenation and deter pests).
- ● Sunlight: 6+ hours of direct sun daily (tropical lilies need full sun; hardy varieties tolerate partial shade).
- ● Water source: Ensure a steady, clean water supply (dechlorinate tap water if using).
- ● Local climate check: Hardy lilies thrive in USDA Zones 3–11; tropical varieties need Zone 7+ or overwintering indoors.
Step-by-Step guide to designing a stunning water lily garden
Here's how to create a tranquil aquatic oasis that thrives all season long.
🪴 Step 1: Select and Prepare the Pond Location
Choose a sunny spot with at least 6 hours of direct sunlight daily—water lilies need plenty of light to bloom. I dig a hole 18-24 inches deep for medium-sized varieties, adjusting depth based on the lily's mature size. The pond should be at least 12 inches deep to prevent freezing in winter and provide proper root space.
Line the bottom with 1-2 inches of coarse sand to create a natural base. This prevents soil from sinking and helps roots establish firmly. For a 4-foot diameter pond, you'll need about 3 cubic feet of sand. Smooth the edges with a trowel, creating gentle slopes for easy access.
💧 Step 2: Layer Soil and Plant Water Lilies
Add 3-4 inches of aquatic plant soil (or a mix of 50% potting soil and 50% perlite) to the bottom of the pond. This lightweight blend drains well while retaining moisture—critical for lily roots. I like to mound the soil slightly in the center to create a natural planting hill.
Gently remove the water lily tubers from their pots and place them 1-2 inches deep in the soil, spacing them 12-18 inches apart depending on the variety. Larger tubers go in deeper water, while smaller ones thrive in shallower areas. Press lightly to secure, then cover with an extra inch of soil to stabilize them.
☀️ Step 3: Add Water and Monitor Growth
Fill the pond slowly with dechlorinated water (let tap water sit for 24 hours or use a dechlorinator) until the water level reaches 3-4 inches above the soil surface. This ensures roots stay submerged but leaves float freely. Avoid sudden water changes—gradual filling prevents soil erosion.
Watch for new leaves emerging in 2-4 weeks—this signals healthy growth. If leaves appear yellow or weak, check water depth. Most water lilies need 6-12 inches of water coverage for optimal blooming. Add a small solar-powered fountain (if desired) to improve oxygen circulation and deter mosquitoes.
✂️ Step 4: Maintain and Winterize the Pond
Remove spent blooms by pinching them off at the base to encourage more flowers. I fertilize lightly every 4-6 weeks with aquatic plant tabs placed in the soil. Avoid over-fertilizing—water lilies thrive in nutrient-rich but not overly rich conditions. Test water weekly for clarity; cloudy water often means excess algae.
In fall, when temperatures drop below 50°F, reduce water levels to 6 inches above soil to protect tubers. Cover the pond with floating row covers or pond netting to shield plants from debris and freezing. In spring, remove covers once water temperatures reach 60°F and trim any damaged foliage.
Tips & tricks for perfect water lily garden
Creating a stunning water lily garden takes patience and attention to detail—here's how to avoid common pitfalls and ensure your aquatic oasis thrives.
Location is Everything: That 6 hours of sunlight requirement isn't just ideal—it's essential. I've seen beautiful gardens fail because they were placed in partial shade. If your yard only gets 4-5 hours, consider adding a small solar-powered pond pump to circulate water and maximize light exposure.
Soil Preparation Matters: When creating that 3-4 inch soil layer in Step 2, don't compact it too tightly. Press gently but leave room for roots to expand. I like to use a small garden rake to create gentle contours—this helps water circulate better around the tubers. The 50% potting soil/50% perlite mix is perfect for drainage while retaining moisture.
Water Quality is Critical: The 24-hour dechlorination step isn't optional—chlorine can harm your lilies. I've found that adding a few drops of liquid potassium permanganate (just enough to turn water pale pink) helps prevent algae growth naturally. This works alongside your gradual filling technique to keep water crystal clear.
Seasonal Timing: Those 50°F and 60°F temperature thresholds are important for winterizing and spring revival. I mark my calendar to check water temps weekly in spring—once it hits 60°F consistently, that's when I remove covers and trim damaged foliage. In fall, I start monitoring temps in October to be ready for winter protection.
Pro Tips for Water Lily Garden
- Creating a stunning water lily garden takes patience and attention to detail—here's how to avoid common pitfalls and ensure your aquatic oasis thrives.
- Location is Everything: That 6 hours of sunlight requirement isn't just ideal—it's essential.
- Soil Preparation Matters: When creating that 3-4 inch soil layer in Step 2, don't compact it too tightly.
Frequently asked questions
Got questions about creating your dream water lily garden? You’re not alone! Here are some of the most common queries—and their answers—to help you dive in with confidence.
What’s the best time of year to plant water lilies?
Plant water lilies in spring or early summer (after the last frost) for the best results. This gives roots time to establish before winter. If you’re in a warmer climate, fall planting can also work—just avoid extreme heat or cold. Hardy varieties like Nymphaea odorata (fragrant white water lily) thrive with a little patience!
How often should I fertilize my water lilies?
Feed your lilies every 4–6 weeks during the growing season (spring to fall) with a slow-release aquatic fertilizer or liquid plant food. Over-fertilizing can harm fish or pollute water—always follow package instructions! In winter, skip fertilizing unless you’re in a mild climate with year-round growth.
Are water lilies safe for ponds with fish or wildlife?
Yes! Water lilies are non-toxic and provide shade for fish, reducing algae growth. Just avoid heavy herbicides or pesticides. For wildlife, opt for native varieties like Nymphaea mexicana (Mexican water lily) to support local ecosystems. Pro tip: Leave some foliage in winter to protect pond life from freezing.
Why aren’t my water lilies blooming?
Blooming depends on sunlight, nutrients, and water depth. Most lilies need 4–6 hours of direct sun daily and roots planted in 12–18 inches of water. If blooms are sparse, check for:
- Depth: Too deep = fewer blooms; too shallow = stress.
- Fertilizer: Lack of nutrients stunts growth.
- Age: Young plants may take 1–2 years to bloom.
- Winter: Many varieties rest in cold months—patience!
Can I grow water lilies in containers or small ponds?
Use pond baskets with aquatic soil (like clay or coconut coir) and place them in containers as small as 10 gallons (for dwarf varieties). Ensure the container has drainage holes and can hold water lilies’ roots securely. For tiny ponds (<50 sq ft), choose compact species like Nymphaea ‘Helvola’ (yellow dwarf lily).
Do water lilies survive winter, or do I need to dig them up?
Hardy water lilies (zones 3–11) overwinter in the pond—no digging required! In cold climates, cover the pond with a pond net or bubble wrap to prevent debris buildup. Tropical varieties (like Nymphaea ‘James Brydon’) may need winter protection or indoor storage. Check your local zone to plan ahead!
Wrapping up and next steps
Creating a water lily garden is more than just adding beauty to your pond—it’s an invitation to tranquility and nature’s artistry. Whether you’re a seasoned gardener or a beginner, these floating blooms bring year-round elegance with minimal effort. Now’s the perfect time to dive in!
Start small, observe your pond’s conditions, and let your water lilies thrive. Need inspiration? Sketch a simple layout or gather a few plants to test the waters—literally! Your serene oasis awaits.
Next steps:
- Pick your lilies (hardy or tropical?) and shop for supplies.
- Plan your design—sunny spots for blooms, shade for foliage.
- Dive into planting and enjoy the process!