
Tools
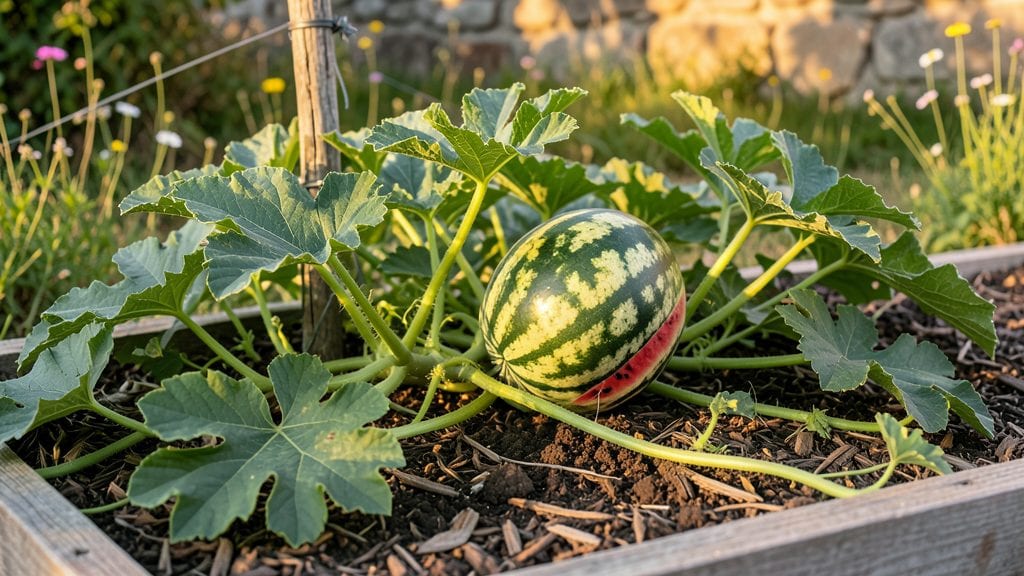
Growing watermelons in the garden means sinking your teeth into the sweetest, juiciest slices of summer—right from your own backyard. 🌞 I’ve grown them for years, and the secret isn’t just heat and sun, but the right soil, spacing, and a little patience that pays off with melons so ripe they practically beg to be sliced.
The first year, I nearly gave up after a few small, bland fruits, but once I adjusted my approach, I’ve never looked back.
You’ll need a spot that gets at least 8 hours of full sun daily, well-draining soil mixed with compost, and plenty of space—these vines spread like they’re racing for the county line.
Plant seeds after your last frost when soil reaches 70°F, and give each plant 3–4 feet of room. Water deeply once a week (more in extreme heat), keeping the soil moist but not soggy, because soggy soil means rotten dreams.
By mid-summer, you’ll be watching those tendrils stretch and those melons swell, their stripes deepening into the classic watermelon pattern. The first harvest? 60–90 days after planting, when the tendril near the stem turns brown and the melon thuds like a drum when tapped.
That’s when you know—juicy perfection is just a knife’s cut away.
Works in most climates, though cooler zones may need black plastic mulch to warm the soil. And if squirrels or birds eye your melons first, try netting—trust me, the melons are worth the effort. Here’s how to make it happen without the headaches.
📚 In This Guide
- What you need
- Instructions
- Tips and common mistakes
- Wrapping up and next steps
What you need
- ● Watermelon seeds: Choose disease-resistant varieties like 'Sugar Baby' (small, sweet) or 'Crimson Sweet' (classic, large). Buy 1-2 packets (50-100 seeds) for a full garden bed.
- ● Garden soil: Well-draining, fertile soil with a pH of 6.0–7.0. Amend with 2–3 inches of compost or aged manure before planting.
- ● Fertilizer: A balanced 10-10-10 or 5-10-10 fertilizer (low nitrogen to encourage fruiting) or organic options like composted chicken manure.
- ● Mulch: Straw or black plastic mulch (1–2 inches thick) to retain moisture and suppress weeds.
- ○ Trellis or support: Optional but helpful for smaller varieties—use a 6–8 ft tall trellis or sturdy stakes.
- ● Watering supplies: A hose with a gentle spray nozzle or drip irrigation system (watermelons need 1–2 inches of water weekly).
- ● Gloves & pruners: Heavy-duty gardening gloves and sharp pruners ($5–$15) for maintenance.
- ● Soil test kit: Check nutrient levels ($10–$20) to avoid over/under-fertilizing.
- ● Plant markers: Label seeds or seedlings to track varieties.
- ● Row covers: Lightweight fabric to protect young plants from pests ($15–$30).
- ● Harvest knife: A serrated knife for clean cutting when melons are ripe.
- ● Shade cloth: 30–50% coverage for hot climates to prevent sunburn on fruit.
Step-by-Step instructions for growing juicy watermelons
Here’s how to grow watermelons that burst with sweetness—no fancy tricks, just proven techniques.
🪴 Step 1: Pick the Perfect Spot and Prep the Soil
Watermelons crave full sun, so choose a spot that gets at least 8 hours of direct sunlight daily. I always test my garden bed by checking how much light it gets over a few days—shadows mean lower yields. Clear away weeds and loosen the soil to a depth of 12 inches using a garden fork. This helps roots spread deep for those heavy melons.
Mix in 3 gallons of compost into the top 6 inches of soil to boost nutrients. Watermelons are heavy feeders, so rich soil prevents bitter fruit. I also add a handful of garden lime if my soil tests acidic—watermelons prefer a pH between 6.0 and 7.0. Spread the compost evenly, then rake the bed smooth for planting.
🌱 Step 2: Plant Seeds or Transplants at the Right Time
Start seeds indoors 4-6 weeks before your last frost date or sow directly in the garden after all danger of frost has passed. I like to plant 4 seeds per hill, spacing hills 5-6 feet apart in rows 6 feet apart. Dig holes 1 inch deep and place seeds 2 inches apart—this gives them room to germinate without competing.
Cover seeds lightly with soil and water gently to avoid displacing them. Keep the soil consistently moist until sprouts appear, which usually takes 7-10 days. If you’re using transplants, bury them just below the first set of true leaves to encourage strong root growth. I always harden off seedlings first—place them outside for 1-2 hours the week before transplanting to avoid shock.
☀️ Step 3: Support Vines and Manage Water Like a Pro
Watermelon vines can sprawl 10-15 feet, so give them space or train them onto a trellis if you’re short on ground space. I use a strong wire trellis to lift vines vertically, which also keeps fruit off the ground and cleaner. Once vines reach 3-4 feet, start pruning side shoots to direct energy into 2-3 main vines per plant—this ensures bigger, juicier melons.
Water deeply 1-2 times per week, soaking the soil to a depth of 6 inches. Watermelons need 1-2 inches of water weekly, but avoid wetting the leaves to prevent disease. I water in the early morning so foliage dries quickly. Stop watering 2 weeks before harvest to concentrate sweetness in the fruit. You’ll know it’s time when the tendril nearest the fruit turns brown and dies.
✂️ Step 4: Fertilize and Watch for Signs of Maturity
Feed plants with a balanced fertilizer (10-10-10) when vines are 6 inches long, then again when flowers appear. I use 1 tablespoon per plant mixed into the soil around the base. Too much nitrogen makes vines lush but fruit small—focus on potassium and phosphorus for sweet, juicy melons. Remove any male flowers that appear early to redirect energy to female flowers, which have tiny fruit at their base.
Harvest watermelons when the underbelly turns cream-colored and the tendril nearest the stem dries up. Tap the melon—it should sound hollow when ripe. Cut with a sharp knife, leaving 1 inch of stem attached to prevent rot. I always harvest in the morning when temperatures are cooler, which preserves freshness longer.
🌿 Step 5: Extend the Season and Prevent Common Pests
To keep producing melons later in the season, I mulch heavily with 3 inches of straw to retain moisture and regulate soil temperature. This also blocks weeds, which compete for nutrients. If pests like cucumber beetles or squash bugs appear, handpick them early in the morning when they’re sluggish. I also spray plants with neem oil as a preventive measure—it’s organic and safe for edibles.
Watch for powdery mildew on leaves, especially in humid weather. Improve airflow by spacing plants properly and avoid overhead watering. If mildew appears, remove affected leaves and spray with a baking soda solution (1 tablespoon baking soda + 1 quart water + a drop of dish soap). With these steps, you’ll enjoy 4-6 juicy watermelons per plant by midsummer!
Tips & tricks for perfect watermelon growth
These simple secrets will help you grow watermelons that practically explode with sweetness in your garden.
Soil Prep is Everything: Don't just loosen the soil—break up those 12-inch-deep clods until it feels like crumbly cake. Watermelon roots need that kind of air space to spread out. I also like to add a thin layer of coarse sand to improve drainage, especially in clay-heavy soils. This prevents waterlogging that leads to bitter fruit.
Timing Secret for Transplants: When hardening off seedlings in Step 2, I gradually increase their outdoor time by 1 hour daily until they're out there for the full 1-2 hours before transplanting. This slow acclimation prevents shock that can stall growth. Also, plant in the late afternoon when temperatures are cooler—it gives seedlings a head start.
Watering Wisdom: That 1-2 inches weekly water requirement is non-negotiable, but here's the trick: water at the base using a soaker hose or drip irrigation. This keeps leaves dry and prevents powdery mildew. I set my timer for early morning watering—this gives foliage all day to dry, which is crucial in humid climates. The 2-week pre-harvest dry spell is what concentrates that sweetness we all crave.
Harvesting Hack: That hollow-sounding tap test in Step 4 works, but I also check the tendril nearest the fruit. When it turns completely brown and crispy, that's your cue. For extra juicy melons, harvest when temperatures are below 80°F—cooler fruit stays fresher longer. I always leave that 1-inch stem attached because it helps seal the cut and prevents rot during storage.
Pro Tips for Watermelon In The Garden
- These simple secrets will help you grow watermelons that practically explode with sweetness in your garden.
- Soil Prep is Everything: Don't just loosen the soil—break up those 12-inch-deep clods until it feels like crumbly cake.
- Timing Secret for Transplants: When hardening off seedlings in Step 2, I gradually increase their outdoor time by 1 hour daily until they're out there for the full 1-2 hours before transplanting.
Frequently asked questions
Got questions about growing watermelons? You’re not alone—this sun-loving fruit has its quirks! Here are answers to the most common queries to help you cultivate the juiciest harvest.
When is the best time to plant watermelon seeds?
Watermelons thrive in warm soil, so wait until after the last frost when temperatures consistently stay above 70°F (21°C). Start seeds indoors 3–4 weeks before transplanting, or sow directly in the garden once the ground is toasty. Pro tip: Use black plastic mulch to warm the soil faster!
How long does it take for watermelons to grow?
Patience is key! From seed to harvest, watermelons typically take 70–90 days, depending on the variety. Smaller "sugar baby" types may ripen in 60–70 days, while giant heirlooms can take up to 100 days. Check for readiness by tapping the fruit—it should sound hollow and the tendril near the stem should turn brown.
What are common pests or diseases, and how do I prevent them?
Watch for cucumber beetles (they spread disease), aphids, and powdery mildew in humid climates. Prevent issues by:
- Rotating crops yearly (avoid planting in the same spot for 3+ years).
- Using row covers early in the season to deter pests.
- Watering at the base (not overhead) to reduce mildew.
- Handpicking beetles or using neem oil as a natural spray.
Can I grow watermelons in containers, or do they need a big garden?
Yes! While watermelons love space, bush varieties (like 'Sugar Baby' or 'Tiny Tim') thrive in 5-gallon containers or larger. Choose a deep pot with drainage, use a lightweight potting mix, and train vines with trellises if needed. Just ensure they get 6–8 hours of sun daily and plenty of water.
Why aren’t my watermelons ripening, even though the vines look healthy?
Several factors could be at play:
- Insufficient sunlight: Watermelons need full sun (6+ hours/day)—move plants to a sunnier spot if needed.
- Inconsistent watering: Too much or too little water stresses plants. Aim for 1–2 inches per week, especially during flowering.
- Poor pollination: Hand-pollinate if bees are scarce by gently transferring pollen with a paintbrush.
- Nutrient deficiency: Yellow leaves? Add compost or a balanced fertilizer (high in potassium).
Pro Tip:
For extra-sweet watermelons, reduce watering 1–2 weeks before harvest to concentrate sugars. And always let the fruit fully mature on the vine—early picking = bland flavor!
Wrapping up and next steps
Growing watermelon in your garden is a rewarding journey—full of sun-soaked days, vibrant vines, and the sweet taste of homegrown success! 🌞 With the right space, soil, and care, you’ll soon be slicing into juicy, ripe melons that taste better than anything store-bought.
Whether you’re a first-time gardener or a seasoned green thumb, every slice of that first harvest will feel like a victory.
Ready to dive in? Start by sketching your garden plan—mark those sunny spots, gather your supplies, and get those seeds in the ground! And if you hit a snag?
Don’t stress—your FAQs are packed with troubleshooting tips to keep those vines thriving. Now, grab your gloves and let’s grow something delicious! 🍉✨