
Picking
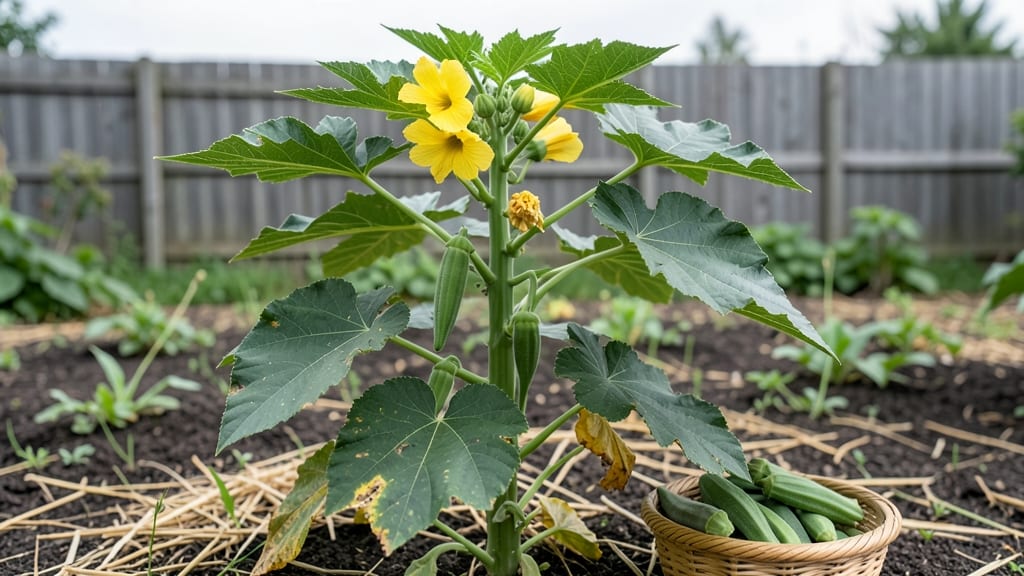
Picking okra from the garden at the right time turns a bitter, fibrous mess into a crisp, tender treasure—think 2-3 inches long and ready to snap like a fresh green bean.
Okra lovers know that timing is everything—pick too early, and you’ll get tough, bitter pods; wait too long, and the seeds take over. But mastering the perfect harvest window transforms your garden okra into a crisp, tender delight that rivals store-bought (if you can find it!).
Here’s the secret: check for glossy, deep green pods that yield slightly when pressed—those are your peak-flavor clues. Miss this window, and you’ll end up with oversized pods that turn slimy in the kitchen.
Below, I’ll show you exactly what to look for, how often to harvest, and the best time of day to avoid stressing your plants. Ready to turn your okra into a garden superstar?


3 Exact okra size checks to harvest at peak flavor
Harvesting okra at the right moment turns a simple garden task into a flavor game-changer. The difference between tender, sweet pods and woody, bitter ones often comes down to three precise checks: length, diameter, and texture.
Skipping these can mean sacrificing that crisp, fresh-from-the-plant taste everyone loves. I’ve learned the hard way—overripe okra turns into a tough, seedy mess that even frying can’t save!
Okra pods grow fast, sometimes adding an inch per day under ideal conditions. That means checking your plants every 2-3 days is key to catching them at peak perfection. The best part?
These checks take just seconds per pod, so you’ll spend more time enjoying your harvest than debating when to pick. Let’s break down the three foolproof indicators that guarantee the best flavor every time.
The first check is the easiest: pod length. Aim for pods between 2 and 3 inches. Anything shorter lacks flavor, while pods over 3 inches start developing fibrous strings and hard seeds.
Pro tip: Use a ruler or tape measure if you’re unsure—just a quick glance won’t cut it when you’re dealing with fractions of an inch. I keep a small measuring tape clipped to my gardening apron for speed.
Next, check the pod diameter. The sweet spot is between ½ and ¾ inch. Thinner pods (under ½ inch) are still developing their signature crunch, while thicker ones (over ¾ inch) become tougher and more seedy.
Pinch the pod gently between your thumb and forefinger—if it feels like a thick pencil, it’s time to harvest. Thicker pods also signal the plant is shifting energy from growth to seed production, which means fewer future harvests.
Texture is where most gardeners go wrong. A perfect okra pod should feel firm but slightly yielding—like pressing a ripe avocado. If it’s rock-hard, it’s underripe; if it’s mushy or dented, it’s overripe. Here’s a trick I learned: Hold the pod between your fingers and press lightly.
If it leaves a slight imprint, it’s ready. If not, wait another day. Overripe pods also develop a dull, waxy sheen, while ideal pods have a glossy, vibrant green finish.
Color is your final clue. Deep, glossy green pods are the gold standard, but some varieties (like Emerald or Clemson Spineless) develop subtle purple streaks when fully ripe. Avoid pods with yellowing tips or brown spots, as these indicate overmaturity or stress.
I’ve noticed that morning harvests often yield the brightest green pods—sunlight during the day can cause slight fading, so if you’re picking later, look for pods that still hold their color.
Don’t overlook the snap test, a fail-safe for doubters. Hold the pod at both ends and bend it gently. A ripe okra should snap cleanly with a slight give, almost like a fresh asparagus spear. If it bends without snapping or splinters, it’s past its prime.
This test works even for pods that look borderline—trust your ears and hands as much as your eyes. I’ve saved many a “maybe” pod with this method alone.
Timing your harvests also matters. Okra plants produce new pods every 2-3 days, so checking them daily ensures you never miss the window. I set a reminder on my phone for every morning and evening during peak season.
Early morning harvests (before 9 AM) often yield the freshest pods, as overnight humidity can slightly soften the texture. If you’re busy, even a quick weekly scan will help you spot the best candidates for
How okra growth stages affect taste and texture
Okra’s flavor and texture transform dramatically as it matures, making harvest timing a flavor science lesson in your garden. Young pods pack a crisp, sweet bite with minimal fiber, while overripe okra becomes woody and bitter as seeds develop.
Understanding these stages helps you harvest at peak quality and even boost plant productivity.
The secret lies in okra’s growth hormones. When pods reach 2-3 inches, they contain just enough natural sugars for sweetness while maintaining tender cell walls. But as they grow, lignin production (the compound that makes plants woody) kicks in, turning your okra into edible kindling.
Frequent harvesting tricks plants into focusing energy on more pods instead of seed development.
Here’s how each stage impacts your harvest:
- 🌱 Stage 1 (0-2 inches): Pods are tender and sweet but underdeveloped. Harvesting now means smaller yields but ideal texture for stir-fries and soups.
- 🌿 Stage 2 (2-3 inches): The sweet spot! Pods are crisp, mild, and packed with nutrients. This is when okra tastes most like fresh asparagus.
- 🌻 Stage 3 (3-4 inches): Texture turns mealy and fibrous. Still edible but less sweet, better suited for gumbo or pickling.
- 🌾 Stage 4 (4+ inches): Bitter and woody—the seeds dominate. Only harvest if you’re saving for seeds or composting.
Frequent harvesting—every 2-3 days—stimulates your okra plant to produce more side shoots, creating a bushier plant with a longer harvest window. Think of it like pruning tomatoes: you’re encouraging the plant to focus on fruit production rather than letting a few pods grow oversized.
Temperature also plays a role. In hot climates, okra grows faster, so check pods daily to avoid missing the 2-3 inch window. In cooler areas, pods mature slower, giving you more harvest flexibility.
Always harvest in the morning when pods are cool and crisp—this preserves texture better than harvesting in the heat.
Pro tip: Run your thumb along the pod seam—if it feels slightly spongy (like a ripe avocado), it’s ready. A hard, unyielding pod means you’ve waited too long. By mastering these cues, you’ll turn your okra plants into flavor factories all season long.