
Container Gardens
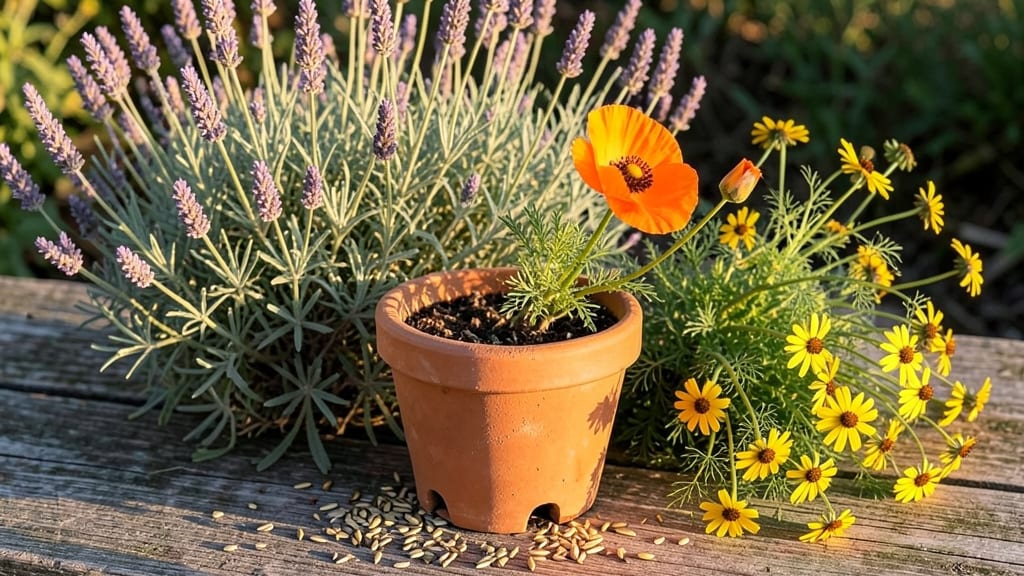
A wildflower container garden transforms even the tiniest balcony into a buzzing pollinator haven. I’ve filled my own 12-inch pots with native wildflowers that attract bees, butterflies, and hummingbirds all season long—no yard required.
The key is choosing the right mix of hardy annuals and perennials that thrive in shallow roots and bright sunlight.
You’ll need just three things: containers with drainage holes, lightweight potting mix, and a blend of wildflower seeds tailored to your climate zone. I opt for a mix of black-eyed Susans, coneflowers, and lupines—they’re drought-tolerant once established and bloom from early summer through fall.
The containers can be anything from classic terracotta to repurposed wooden crates, as long as they’re at least 6 inches deep.
By late spring, your containers will be a riot of color and movement, with bees darting between blooms and butterflies sipping nectar. The best part? These gardens need almost no maintenance—just occasional deadheading and watering when the soil feels dry.
Plus, you’ll create a mini ecosystem that supports local wildlife without taking up garden space.
Works in urban apartments, fire escapes, or even indoor sunrooms with bright windows. The only rule is to avoid invasive species—stick to native wildflowers to keep your garden thriving for years to come.
📚 In This Guide
- What you need
- Instructions
- Tips and common mistakes
- Wrapping up and next steps
What you need
- ● Container: 1 large planter (12–18 inches deep) or multiple smaller pots (at least 6–8 inches deep). Use drainage holes—no exceptions!
- ● Wildflower seeds: 1–2 seed packets (mix of native annuals/perennials like cosmos, black-eyed Susans, or milkweed). Aim for 50–100 seeds per square foot of container space.
- ● Potting soil: 1 bag of well-draining, organic potting mix (avoid garden soil—it compacts!).
- ● Compost or fertilizer: 1 cup of balanced, slow-release fertilizer (5-10-5 ratio) or compost tea.
- ○ Mulch (optional): 1 inch of straw, pine needles, or coconut coir to retain moisture.
- ● Garden trowel or small shovel (for digging and planting).
- ● Measuring cup or spoon (for soil and fertilizer).
- ● Watering can or hose with gentle spray (avoid blasting seeds!).
- ○ Gloves (optional)—wildflower seeds can be sticky!
- ○ Label or plant markers (optional)—helpful for tracking varieties.
- ● Sunlight: Choose a spot with 6+ hours of direct sun daily (most wildflowers thrive here!).
- ● Water source: Ensure easy access for daily watering until seeds germinate (then taper off).
- ● Location: Place containers where you’ll see them—wildflowers attract pollinators, and you’ll want to enjoy the show!
- ● 💡 Pro Tip: If your space gets hot, add a 50% shade cloth temporarily to protect seedlings.
- ● 🐝 Pollinator Perk: Add a small saucer of water or a shallow dish with pebbles near your container to give bees a drink!
Step-by-Step instructions for creating a wildflower container garden
Here's how to transform a small patio or balcony into a thriving pollinator haven.
Select the Right Containers and Drainage
Choose containers with drainage holes—wildflowers despise soggy roots. I prefer 12-18 inch diameter pots for this project, as they provide enough soil volume for roots to establish while remaining manageable. If your containers lack drainage, drill holes in the bottom yourself. Line the bottom with 1-2 inches of gravel to prevent soil from clogging the holes and ensure excess water escapes freely.
For a year-round display, opt for unglazed terra cotta or fiberglass pots—these materials regulate moisture better than plastic. Place a cactus liner or landscape fabric over the gravel to keep it in place while allowing water to pass through. This layering prevents root rot, which is especially critical for wildflowers that thrive in well-draining conditions.
Layer Soil for Optimal Drainage and Nutrition
Fill each container with 3-4 inches of coarse perlite or pumice on top of the gravel layer. This creates a fast-draining base that mimics wildflower native habitats. Next, add 6-8 inches of a well-draining potting mix—avoid garden soil, as it compacts and suffocates roots. I blend 50% premium potting mix with 50% coarse sand or perlite to improve aeration and prevent waterlogging.
Moisten the soil mixture thoroughly before planting. Press it down lightly to eliminate air pockets, but avoid compacting it. The goal is a loose, crumbly texture that allows roots to spread easily. For four containers, you’ll need about 1 cubic foot of this mix per pot, ensuring each has enough volume for deep-rooted wildflowers like coneflowers or black-eyed Susans.
Choose and Plant Pollinator-Friendly Wildflowers
Select a mix of native wildflowers that bloom at different times to ensure year-round color and nectar. For this project, I recommend 4-6 plants per container, combining tall varieties (3-4 feet) like coneflowers or bee balm with mid-height (1-2 feet) options like black-eyed Susans or purple coneflower. Add low-growing ground covers (6-12 inches) like creeping thyme or wild strawberries to fill gaps and prevent soil erosion.
Dig holes twice as wide as the root ball but no deeper. Place each plant at the same depth it was in its nursery pot, then backfill with soil, pressing gently to remove air pockets. Space taller plants toward the center and shorter ones toward the edges. Water deeply immediately after planting to settle the soil and encourage root contact with the moist mix.
Position for Sunlight and Water Efficiently
Wildflowers thrive in full sun (6-8 hours daily), so place your containers in the sunniest spot available. If you’re limited to partial shade, choose shade-tolerant varieties like columbine or asters. Group containers closely to create a naturalistic display while making watering easier. I place mine on a drip irrigation tray to catch runoff and deliver water directly to the soil, reducing waste.
Water deeply once a week during the first month to encourage deep root growth, then taper to every 10-14 days once established. Let the top 1-2 inches of soil dry out between waterings—wildflowers are drought-tolerant once rooted. Mulch the surface with 1 inch of gravel or bark chips to suppress weeds and retain moisture without smothering plants.
Maintain and Encourage Pollinators Year-Round
Deadhead spent blooms monthly to encourage continuous flowering. Snip back 1/3 of the plant height in early spring to promote bushier growth. Fertilize lightly in early spring with a balanced, slow-release fertilizer (5-10-5 ratio) to support new growth without encouraging leggy stems. Avoid high-nitrogen fertilizers, which favor foliage over flowers.
To extend the season, add winter-hardy varieties like sedum or hellebores to containers that stay outdoors. Bring tender perennials indoors before the first frost or protect them with burlap wraps to shield from cold winds. Watch as butterflies, bees, and hummingbirds visit your garden—this is the true reward of a well-planned wildflower container.
Tips & tricks for perfect wildflower container gardens
A few strategic adjustments will transform your containers into a thriving pollinator magnet that lasts all year. These insights come from years of trial and error—trust me, the details matter more than you think.
Container Material Matters: While terra cotta and fiberglass are ideal, don't overlook wooden half-barrels or window boxes for vertical growing. These options create stunning cascading displays while providing excellent drainage. If using plastic containers, drill extra drainage holes along the sides to prevent water pooling. The key is ensuring excess water escapes freely—wildflowers will reward you with vibrant blooms when their roots stay dry.
Soil Layering Secrets: In Step 2, when creating that fast-draining base, consider adding a thin layer of biochar beneath the perlite. This porous charcoal improves moisture retention while preventing compaction. For containers in windy locations, mix in 10% coconut coir with your sand-perlite blend—it adds structure without altering drainage. The goal is that loose, crumbly texture mentioned in the instructions, but with even better aeration for those delicate wildflower roots.
Plant Placement Strategy: When arranging your 4-6 plants per container, position the tallest varieties (3-4 feet) slightly off-center rather than in the middle. This creates visual interest and prevents shading of shorter plants. For containers with limited space, choose compact varieties like dwarf coneflower or butterfly weed—they'll thrive in the 12-18 inch pots while still attracting pollinators. The spacing instructions about twice the root ball width apply, but remember to leave extra room for air circulation between plants.
Watering Wisdom: The deep weekly watering during the first month is crucial, but here's what nobody tells you: water in the early morning to allow foliage to dry completely by evening. This prevents fungal diseases that can devastate your pollinator haven. For containers on balconies or patios, consider adding water-retaining crystals to the soil mix—they'll release moisture gradually during dry spells, giving you more flexibility with your watering schedule.
Pro Tips for Wildflower Container Garden
- A few strategic adjustments will transform your containers into a thriving pollinator magnet that lasts all year.
- Container Material Matters: While terra cotta and fiberglass are ideal, don't overlook wooden half-barrels or window boxes for vertical growing.
- Soil Layering Secrets: In Step 2, when creating that fast-draining base, consider adding a thin layer of biochar beneath the perlite.
Frequently asked questions
Got questions about creating your own wildflower container garden? You’re not alone! Here are some of the most common queries—and their answers—to help you grow a thriving pollinator paradise with ease.
What’s the best container size for wildflowers?
For most wildflowers, aim for containers at least 12–18 inches deep and 10–12 inches wide. Deeper pots (like window boxes or half-barrels) work best for taproots, while shallower trays suit smaller annuals. Pro tip: Drill drainage holes—wildflowers hate soggy feet!
When is the ideal time to plant wildflowers in containers?
Plant in early spring (after frost) or late summer (6–8 weeks before first frost). This gives roots time to establish before extreme weather. Perennials may need a head start—start seeds indoors 4–6 weeks before transplanting. Annuals? Direct-sow after soil warms (60°F+).
How do I keep my container garden thriving for pollinators year-round?
Mix native wildflowers (like coneflowers or milkweed) with seasonal bloomers (e.g., cosmos in summer, pansies in winter). Add a shallow dish of water or a bee hotel nearby. Bonus: Avoid pesticides—even “organic” ones can harm pollinators!
Why are my wildflowers wilting or dying in their container?
Check for these fixes:
- Drainage issues? Ensure pots have holes and saucers underneath.
- Overwatering? Wildflowers often thrive in dry conditions—let soil dry between waterings.
- Nutrient burn? Skip heavy fertilizers; wildflowers prefer lean soil.
- Root-bound? Divide crowded plants or repot every 2–3 years.
Can I use recycled containers (like old boots or buckets) for wildflowers?
Just ensure they’re clean, sturdy, and have drainage. Line the bottom with landscape fabric to prevent soil loss. Creative options: Colanders (for tiny annuals), teapots (for succulents), or even pallet wood planters. Just avoid treated wood—it can leach chemicals.
Wrapping up and next steps
Creating a wildflower container garden is a rewarding way to bring life, color, and pollinator support to even the smallest spaces—no matter your experience level! 🌸 With the right mix of native seeds, well-draining soil, and a little TLC, you’ll transform a humble pot into a thriving haven for bees, butterflies, and hummingbirds.
The best part? Your garden will keep giving back, season after season.
Ready to dive in? Start small—pick one container, gather your supplies, and plant with confidence. Before you know it, your balcony or patio will buzz with beauty and purpose. Happy gardening! 🌿