
Tools
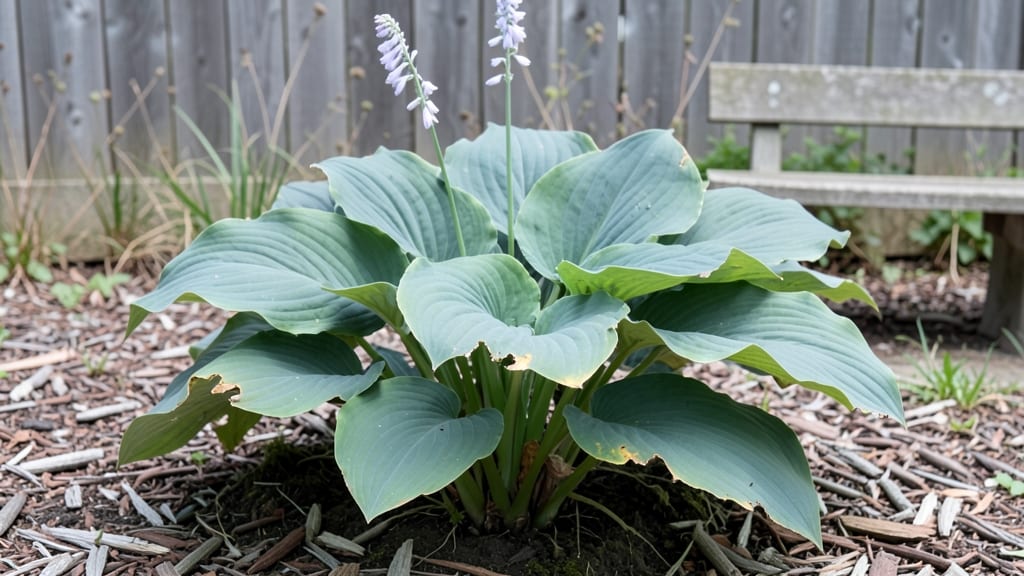
Creating a backyard secret garden turns your outdoor space into a lush, private escape where every path feels like a discovery. 🌿 I stumbled upon this idea after longing for a quiet corner that wasn’t just functional but magical—somewhere vines could climb unseen walls and fragrant herbs hid behind towering grasses.
The key isn’t just plants; it’s layering them so the garden reveals itself like a story, one step at a time.
Start with a hidden focal point—maybe a stone bench tucked behind a curtain of clematis or a tiny fountain masked by bamboo. Use vertical growth (trellises, arbors) to draw eyes upward and create pockets of shade where you can barely see the neighbors.
My first secret garden used three layers: tall privacy plants (like arborvitae), mid-height shrubs (hydrangeas, boxwood), and low creepers (ajuga, sweet woodruff) to soften the edges. The result? A space that feels like stepping into another world.
This isn’t just about looks—it’s about abundance in disguise. Plant edibles among the ornamentals (think strawberries under roses or thyme between stepping stones) so your "secret" garden also feeds you. Add DIY touches like a pebble pathway that meanders just slightly off-kilter or a birdhouse disguised as a toadstool.
The magic happens when you can’t tell where the garden ends and the fantasy begins.
Seasonal swaps keep it fresh: replace spring bulbs with summer blooms, swath autumn leaves over seating areas, and add twinkling lights for winter coziness. The best part? No one will guess how little maintenance it takes—once established, these layers thrive on neglect. Ready to design your own hidden retreat?
📚 In This Guide
- What you need
- Instructions
- Tips and common mistakes
- Wrapping up and next steps
What you need
- ● Soil & Compost: 5–10 bags of high-quality garden soil (e.g., Miracle-Gro Garden Soil) + 2–3 bags of compost (for nutrient-rich beds).
- ● Plants: Tall, dense shrubs (e.g., Bamboo, Hydrangeas, or Boxwood) – 4–6 plants.
- ● Medium-height foliage (e.g., Hostas, Ferns, or Ornamental Grasses) – 8–10 plants.
- ● Low-growing ground covers (e.g., Creeping Thyme, Ivy, or Clover) – enough to fill gaps.
- ● Flowering plants (e.g., Lilies, Roses, or Clematis) – 3–5 for color and fragrance.
- ● Mulch: 2–3 bags of cedar or pine mulch (to retain moisture and suppress weeds).
- ○ Privacy Screens (Optional): Lattice panels (2–4, depending on space).
- ● Bamboo rolls or trellises (for climbing plants like Jasmine or Wisteria).
- ● Hand Tools: Shovel, trowel, pruners, and garden gloves.
- ● Wheelbarrow (for hauling soil and plants).
- ● Measuring & Layout: Measuring tape, stakes, and string (for marking garden beds).
- ● Level (to ensure even planting).
- ● Watering: Hose with spray nozzle + watering can (for delicate plants).
- ○ Optional Extras: String lights or solar-powered path lights (for ambiance).
- ● Bench or small seating area (e.g., Adirondack chairs).
- ● Decorative stones or pebbles (for pathways or borders).
- ● Sunlight assessment: Note which areas get full sun (6+ hrs), partial shade (3–6 hrs), or full shade.
- ● Space planning: Sketch a rough layout (consider layers: tall → medium → low).
- ● Local climate check: Choose plants suited to your USDA hardiness zone.
Step-by-step instructions for creating your backyard secret garden
Here's how to craft a lush, layered retreat that feels like a hidden world.
🌿 Step 1: Define Your Garden's Core Structure
Start by marking the garden's boundaries with 4-foot wooden stakes at each corner. Use a 25-foot tape measure to ensure straight lines and right angles. This creates a solid foundation for your layered design. I like to sketch a rough layout first—this helps visualize how each layer will flow together.
Dig a 12-inch deep trench along the perimeter using a shovel, leaving space for the 6-foot tall lattice fence. This trench will anchor the fence posts securely. The deeper you dig, the more stable your garden's privacy screen will be. Press the 6 bags of gravel into the trench's bottom to improve drainage and prevent rot.
🪴 Step 2: Install the Privacy Framework
Set the 4 wooden fence posts upright in the trench, spacing them 6 feet apart. Use a level to ensure they're perfectly vertical before backfilling with the remaining gravel and soil. Hammer the posts in until they're firm—this prevents wobbling when vines climb later. Attach the 6-foot tall lattice fence to the posts using galvanized screws, leaving 4 inches of space between each panel for airflow.
Here's the thing—don't skip the wood preservative. Brush it on all exposed wood surfaces to protect against moisture and pests. The lattice will become your garden's backbone, supporting both climbing plants and your dreamy, secluded atmosphere.
☀️ Step 3: Layer the Foundation Plants
Plant the 2 clematis vines at the fence's base, spacing them 3 feet apart. Dig holes twice as wide as the root balls and 6 inches deeper to encourage deep root growth. Mix the 1 bag of compost into the soil before backfilling—this gives your vines a nutrient boost right away. Water deeply after planting to settle the soil.
Add the 4 hosta plants along the garden's perimeter, placing them 18 inches apart. These shade-tolerant workhorses will create a lush, textured border. Mulch around them with the 3 cubic feet of mulch, keeping it 2 inches away from stems to prevent rot. This layer keeps roots cool and conserves moisture.
🌱 Step 4: Build the Mid-Layer Drama
Create a 3-foot wide path down the garden's center using the 10 cubic feet of decomposed granite. This walkway guides visitors deeper into your secret space while keeping soil compacted. Plant the 6 ferns along the path's edges, spacing them 12 inches apart. Their delicate fronds add softness and contrast to the garden's structure.
Place the 2 ornamental grasses near the garden's center, giving them room to spread. These architectural plants will sway gently in the breeze, adding movement and height. Water everything thoroughly after planting—this helps roots establish quickly in the 2 gallons of liquid fertilizer you'll mix into the soil.
✂️ Step 5: Add Finishing Touches for Enchantment
Weave the clematis vines through the lattice as they grow, training them to climb upward. Prune any leggy growth to encourage bushier vines—this creates a denser privacy screen over time. Add the 2 garden benches along the path, positioning them where you'll enjoy morning coffee or evening stargazing.
Finally, scatter the 1 bag of wildflower seeds in sunny spots. These self-seeding beauties will attract pollinators and add spontaneous color. Water lightly for the first 2 weeks to help germination. Your secret garden is now a living, breathing retreat—just waiting for you to step inside.
Tips & tricks for perfect backyard secret garden design
A few key strategies will help you create a garden that feels like a magical escape rather than just another backyard.
The Layout Secret: Before you dig, sketch your garden layout on paper first. This helps visualize how each layer will flow together and prevents costly mistakes. I always mark the location of my garden benches and path first—they become the anchor points for everything else. Trust me, this saves hours of rework later!
Digging Deep Matters: When you create that 12-inch deep trench for your fence posts, don't skimp on the depth. The deeper you dig, the more stable your privacy screen will be—especially important if you live in windy areas. Press those 6 bags of gravel firmly into the trench bottom to improve drainage and prevent rot. This is where many gardeners cut corners and end up with wobbly fences later.
Plant Spacing Precision: The spacing measurements in Step 3 and Step 4 are crucial for your garden's long-term success. For the 2 clematis vines, that 3-foot spacing gives them room to spread without crowding. With the 4 hosta plants, the 18-inch spacing creates that lush, textured border we all love. I've learned the hard way that cramming plants too close leads to competition for nutrients and increased disease risk.
Seasonal Planting Strategy: If you're creating this garden in spring, consider planting your wildflower seeds in fall instead. Many wildflowers germinate better when sown in cooler weather. The 2-week light watering period you'll do after planting gives them the perfect start—just enough moisture to wake up those seeds without drowning them.
Pro Tips for Backyard Secret Garden
- A few key strategies will help you create a garden that feels like a magical escape rather than just another backyard.
- The Layout Secret: Before you dig, sketch your garden layout on paper first.
- Digging Deep Matters: When you create that 12-inch deep trench for your fence posts, don't skimp on the depth.
Frequently asked questions
Got questions about creating your own backyard secret garden? You’re not alone! Here are some of the most common queries—and their practical solutions—to help you bring your dream space to life.
What’s the best time of year to start a secret garden?
The ideal time depends on your climate! In mild zones, spring or early fall is perfect—soil is workable, and plants thrive. In hotter regions, opt for late summer or fall to avoid drought stress. Pro tip: Start with shade-tolerant plants (like ferns or hostas) if your garden is initially sun-starved!
How much does a backyard secret garden cost?
Costs vary widely: A DIY project with thrifted materials and native plants can run $50–$200, while a luxury setup with custom trellises, lighting, and rare foliage may exceed $1,000+. Prioritize privacy screens (bamboo, lattice) and mulch to stretch your budget!
Can I create a secret garden in a small space?
Vertical gardens (using wall planters or hanging baskets), tiered shelves, and compact evergreens (like boxwoods) work beautifully in tight spots. Even a 4’x4’ corner can become a lush hideaway with layered plants and strategic lighting.
How do I keep pests out of my secret garden?
Prevention is key! Use natural barriers like copper tape (for slugs), neem oil sprays, and companion planting (marigolds deter pests). Pro tip: Avoid overwatering—damp soil attracts bugs. A chicken wire wrap around young plants also helps!
What are some low-maintenance plant ideas for beginners?
Start with hardy, self-spreading plants like:
- Hosta (shade-loving, pest-resistant)
- Heuchera (colorful foliage, drought-tolerant)
- Japanese Holly Fern (thrives in shade, low care)
- Lavender (fragrant, deters pests, drought-proof)
Wrapping up and next steps
Transforming your backyard into a secret garden isn’t just about privacy—it’s about creating a magical escape that nourishes both your soul and your senses. From lush foliage to fragrant blooms, every layer you design adds depth, serenity, and even a bountiful harvest.
Whether you’re a seasoned gardener or a curious beginner, this space is your sanctuary waiting to unfold.
Ready to dive in? Start small—sketch a rough layout, gather a few key materials, and let your creativity bloom! 🌿✨ Your secret garden adventure begins today!