
Tools
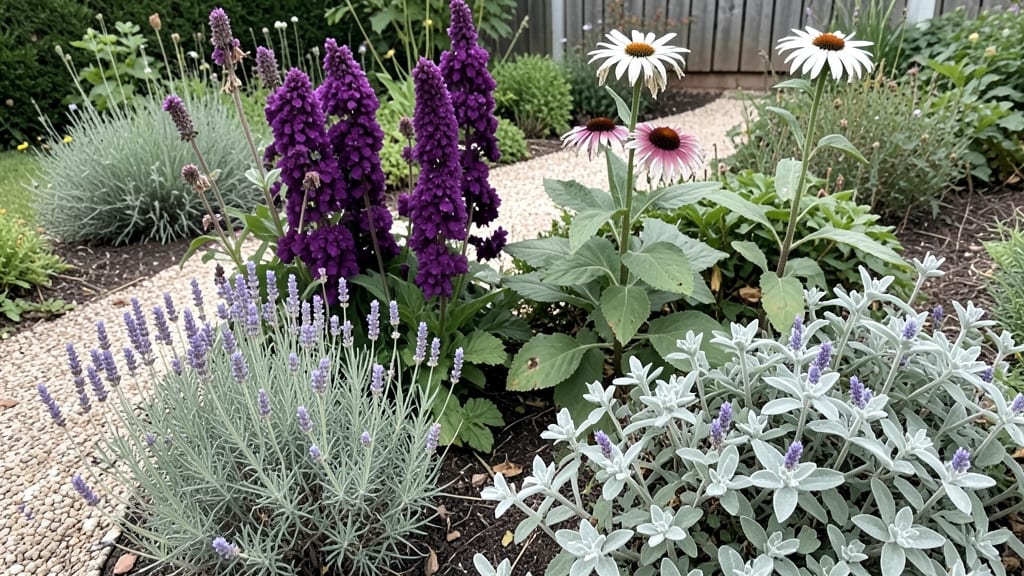
Designing a large garden layout that balances beauty and productivity starts with dividing your space into zones that work together—like a well-choreographed dance between vegetables, flowers, and relaxation spots.
I learned this the hard way after spending years rearranging my own yard, only to realize the key wasn't just what I planted, but how I grouped it. The right layout turns a chaotic yard into a functional, inviting space where every square foot earns its keep.
Think of your garden as a puzzle where sunlight, drainage, and accessibility dictate where each piece fits. Vegetable patches need full sun and easy access, while seating areas thrive in dappled shade or near evening breezes.
Hardscaping—paths, patios, and borders—connects these zones smoothly, making your garden feel intentional rather than haphazard. My first attempt used winding paths that looked pretty but made weeding a nightmare; now, straight lines guide me from task to task without wasted steps.
You’ll end up with a space that’s not just productive but also a retreat—where morning coffee becomes a ritual under the apple tree and evening strolls wind through fragrant herbs.
The layout I’ll show you balances high-yield crops near the kitchen, privacy screens along property lines, and seasonal interest that keeps the garden lively year-round. The best part? It scales to any size, whether you’ve got a quarter-acre or just a sprawling backyard.
Here’s where it gets interesting—this approach works for any style, from formal geometric beds to wild, cottage-garden charm. The secret isn’t perfection; it’s creating zones that serve your life while letting the plants do their magic. Let’s sketch out your dream layout, one strategic zone at a time.
📚 In This Guide
- What you need
- Instructions
- Tips and common mistakes
- Wrapping up and next steps
What you need
- ● Soil & Amendments: Topsoil – 10+ cubic yards (depends on garden size)
- ● Compost – 2–3 bags (or homemade compost)
- ● Mulch – 5–10 bags (wood chips or straw for pathways)
- ● Planting Supplies: Perennials/annuals – Varies by zone (check local nurseries!)
- ● Shrubs/trees – 3–5+ (for privacy & structure)
- ● Edible plants – Seeds/plants for veggies, herbs, or fruit
- ● Hardware & Structures: Fencing – 6–8 ft tall, 50–100 ft+ (vinyl, wood, or lattice)
- ● Trellises/arbors – 2–4 (for climbing plants)
- ● Garden beds/raised planters – Wooden or metal, 4’x8’ or custom
- ● Gravel/sand – 50–100 lbs (for pathways)
- ● Must-Haves: Shovel & spade
- ● Wheelbarrow
- ● Pruners & loppers
- ● Rake & hoe
- ● Measuring tape & string line
- ● Nice-to-Haves: Post-hole digger (for fencing)
- ● Garden cart (for heavy loads)
- ● String trimmer (for edging)
- ● Soil pH tester (for optimal plant health)
- ● Check local zoning laws (especially for fencing/structures).
- ● Test your soil type & drainage (DIY kits or pro lab).
- ● Plan for water access (hose, drip irrigation, or well).
- ○ Optional: Permits for major structures (trees, decks, etc.).
Instructions for designing a functional large garden layout
Here's how to organize your space for both beauty and productivity without the overwhelm.
Divide Your Space Into Four Strategic Zones
Start by sketching your garden on graph paper, using a 1-inch scale for every 10 feet of space. I always begin with the privacy zone—place tall hedges, trees, or trellises along property lines to create a natural barrier. This zone should occupy 20-30% of your total space if privacy is a priority. Next, mark the harvest zone where vegetables, herbs, and fruits will grow—this should be the largest section, ideally 40-50% of the garden.
Reserve 15-20% for the ornamental zone, where flowers, shrubs, and decorative plants add visual interest. Finally, leave 10-15% for pathways and access points. This ensures you can move through the garden without trampling plants. Use the 3-foot rule for pathways: if they're narrower, you'll struggle to carry tools or harvests, and wider paths waste valuable growing space.
Plan the Harvest Zone for Maximum Productivity
In the harvest zone, group plants by their light and water needs to simplify maintenance. Tall crops like corn or sunflowers go in the north side of the zone to avoid shading shorter plants. Place medium-height plants like tomatoes or peppers in the center, and low-growing crops such as lettuce or radishes along the south side where they’ll receive the most sunlight. I like to use raised beds here—4 feet wide by 8 feet long—because they improve drainage and make weeding easier.
Leave 18-24 inches between rows to allow for airflow and easy access with a wheelbarrow. If you're growing vining plants like cucumbers or beans, dedicate a 6-foot section to a trellis system. This not only saves space but also keeps fruits off the ground, reducing pests and disease. Label each section with stakes or a simple map to avoid confusion later—trust me, you’ll forget what’s planted where by mid-summer.
Design the Ornamental Zone for Year-Round Interest
In the ornamental zone, focus on layering plants by height to create depth and visual appeal. Start with tall perennials or shrubs like hydrangeas or lilacs along the back edge, then add medium-height plants such as daylilies or coneflowers in the middle. Fill the front with low-growing annuals or ground covers, like impatiens or creeping thyme. This arrangement ensures your garden looks lush from every angle, even when some plants are dormant.
Incorporate seasonal blooms to keep color consistent. For example, plant spring bulbs like tulips or daffodils in early spring, summer annuals like petunias or marigolds for mid-season color, and fall mums or asters for late-season interest. Add a few evergreen shrubs or ornamental grasses to provide structure and texture year-round. Mulch with 3 inches of shredded bark to suppress weeds and retain moisture—this is a game-changer for low-maintenance beauty.
Create Functional Pathways and Access Points
Design pathways using gravel, stepping stones, or decomposed granite—these materials allow water to drain easily and prevent soil compaction. For a 4-foot-wide path, use 2 feet of gravel surrounded by 1 foot of mulch or edging to keep it contained. Place pathways 12-18 inches wide between beds to allow easy access with a hose or pruners. If your garden has slopes, create switchbacks or terraces to prevent erosion and make navigation easier.
Include at least one wide access point—3 feet or wider—near the center of the garden for moving equipment like wheelbarrows or lawn mowers. Position a small gate or archway at the entrance of the privacy zone to add charm while marking the transition between public and private spaces. Avoid placing pathways directly in front of plants that need frequent harvesting, like strawberries or salad greens—you’ll want to step right into those areas when it’s time to pick.
Add Functional Features for Comfort and Utility
Incorporate a few key features to make your garden more enjoyable and practical. Place a small bench or seating area in a shaded spot, ideally near the ornamental zone, so you can relax while tending to flowers. Install a drip irrigation system along the edges of beds to deliver water efficiently—this saves time and ensures plants get consistent moisture. If space allows, add a small shed or storage bench near the harvest zone to keep tools and supplies organized and within reach.
Consider adding a fruit tree or berry bush near the edge of the privacy zone where it won’t overshadow other plants. These not only provide shade but also delicious harvests. Finally, place a windbreak—like a row of bamboo or a lattice fence—along the north or west side of the garden to protect delicate plants from harsh winds. This small addition can dramatically improve growing conditions and reduce stress on your plants.
Tips & tricks for perfect large garden layout organization
These practical strategies will help you create a garden that balances productivity, beauty, and ease of maintenance without the guesswork.
Scale and Measurement: When sketching your garden using the 1-inch scale for every 10 feet, I recommend using graph paper with 1/4-inch squares for precision. This makes it easier to visualize and adjust your 20-30% privacy zone, 40-50% harvest zone, and other proportions. If your garden has irregular shapes, use a string and measuring tape to transfer measurements accurately to your sketch before making final decisions.
Plant Grouping Strategy: In Step 2, when arranging your harvest zone, I've found that grouping plants by their water needs first—rather than just sunlight—saves time during irrigation. For example, place drought-tolerant herbs like rosemary and thyme together near the south side where they'll get maximum sun, while moisture-loving lettuces can go near your drip irrigation lines. This creates natural watering zones that simplify your routine.
Pathway Planning: For the 3-foot rule in pathways, I always add an extra 6 inches to each side of my 12-18 inch walkways when sketching. This accounts for the natural tendency to step wider when carrying tools or harvests. Consider placing your wide access points near the center of your harvest zone—this creates a natural "hub" where you can park your wheelbarrow and access multiple planting areas efficiently.
Seasonal Layering: When designing your ornamental zone, I recommend creating a simple color wheel on index cards to visualize seasonal transitions. Place spring bulbs like tulips in the front layer where they'll emerge early, then add summer annuals behind them, and finally position fall mums in the middle layer. This creates a cascading effect where each season's colors naturally complement the next without overwhelming the space.
Pro Tips for Large Garden Layout
- These practical strategies will help you create a garden that balances productivity, beauty, and ease of maintenance without the guesswork.
- Scale and Measurement: When sketching your garden using the 1-inch scale for every 10 feet, I recommend using graph paper with 1/4-inch squares for precision.
- Plant Grouping Strategy: In Step 2, when arranging your harvest zone, I've found that grouping plants by their water needs first—rather than just sunlight—saves time during irrigation.
Frequently asked questions
Got questions about designing a large garden layout?
You’re not alone! Here are answers to the most common concerns—from planning to execution—to help you create a space that’s both functional and stunning.
How do I decide which plants go where in a large garden?
Start by grouping plants with similar needs—sunlight, water, and soil type—together. Place tall crops (like sunflowers or corn) on the north or west side to avoid shading shorter plants. Use companion planting (e.g., basil with tomatoes) to boost growth and deter pests. Sketch a rough map first to visualize flow!
What’s the best time of year to start planning a large garden layout?
Ideally, begin in late winter or early spring (before planting season) to account for frost dates and soil prep. If you’re in a warm climate, fall planning works too—just adjust for your local growing zone. Pro tip: Observe your garden’s sunlight patterns for 2–3 days to map sun/shade zones accurately.
Can I design a large garden on a budget?
Prioritize mulch, compost, and native plants (they’re cost-effective and low-maintenance). Use repurposed materials (e.g., pallets for raised beds, recycled containers) and swap seeds with neighbors. Start small with high-value crops (like herbs or leafy greens) to test layouts before expanding.
How do I handle uneven terrain in a large garden?
Uneven ground? No problem! Level small areas with a rake, or use raised beds or berms to create defined zones. For slopes, build contour lines or terraces to prevent erosion. If drainage is poor, amend soil with sand or install a French drain in problem areas.
What’s the easiest way to add privacy to a large garden?
Mix fast-growing hedges (like arborvitae or bamboo), tall grasses, or trellised climbers (e.g., clematis or wisteria) for natural screens. For quick solutions, use privacy fencing, lattice panels, or living walls. Place these along property borders or near seating areas to maximize impact.
What tools do I really need for a large garden layout?
Essentials include:
- A wheelbarrow (for hauling soil/mulch)
- A stake and string kit (for marking layouts)
- A shovel and transplanter (for digging)
- A level and measuring tape (for precision)
- Pruners and garden gloves (for maintenance)
Wrapping up and next steps
Designing a large garden layout is all about balancing beauty, function, and your personal vision—whether that’s a thriving harvest, serene privacy, or both! 🌿 By strategically zoning your space, you’ve taken the first steps toward creating a space that’s as productive as it is peaceful.
Now, it’s time to roll up your sleeves, gather your tools, and let your creativity bloom.
Ready to transform your garden into a showcase of nature’s bounty? Start small—sketch a rough plan, test soil health, or even just plant a few seeds in your designated zones. Every expert gardener began with a single step, so trust the process and enjoy the journey!