Container Gardens
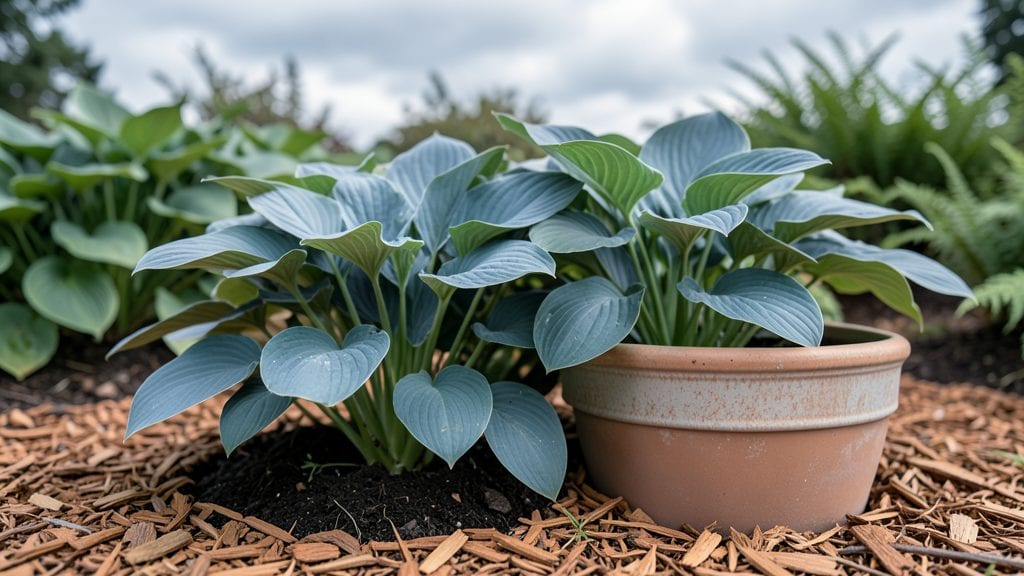
Container perennials gardening transforms your patio into a vibrant, low-fuss retreat where tough, blooming plants thrive from spring through fall—some even surviving winter’s quiet beauty—and. the secret isn’t complicated: the right plants, the right pots, and a little seasonal tweaking.
The best container perennials are the ones that thrive in tight spaces and don’t demand constant attention—think heuchera with its velvety leaves, lavender that stays fragrant and compact, or sedum that practically grows itself.
You’ll need containers with drainage, a well-draining potting mix, and a sunny spot (or shade, depending on the plants). Watering’s the only real chore, but even that gets easier once you establish a routine.
By late summer, your containers will be packed with blooms, foliage, and maybe even a few winter-hardy evergreens. The best part? You skip the annual replanting and still get bold, seasonal interest—no deadheading required.
I’ll show you how to mix textures, colors, and heights for containers that look intentional, not like an afterthought.
Works for balconies, fire escapes, or even a small porch—no yard needed. Let’s get those perennials planted in pots that’ll outlast the season.
📚 In This Guide
- What you need
- Instructions
- Tips and common mistakes
- Wrapping up and next steps
What you need
- ● Containers: 1–3 large pots (12–18 inches deep) with drainage holes. Choose materials like ceramic, fiberglass, or lightweight plastic.
- ● Potting Mix: 3–5 gallons of high-quality, well-draining container-specific mix (avoid garden soil—it compacts!).
- ● Perennial Plants: 3–5 low-maintenance perennials (e.g., Heuchera, Sedum, Salvia, or Russian Sage). Pick varieties suited to your climate zone.
- ● Drainage Layer: 1–2 inches of gravel, perlite, or broken pottery pieces per container.
- ○ Slow-Release Fertilizer: 1–2 tbsp per plant (optional but recommended for nutrient boost).
- ● Mulch: 1–2 inches of organic mulch (e.g., shredded bark or coconut coir) to retain moisture.
- ● Garden Gloves: 1 pair (to protect hands from thorns or rough edges).
- ● Trowel or Small Shovel: For planting and mixing soil.
- ● Watering Can or Hose with Nozzle: With a gentle spray setting for even watering.
- ○ Pruners (Optional): Small, sharp pruners for minimal trimming (if needed).
- ○ pH Test Kit (Optional): To check soil acidity (ideal range: 6.0–7.0 for most perennials).
- ● Sunlight Assessment: Know your space’s light conditions (full sun, partial shade, or full shade).
- ● Weather Check: Plant in spring or early fall (avoid extreme heat or frost).
- ● Drainage Plan: Ensure containers won’t sit in standing water (elevate if needed).
Step-by-Step guide to designing low-maintenance container perennial gardens
Here’s how to create vibrant, self-sustaining container displays that thrive with minimal pruning and year-round interest.
Select the Right Containers and Drainage System
Choose containers with at least one drainage hole—perennials despise soggy roots. I prefer 12-18 inch diameter pots for four plants, as they provide enough root space while keeping the design cohesive. Terra cotta or fiberglass pots regulate moisture better than plastic, but add a saucer underneath to catch excess water and prevent staining.
If your container lacks drainage, drill ¼-inch holes in the bottom and line the interior with landscape fabric to prevent soil from washing out. For a cohesive look, select pots with similar shapes and textures—mismatched containers create visual clutter. I often use a 6-inch layer of gravel at the bottom before adding soil to improve drainage further.
Layer Soil for Optimal Root Health
Fill the container with a 50/50 mix of high-quality potting soil and perlite or coarse sand to ensure aeration. The perlite prevents compaction, which is critical for perennials that need deep root systems. I always add a handful of slow-release fertilizer (like 10-10-10) to the bottom layer to feed roots gradually over the season.
Leave 1-2 inches of space between the soil surface and the container’s rim—this prevents overflow when watering and allows for mulch. Tap the container gently to settle the soil, but avoid compacting it. The ideal mix should feel like a damp sponge, holding moisture without becoming waterlogged.
Choose Perennials for Complementary Growth Habits
Group plants by height, sunlight needs, and bloom time to create a balanced, long-lasting display. For example, pair a tall ornamental grass (like fountain grass) at the back with a mid-height shrub (like lavender) and spiller plants (like creeping thyme) at the edges. This ensures no plant is overshadowed or crowded.
Select perennials with similar water requirements—mixing drought-tolerant sedum with moisture-loving heuchera will lead to uneven growth. I recommend three to five plants per container to allow airflow and reduce competition. Space smaller plants 3-4 inches apart and larger ones 6-8 inches away from the container’s edge.
Plant and Water for Immediate Establishment
Dig holes twice as wide as the root ball but only as deep as the container’s existing soil line. Gently tease apart roots if they’re circling, then place each plant in its hole and backfill with soil, pressing lightly to eliminate air pockets. Water deeply until it drains from the bottom—this settles the soil and encourages roots to spread outward.
After planting, apply a 1-inch layer of mulch (like shredded bark) to retain moisture and suppress weeds. Avoid piling mulch against plant stems, as this can cause rot. Within 2-3 weeks, you’ll see new growth signaling the plants have established. This is the moment they’ll start thriving with minimal intervention.
Position for Light and Maintain Seasonal Care
Place containers where they’ll receive at least 6 hours of sunlight daily, adjusting based on the plants’ needs. Most perennials prefer morning sun and afternoon shade in hot climates. Rotate containers quarter-turn weekly to ensure even growth—you’ll notice plants leaning toward light if neglected.
Water deeply once a week (or more in extreme heat) until water runs from the drainage hole. Perennials in containers dry out faster than in-ground plants, so check soil moisture 1 inch below the surface—if it’s dry, it’s time to water. Fertilize once in early spring with a balanced formula, then let the plants focus on blooming and growth.
This approach ensures your container perennials stay vibrant with minimal pruning, as the right plant combinations naturally complement each other.
Tips & tricks for perfect container perennial gardens
A few strategic choices can transform your container perennials from ordinary to extraordinary with minimal effort. These insights will help you create displays that stay vibrant all season long.
Container Selection Wisdom: When choosing containers in Step 1, prioritize materials that match your climate. Terra cotta works beautifully in cooler climates as it breathes moisture, while fiberglass containers excel in hotter areas where they won't overheat. For containers without drainage holes, consider adding a self-watering reservoir system by placing a waterproof tray beneath the gravel layer—this creates a built-in water supply that can last weeks between waterings. The key is balancing aesthetics with functionality while ensuring your plants' root zones stay healthy.
Soil Mix Precision: In Step 2, the 50/50 soil mix is non-negotiable for perennials, but the quality matters just as much as the ratio. I recommend using a premium potting mix with added mycorrhizal fungi, which helps roots establish more quickly. For containers in particularly hot climates, consider adding a 10% vermiculite component instead of sand—it holds moisture better while still preventing compaction. When tapping the container to settle soil, do it gently over the sides rather than the center to avoid creating air pockets that could suffocate roots.
Plant Placement Strategy: The three-to-five plant guideline in Step 3 is perfect, but arrangement matters just as much as quantity. Place your tallest plants toward the back center of the container, not the edges, to create a natural focal point. For containers placed against walls or fences, position your tallest plants toward the front to prevent them from being obscured. When spacing plants, consider their mature size—what looks perfect now might become crowded in six months. I often create a rough sketch of my container layout before planting to visualize the final arrangement.
Watering Technique: The deep watering instruction in Step 4 is crucial, but how you water matters just as much as how much. Water slowly in a circular motion to encourage even moisture distribution throughout the soil. For containers with multiple drainage holes, water from different directions to ensure all areas receive hydration. In particularly hot weather, I recommend watering in the early morning to allow foliage to dry before evening, which helps prevent fungal diseases. The 1-inch mulch layer will help maintain consistent moisture levels between waterings.
Pro Tips for Container Perennials Gardening
- A few strategic choices can transform your container perennials from ordinary to extraordinary with minimal effort.
- Container Selection Wisdom: When choosing containers in Step 1, prioritize materials that match your climate.
- Soil Mix Precision: In Step 2, the 50/50 soil mix is non-negotiable for perennials, but the quality matters just as much as the ratio.
Frequently asked questions
Got questions about container perennials? You're not alone! Here are some of the most common concerns—and their easy solutions—to help you create a thriving, low-maintenance garden in pots.
What are the best low-maintenance perennials for containers?
Look for hardy, drought-tolerant varieties like heuchera (coral bells), sedum (stonecrop), lavender, or Russian sage. These thrive in pots with minimal pruning and often bloom for months. Pair them with evergreen foliage like hebe or dwarf boxwood for year-round structure.
When is the best time to plant perennials in containers?
Plant in early spring (after the last frost) or early fall (6-8 weeks before the first frost) for the best root establishment. Avoid summer heatwaves, which can stress newly planted perennials. If repotting, do it in spring to encourage fresh growth.
How often should I water container perennials?
Containers dry out fast—check soil moisture daily in hot weather. Water deeply until it drains from the bottom, then let the top inch dry out before watering again. Use self-watering pots or mulch (like shredded bark) to retain moisture. Overwatering is just as harmful as underwatering!
What pests should I watch for in potted perennials?
Common culprits include aphids, spider mites, and slugs. Inspect leaves regularly for holes, webbing, or sticky residue. Treat aphids with a soapy water spray; deter slugs with copper barriers or diatomaceous earth. Healthy plants with good airflow resist pests better!
Can I reuse the same container soil year after year?
Nope! Soil compacts and loses nutrients over time. Refresh your mix by removing the top 2-3 inches of old soil and replacing it with new potting mix (or a 50/50 blend of garden soil and compost). Sterilize containers annually with a 10% bleach solution to prevent disease.
How do I protect container perennials in winter?
Move pots to a protected spot (like a garage or under eaves) or wrap them in bubble wrap for insulation. Water sparingly in winter—just enough to keep soil from drying out completely. Evergreens may need extra protection from windburn; use burlap wraps if needed.
Wrapping up and next steps
Container perennials are your ticket to low-maintenance, vibrant gardens that thrive year after year! By choosing the right plants—like heuchera, sedum, or salvia—and mastering simple care tips, you’ll enjoy colorful blooms with minimal pruning.
Whether you’re a beginner or a seasoned gardener, these hardy plants bring beauty to patios, balconies, and small spaces effortlessly.
Ready to transform your outdoor space? Start by selecting 2-3 perennials that complement each other in color and sunlight needs, then grab a container and get planting! 🌱 With the right setup, your garden will reward you with seasonal interest and resilience—no green thumb required.