
Tools
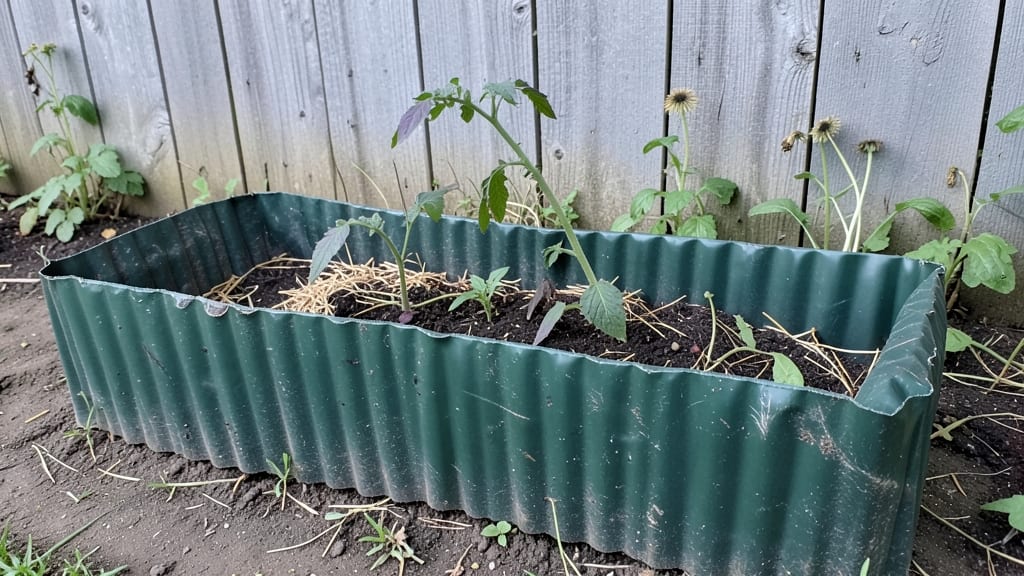
My corrugated raised garden beds transformed my tiny backyard into a thriving vegetable patch—no digging, no weeds, and no back pain. These sturdy planters are built from simple materials you can source at any hardware store, making them perfect for renters, small spaces, or anyone tired of battling compacted soil.
The corrugated design adds unexpected strength while keeping costs low, and you can customize the size to fit even the narrowest patio or balcony.
I built mine in under an hour using basic tools, and the results speak for themselves: deeper soil, fewer pests, and crops that outperform anything I’ve grown in the ground.
The beauty of corrugated beds is how they solve real problems: poor drainage, soil compaction, and limited space. By stacking or arranging them in modules, you create a garden that adapts to your layout—not the other way around.
My 4-foot by 8-foot bed fits perfectly against my fence, and the corrugated sides prevent soil from spilling out while adding structural integrity. Plus, the material resists rot better than wood, so these beds last for years with minimal upkeep.
For gardeners with mobility issues or bad knees, the raised height means no more bending over—just reach in and harvest.
What you’ll love most is how these beds improve soil quality from day one. Fill them with a mix of compost, topsoil, and organic matter, and you’ll create a fertile growing environment where plants thrive.
My tomatoes, peppers, and herbs produce more consistently than ever, and the soil stays looser and warmer than in-ground plots. The corrugated design also allows for better airflow at the roots, reducing the risk of fungal diseases.
By the end of the season, you’ll have a system that’s not just functional but also beautiful—think neat lines, clean edges, and a garden that actually fits your space.
Whether you’re a first-time gardener or a seasoned pro looking to maximize efficiency, corrugated raised beds deliver. They’re lightweight enough to move if needed, durable enough to last, and versatile enough to grow everything from lettuce to dwarf fruit trees.
Start with a single bed, and you’ll wonder how you ever gardened any other way. Let’s get building—your future harvests will thank you.
📚 In This Guide
- What you need
- Instructions
- Tips and common mistakes
- Wrapping up and next steps
What you need
- ● Corrugated metal sheets – 2–4 sheets (24"–36" wide, 4–8 ft long; gauge 26 or 29 for durability).
- ● Galvanized or stainless steel screws – 1 lb box (1.5"–2" long, coarse thread for grip).
- ● Wooden stakes or rebar – 4–6 pieces (½" diameter, 18"–24" long) for anchoring.
- ● Landscape fabric or hardware cloth – 1 roll (to block weeds/rodents if using metal alone).
- ● Soil mix – 2–3 cubic feet per square foot of bed (compost, topsoil, and perlite/sand blend).
- ● Measuring tape, pencil, and level – For precision cuts and even assembly.
- ● Drill/driver (with metal drill bit attachment).
- ● Tin snips or metal shears (for clean corrugated cuts).
- ● Safety glasses and gloves (metal edges are sharp!).
- ● Post hole digger or auger (if anchoring stakes deeply).
- ● Wheelbarrow or tarp (for hauling soil).
- ● Wooden slats or lattice – For extra stability or a rustic look.
- ● Paint or powder coating – To protect metal from rust (choose non-toxic options!).
- ● Drip irrigation kit – For hassle-free watering.
- ● Garden edging – To define the bed neatly.
Step-by-Step instructions for building a corrugated raised garden bed
This method transforms simple corrugated sheets into a durable, low-maintenance planter that lasts years with minimal effort.
Measure and Cut Corrugated Sheets to Size
First, decide on your bed dimensions—most gardeners use 4 feet by 8 feet for easy access and efficient space. Measure and mark your corrugated sheets with a pencil, accounting for 12-inch overhangs on the sides if you want to bury the edges for stability. Use a utility knife to cut along the ridges for clean, precise lines. I always wear gloves for this step; the edges can be sharp and the material resists smooth cutting.
For a 4-foot-wide bed, you’ll need two 4-foot-wide sheets stacked vertically. Cut the length to 8 feet (or your desired length) plus 2 extra feet for end caps. Test-fit the pieces before finalizing cuts—this ensures the bed will assemble neatly without gaps. If you’re building multiple beds, cut all sheets to the same dimensions first to save time.
Assemble the Bed Frame
Lay two sheets side by side to form the base. Overlap the edges by 1-2 inches and secure them with 1-inch deck screws every 12 inches along the ridges. Pre-drill holes to prevent splitting the corrugated material. For extra strength, add a third sheet on top of the base sheets, screwing it down in the same pattern. This triple-layer base won’t sag under soil or plants.
Next, attach the end caps by screwing them vertically to the sides of the base. For a 4-foot-wide bed, cut the end caps to 4 feet tall (or slightly taller if you want to bury the edges). Reinforce the corners by adding 2x4 lumber inside the bed at each corner, screwed into the corrugated sheets. This hidden support keeps the structure rigid and prevents warping over time.
Reinforce and Add Stability
To prevent the bed from tipping or shifting, bury the bottom 4-6 inches into the ground along the perimeter. Dig a shallow trench where the bed will sit, then lower it in and backfill with soil, tamping firmly to secure it. If you’re placing the bed on a patio or deck, skip burying and instead screw L-brackets to the underside of the corners for added stability.
For long-term durability, line the inside of the bed with landscape fabric before adding soil. Staple the fabric to the corrugated walls to keep it in place. This prevents weeds from growing up through the bottom and helps retain moisture in the soil. Leave a 2-inch border of fabric at the top to make future soil additions easier.
Fill with Soil and Prepare for Planting
Fill the bed with a mix of topsoil and compost in equal parts—this gives plants the nutrients they need while improving drainage. I like to add a 2-inch layer of coarse sand at the bottom first to enhance drainage, especially if your site has heavy clay soil. Tamp the soil lightly as you fill the bed to eliminate air pockets and ensure even settling.
Leave 1-2 inches of space at the top to accommodate watering and mulch. Water the soil thoroughly after filling to help it compact naturally. Let it sit for 24 hours before planting; this allows the soil to settle and prevents roots from floating to the surface. Once settled, you’re ready to add mulch and plants—your corrugated bed is now a sturdy, long-lasting planter.
Maintain and Protect Your Bed
Water the bed deeply 2-3 times per week, depending on your climate, and always water at the base to avoid eroding the soil. Corrugated material resists rot, but the soil inside can dry out faster than ground-level beds, so monitor moisture closely. In hot, dry weather, mulch with 2-3 inches of straw or wood chips to retain moisture and suppress weeds.
Every 2-3 years, refresh the soil by adding a 1-inch layer of compost on top. This keeps nutrients high without disturbing the corrugated structure. If you notice screws loosening over time, tighten them as needed—corrugated material holds screws well, but shifting soil can cause them to work loose. With proper care, your bed will stay sturdy for 5-10 years or more.
Tips & tricks for perfect corrugated raised garden beds
Building a sturdy corrugated raised garden bed is all about attention to detail—these tips will help you avoid common pitfalls and create a planter that lasts for years.
Precision Cutting is Key: When cutting your corrugated sheets in Step 1, use a sharp utility knife and cut along the ridges for clean lines. I learned this the hard way—rough edges make assembly difficult and can create gaps where soil might escape. Mark your cuts with a pencil first, and always wear gloves to protect your hands. For longer beds, consider using a straightedge or speed square to ensure perfectly straight cuts every time.
Screw Placement Matters: In Step 2, when attaching your sheets with 1-inch deck screws, space them every 12 inches along the ridges. This spacing prevents sagging over time. I recommend pre-drilling holes to avoid splitting the corrugated material, especially near the edges. For extra reinforcement, add a third sheet on top of your base—this triple-layer approach creates a base that won't bow under the weight of soil and plants.
Soil Settling is Critical: After filling your bed in Step 4, the 24-hour settling period is essential. This allows the soil to compact naturally and prevents roots from floating to the surface when you plant. I usually water the soil thoroughly after filling, then let it sit uncovered for that full day. You'll notice the soil level drops slightly—this is normal and makes room for your plants' roots to establish properly.
Optional Stability Upgrades: If you're placing your bed on a patio or deck (rather than burying it), consider adding L-brackets to the underside of the corners in Step 3. These metal brackets provide extra support and prevent tipping, especially in windy conditions. For even more stability, you can also screw small wooden blocks to the bottom corners before assembling the frame—this creates a wider base that resists shifting over time.
Pro Tips for Corrugated Raised Garden
- Building a sturdy corrugated raised garden bed is all about attention to detail—these tips will help you avoid common pitfalls and create a planter that lasts for years.
- Precision Cutting is Key: When cutting your corrugated sheets in Step 1, use a sharp utility knife and cut along the ridges for clean lines.
- Screw Placement Matters: In Step 2, when attaching your sheets with 1-inch deck screws, space them every 12 inches along the ridges.
Frequently asked questions
Got questions about building and maintaining your corrugated raised garden? You’re not alone—this innovative gardening method is packed with practical perks but can raise a few curiosities. Here are answers to the most common queries to help you grow with confidence!
What’s the best material for corrugated raised garden beds?
Corrugated metal (like galvanized steel or aluminum) is the classic choice—it’s sturdy, weather-resistant, and easy to customize. For a lighter option, consider corrugated plastic or even wooden slats (like cedar or redwood) for a rustic look. Avoid treated wood with high chemical content, as it can leach into your soil.
How long do corrugated raised garden beds last?
With proper care, corrugated metal beds can last 10–20 years, while plastic versions typically last 5–10 years before UV degradation. To extend lifespan, avoid placing them directly on bare soil (use landscape fabric or pavers underneath) and store them indoors during harsh winters if possible.
Can I build a corrugated raised garden without screws or nails?
Use corrugated fasteners (like pop rivets or self-tapping screws designed for metal/plastic) for a secure fit. For a no-drill approach, opt for interlocking plastic panels or stackable wooden slats with corner brackets. Just ensure your design can handle wind or weight without collapsing.
What’s the ideal height for a corrugated raised bed?
Aim for 6–12 inches tall—this height improves drainage, reduces weed pressure, and makes harvesting easier. If you’re using corrugated metal, 12–18 inches works well for deeper-rooted veggies (like tomatoes or carrots). Pro tip: Add a drip irrigation system along the sides for even watering!
How do I fix a leaking or rusting corrugated bed?
For rust, sand the area, apply a metal primer, and coat with rust-resistant paint. If your bed is leaking, check for gaps between panels—seal with silicone caulk or replace damaged sections. For plastic beds, reinforce weak spots with duct tape or metal strapping temporarily until you can replace the panel.
Can I use a corrugated raised bed in cold climates?
Yes! Corrugated metal beds handle freezing temps well, but add insulation (like straw mulch or bubble wrap) to protect roots in extreme cold. In winter, you can even extend your growing season by covering the bed with a cold frame or row cover. Just avoid placing heavy snow loads on thin plastic beds.
Wrapping up and next steps
Building a corrugated raised garden bed is a game-changer for small spaces—offering durability, affordability, and easy customization without the hassle. Whether you're a beginner or a seasoned gardener, these beds maximize growing potential while keeping maintenance simple. 🌱
Ready to transform your garden? Start by gathering your materials, follow the steps with confidence, and soon you’ll be harvesting fresh produce in style. Happy planting!
- Next step: Sketch your garden layout and measure your space before assembling.
- Pro tip: Add a layer of cardboard or landscape fabric to suppress weeds effortlessly.