Pruning
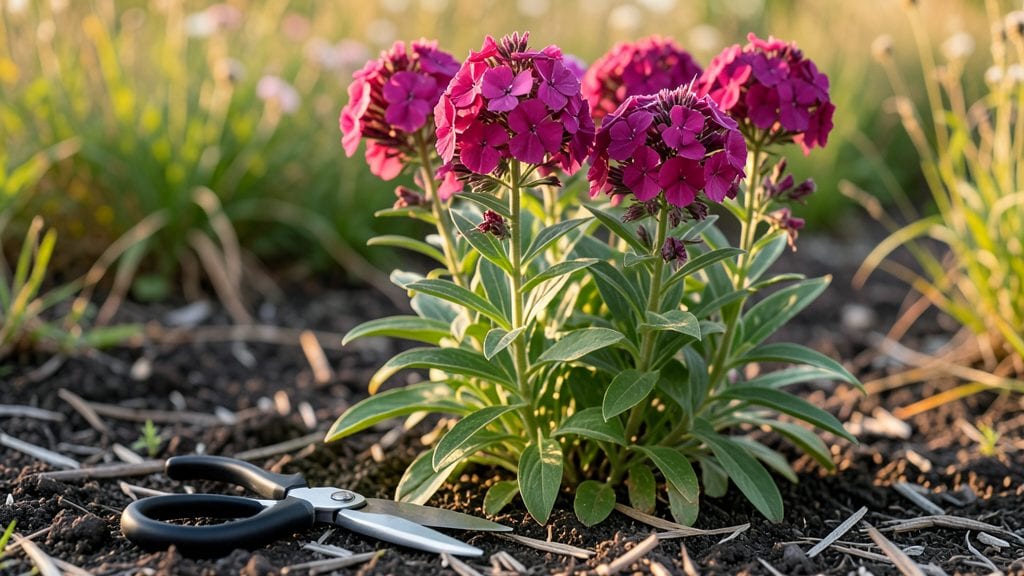
The secret to deadheading garden phlox lies in a single, strategic snip that transforms your late-summer garden from a fading display into a vibrant, long-lasting showstopper. ✨ I’ve watched phlox go from drooping stems to weeks of fresh blooms just by removing spent flowers—it’s that simple, but the timing and technique matter more than most gardeners realize.
You’ll need just three things: sharp pruners (or clean scissors), a sunny morning for the job, and a clear understanding of where to cut—right above the next set of leaves, never into the woody stems.
The payoff? Extended blooming, stronger stems, and plants that look healthier well into fall. Even my first attempt last summer produced results I didn’t expect.
This method works for all phlox varieties, from compact border types to towering garden phlox, and adapts to your schedule—whether you prefer a quick weekly trim or a deeper cut every few weeks.
The key is consistency: a little effort now means fewer wilted blooms and more time enjoying your garden’s peak season.
For those with busy schedules, I’ll share how to spot the perfect moment to cut and which varieties benefit most from this technique. No guesswork, just reliable results that turn deadheading from a chore into a game-changer for your late-summer garden.
📚 In This Guide
- What you need
- Instructions
- Tips and common mistakes
- Wrapping up and next steps
What you need
- ● Pruning shears or sharp bypass pruners – Choose a pair with clean, sharp blades (4-6 inch blades work best for precision). Pro tip: Disinfect with rubbing alcohol before and after use to prevent disease spread! 💡
- ● Gloves – A pair of gardening gloves (nitrile or leather) to protect your hands from thorns and dirt.
- ● Trash bag or bucket – A small container to collect spent blooms and debris.
- ● Water spray bottle or hose – For a quick rinse of tools and hands post-pruning.
- ● Hand pruners or small scissors – For delicate stems or tight spaces.
- ● Knee pad or stool – If your phlox is tall or ground-level pruning is uncomfortable.
- ● Garden twine or rubber bands – To bundle stems for easier disposal.
- ● Fertilizer or compost – A light dose of balanced fertilizer (10-10-10) or compost afterward can give your phlox a post-pruning boost! ✨
Deadheading garden phlox: revitalize blooms with this simple snip technique
Here's how to keep your phlox flowering all summer with just a few minutes of work.
✂️ Step 1: Wait for the Right Moment
Deadhead phlox only after the flowers have fully opened and begun to fade. Look for blooms that have lost their vibrant color and show dried petals—these are ready for trimming. I always check in the morning when dew is present, as the flowers are easier to see and handle.
Never cut fresh, fully open blooms. They're still attracting pollinators and contributing to your garden's ecosystem. The goal is to remove only the spent flowers while leaving healthy ones intact. This ensures continuous blooming without shocking the plant.
✂️ Step 2: Use the Right Cutting Technique
Grab your clean, sharp pruners and make a diagonal cut just above the first set of healthy leaves below the faded bloom. This encourages new growth from that node. I like to angle my cuts slightly to prevent water from pooling on the stem, which can cause rot.
Be precise—cutting too close to the leaves can damage the plant, while cutting too high removes potential growth points. Aim for a spot where you can see fresh green leaves emerging. This is where new blooms will form, so accuracy matters.
✂️ Step 3: Remove Only the Spent Blooms
Hold each flower cluster gently and pinch off only the faded blooms with your fingers or pruners. Avoid cutting into the stem unless absolutely necessary. I find that deadheading by hand gives me better control, especially for delicate phlox varieties.
Leave the green seed pods if you want more plants next year, but remove them if you prefer bushier, more abundant blooms. The choice depends on whether you want to propagate or maximize current-season flowers. Either way, keep the rest of the plant intact.
✂️ Step 4: Clean Up and Monitor Progress
After deadheading, shake off any petals or debris from your pruners and store them in a clean, dry place. This prevents the spread of disease. I like to wipe the blades with rubbing alcohol between cuts for extra hygiene.
Watch your phlox over the next few days. You should see new buds forming at the nodes where you made your cuts. If you notice any wilting or yellowing leaves, it could signal over-pruning or disease—adjust your approach accordingly.
⏰ Step 5: Repeat Weekly for Continuous Blooms
Phlox blooms continuously, so repeat the deadheading process every 7-10 days to maintain fresh flowers. Set a reminder or tie it to your regular garden maintenance routine. I find that deadheading right after a rain shower makes the job easier and keeps the plant hydrated.
By the end of summer, your phlox will look fuller and more vibrant than ever. The key is consistency—just a few minutes of effort each week pays off with weeks of beautiful blooms. Plus, you'll encourage stronger stems and healthier growth for next season.
Tips & tricks for perfect phlox deadheading
A few simple tricks will help you extend your phlox blooms all season long.
Timing Secret: The 7-10 day window between deadheadings is crucial. I've found that morning is the best time to work—dew makes the spent blooms easier to spot and the plants are fully hydrated. If you're short on time, aim for every 10 days rather than 7, but don't go beyond that or you'll miss the optimal growth window.
Precision Cutting: In Step 2, when making your diagonal cut, aim for about a 45-degree angle. This creates a larger surface area for water absorption and prevents rot. I like to make the cut just above where the stem meets the first set of healthy leaves—this is where new growth will emerge. If you're unsure, count the nodes from the base of the plant to find the perfect spot.
Hand vs Tools: While pruners work well, I often use my fingers for delicate phlox varieties. This gives me better control and prevents accidental damage to nearby buds. Just be gentle—phlox stems are more fragile than they look. For larger clusters, I'll use pruners for the main stems and fingers for the smaller blooms.
Monitoring Progress: After deadheading, keep an eye on the nodes where you made your cuts. You should see new buds forming within 3-5 days. If you don't see any growth after a week, you might have cut too close to the leaves or the plant needs more water. A quick check of the soil moisture can help determine if it needs hydration.
Pro Tips for Deadheading Garden Phlox
- A few simple tricks will help you extend your phlox blooms all season long.
- Timing Secret: The 7-10 day window between deadheadings is crucial. I've found that morning is the best time to work—...
- Precision Cutting: In Step 2, when making your diagonal cut, aim for about a 45-degree angle. This creates a larger s...
Frequently asked questions
Got questions about deadheading garden phlox? You’re not alone! Here are answers to the most common concerns—plus a few pro tips to keep your phlox thriving.
When is the best time to deadhead garden phlox?
Deadhead phlox as soon as blooms fade—ideally in the morning when flowers are dry. For late-summer bloomers, continue until late August to encourage a second flush. Avoid cutting into woody stems; aim for just above a leaf node or bud. Pro tip: Use sharp shears for clean cuts to prevent disease.
Can I deadhead phlox too much?
Yes! Over-deadheading can stress the plant, especially if you cut into old wood or remove too many stems at once. Focus on spent blooms and avoid pruning more than 1/3 of the plant’s height in a single session. If phlox looks leggy, a light trim in early spring (before new growth) can help rejuvenate it.
What if my phlox stops blooming after deadheading?
If blooms taper off, check these fixes:
- Light levels: Phlox needs 6+ hours of sun daily.
- Watering: Keep soil consistently moist but not soggy.
- Fertilizer: Apply a balanced 10-10-10 or low-phosphorus formula in early spring.
- Pests/disease: Inspect for aphids, powdery mildew, or leaf spots.
Are there alternatives to deadheading phlox?
If deadheading feels tedious, try these low-maintenance options:
- Leave seed heads: For winter interest, let a few blooms go to seed (then trim in early spring).
- Use bloom boosters: Deadhead only the worst spent blooms and let others self-seed.
- Plant companions: Pair phlox with self-cleaning perennials (like coneflowers) to reduce upkeep.
Why does my phlox look ragged after deadheading?
Ragged growth often means you cut too aggressively. Always snip just above a leaf node or bud—never into bare stems. If the plant looks sparse, it may need renewal pruning: Cut back 1/2 the plant’s height in early spring. Over time, phlox will bounce back with fresh, bushy growth!
Wrapping up and next steps
Deadheading garden phlox is a game-changer for keeping your garden vibrant and blooming all season long! 🌸 With just a few simple snips, you’ll encourage more flowers, stronger stems, and healthier plants. Whether you’re a seasoned gardener or just starting out, this technique is easy and rewarding.
Now that you’re ready to tackle deadheading, grab your pruners and get out there! Try it on one section of your garden first, observe the results, and soon you’ll be a pro. Happy gardening—your phlox will thank you with nonstop blooms! 🌿✂️