
Tools
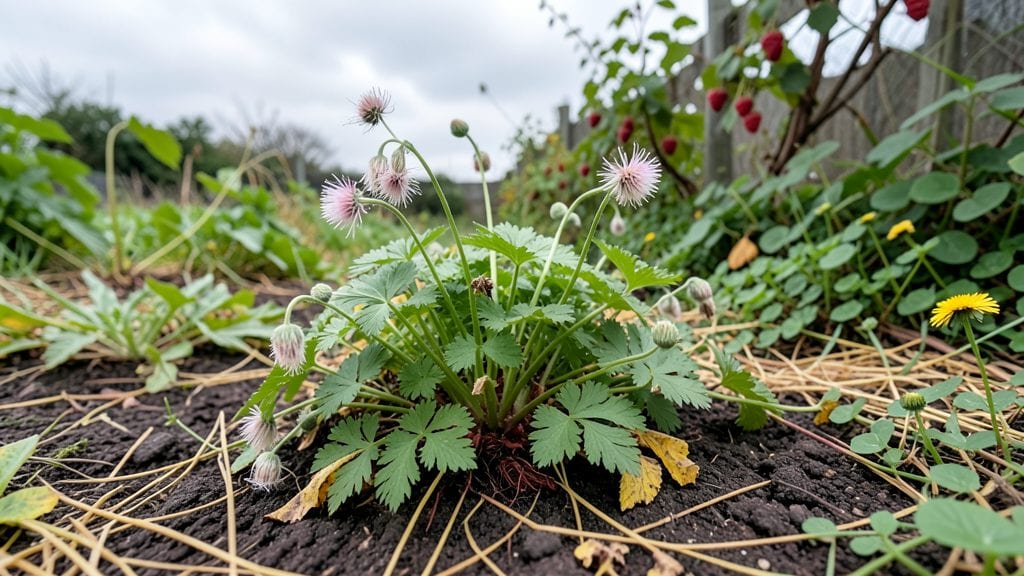
Creating a fairy magical garden feels like designing a secret world where every corner holds a surprise. ✨ I stumbled upon this idea after watching my granddaughter’s eyes light up at a tiny toadstool in our yard—it became the first piece of our enchanted landscape.
The key isn’t just picking pretty plants, but weaving them into a story that feels alive, whether through winding paths or hidden nooks where fairies might leave acorn treasures.
Start with the basics: soft, mossy ground cover to muffle footsteps, delicate ferns for texture, and flowers like foxgloves or bellflowers that nod in the breeze. Add whimsy with weathered wooden stakes as "fairy gates" or tiny lanterns tucked among branches.
The magic happens in layers—tall grasses for drama, low-growing thyme for scent, and a few "mystery" spots where a single mushroom or crystal might appear. Maintenance stays simple if you choose hardy plants and avoid overcrowding.
By summer’s end, you’ll have a garden that sparkles with life—not just in daylight, but under twinkling fairy lights at dusk. The air hums with the scent of lavender and damp earth, and every visit feels like stepping into a storybook.
Even the most skeptical guests will pause to imagine the tiny creatures that might live there. Let’s bring this dream to life, one layer at a time.
This design works year-round: swap summer blooms for winter evergreens, add seasonal touches like pinecones or dried citrus slices, and let the magic evolve. The real secret? It’s not about perfection—it’s about creating a place that feels like home for both you and the fairies.
📚 In This Guide
- What you need
- Instructions
- Tips and common mistakes
- Wrapping up and next steps
What you need
- ● Soil & Mulch: 1–2 bags of well-draining potting mix (for containers or raised beds)
- ● 3–5 cubic feet of organic mulch (cedar or pine for a rustic look)
- ● Fairy Garden Plants: 5–10 miniature succulents (e.g., hens & chicks, echeveria)
- ● 3–5 tiny ferns or mosses (for lush texture)
- ● 2–3 blooming flowers (e.g., baby’s breath, mini roses, or fairy bells)
- ● 1–2 toadstool mushrooms (real or faux—see below!)
- ● Decorative Elements: 1–2 fairy doors (wooden or resin, 2–4" tall)
- ● 3–5 pebbles or glass beads (for pathways or accents)
- ● 1–2 tiny benches or stools (resin or carved wood)
- ● Fairy lights or solar-powered LED string lights (battery-operated for safety)
- ● Basic Tools: 1 hand trowel (for planting)
- ● 1 pruning shears (for trimming)
- ● 1 spray bottle (for misting plants)
- ○ Optional (But Magical!) Extras: Fake toadstools, tiny bridges, or wind chimes (for extra whimsy)
- ● Biodegradable glitter (for a subtle sparkle—use sparingly!)
- ● 1–2 small containers (terracotta pots, acorns, or hollowed-out logs)
Step-by-Step instructions for crafting a fairy magical garden
Bring enchantment to your outdoor space with these simple, dreamy layers that transform any corner into a fairy haven.
🪴 Step 1: Choose and Prepare Your Base Layers
Start with a 4-foot square area of soft, natural ground—avoid compacted soil or hard surfaces. Clear any weeds or debris, then loosen the top 2 inches of soil with a rake. Fairy gardens thrive in loose, well-draining soil, so mix in 1 gallon of compost to enrich the earth. This step ensures roots can spread easily and plants stay healthy for years.
I like to outline the space with small stones or pebbles to create a defined border. This keeps the fairy world contained and adds a magical edge. Use flat, smooth stones—they’re easier to arrange and look more intentional. Press them lightly into the soil so they don’t shift with wind or rain.
🌿 Step 2: Add Whimsical Plant Layers
Plant small, slow-growing foliage like miniature ferns, moss, or tiny succulents to create the base of your fairy garden. Use 1-2 inch deep holes spaced 3-4 inches apart—fairies need room to move, but plants should still feel cozy. I recommend starting with 3-5 plants to fill the space naturally without crowding.
Add tiny flowers like baby’s breath, miniature roses, or wildflowers for color and texture. Place them in clusters of 3-5 stems near the edges or along pathways. Fairy gardens feel magical when there’s a mix of heights—tall grasses or small shrubs (like dwarf boxwood) add dimension. Water lightly after planting to settle the soil around roots.
💧 Step 3: Create Miniature Pathways and Water Features
Use small twigs, pebbles, or moss to craft winding paths that invite fairies to explore. I like to arrange flat stones in a gentle curve, leaving 1-2 inch gaps between them for a natural, uneven look. Avoid straight lines—fairy paths should feel organic and inviting, like they’ve been trodden on for centuries.
Add a tiny water feature with a small dish or shallow bowl filled with pebbles and a tiny waterfall (use a tiny pump or a slow drip from a bamboo spout). Fairy gardens need moisture, but standing water attracts pests, so keep it shallow. Place the dish on a flat stone or moss pad to elevate it slightly and prevent soil erosion.
☀️ Step 4: Decorate with Magical Touches
Scatter tiny mushrooms, acorns, or pinecones throughout the garden to mimic a fairy’s handiwork. I collect these from nature walks—fairies love repurposed treasures! Place 3-5 mushrooms near the center as a focal point, and tuck acorns or pinecones into crevices or along pathways. Avoid overcrowding; fairies need space to hide and play.
Add tiny furniture or decorations like miniature benches, birdhouses, or wind chimes. Use small garden stakes or pebbles to anchor lightweight items. Fairy gardens feel alive when they’re interactive—include a tiny bridge over a "stream" (a shallow groove filled with pebbles) or a miniature door carved from bark. Place these near the edges where fairies might enter or exit.
⏰ Step 5: Maintain and Refresh Seasonally
Water lightly 2-3 times per week during dry spells, but avoid soaking the soil—fairy gardens prefer moist but not soggy conditions. Check for weeds monthly and remove them gently with your fingers. Fairy gardens are delicate, so avoid harsh tools. I like to prune spent flowers in late summer to encourage new growth and keep the space tidy.
Refresh the garden each season by adding new moss, tiny plants, or seasonal decor. In spring, swap out winter greenery for fresh blooms. In fall, add dried leaves or acorns for texture. Fairy gardens evolve like a living story—let your creativity guide updates. With care, your magical space will sparkle year-round, inviting fairies (and humans) to explore.
Tips & tricks for perfect fairy magical garden design
Creating a fairy garden that feels truly magical comes down to a few thoughtful details that transform ordinary spaces into enchanting fairy realms.
The Soil Foundation: Don't skip the compost step in Step 1—this is what gives your fairy garden its healthy, thriving base. I've found that adding a thin layer of sand to your compost mix helps with drainage, especially if your soil tends to stay damp. Press the stones lightly but firmly into the soil so they stay put, creating that perfect contained fairy world edge.
Plant Placement Magic: In Step 2, think about the fairies' perspective when arranging your plants. Place your tallest elements like dwarf boxwood near the back of your 4-foot square, then cascade smaller plants forward. This creates natural depth and makes the space feel like a cozy fairy village rather than a flat arrangement. I like to place the 3-5 stems of tiny flowers in odd-numbered clusters—it feels more natural and inviting.
Pathway Secrets: For Step 3, the 1-2 inch gaps between your flat stones are crucial—they allow fairies to dart between them while keeping the paths functional. If you're worried about erosion near your water feature, place a small piece of landscape fabric under the dish before adding pebbles. This keeps the soil contained while letting water drain properly.
Seasonal Refresh: The 2-3 times per week watering guideline in Step 5 works best if you water in the early morning. This gives plants time to dry slightly during the day, preventing fungal issues. I also recommend keeping a small spray bottle handy for misting delicate elements like moss between waterings—it helps maintain that lush fairy garden feel without over-saturating the soil.
Pro Tips for Fairy Magical Garden
- Creating a fairy garden that feels truly magical comes down to a few thoughtful details that transform ordinary spaces into enchanting fairy realms.
- The Soil Foundation: Don't skip the compost step in Step 1—this is what gives your fairy garden its healthy, thriving base.
- Plant Placement Magic: In Step 2, think about the fairies' perspective when arranging your plants.
Frequently asked questions
Got questions about creating your own fairy magical garden? You’re not alone! Here are some of the most common queries—and their answers—to help you bring your enchanting vision to life with ease.
What’s the best time of year to plant a fairy magical garden?
The best time depends on your climate! In mild zones, plant in early spring or late fall to avoid extreme heat or frost. For cooler regions, aim for late spring after the last frost. Perennials can handle replanting anytime, but annuals thrive with consistent moisture—so plan ahead!
How do I keep my fairy garden from drying out or getting too wet?
Use a well-draining soil mix (like 60% potting soil + 30% perlite + 10% compost) to prevent soggy roots. For containers, add a layer of pebbles at the bottom to improve drainage. Moss and succulents are drought-tolerant picks, while ferns and hostas love moisture—place them in shadier spots. Mulch with bark or leaves to retain humidity!
Can I use artificial materials (like plastic mushrooms or painted stones) in a fairy garden?
Artificial elements add color, durability, and whimsy without the upkeep. Just balance them with real plants or natural textures (like driftwood or smooth stones) to keep the magic feeling organic. Pro tip: Use UV-resistant paint for outdoor decorations to prevent fading!
How do I protect my fairy garden from pests like slugs or ants?
Slugs and ants can be pesky! Diatomaceous earth (food-grade) or copper tape around edges deters slugs naturally. For ants, create a vinegar-water barrier or use citrus peels (they hate the scent!). Avoid chemical pesticides—they can harm fairies (and your plants)! Bonus: Plant marigolds or lavender nearby to repel pests naturally.
What are some easy, low-maintenance plants for beginners?
Start with these fairy-friendly plants that thrive with minimal fuss:
- Moss – Soft, lush, and stays green year-round.
- Succulents (like hens & chicks) – Drought-resistant and adorable!
- Fern varieties (e.g., maidenhair or button fern) – Add delicate texture.
- Mini hostas or creeping jenny – Hardy and shade-loving.
- Wildflowers (like mini daisies or baby’s breath) – Attract pollinators for extra magic.
Pair them with self-watering containers or place your garden in a shady, sheltered spot to reduce maintenance.
Wrapping up and next steps
A fairy magical garden isn’t just a dream—it’s a living, breathing sanctuary where creativity and nature intertwine. Whether you’re crafting tiny fairy doors, weaving enchanted pathways, or layering textures with moss and pebbles, every detail transforms your space into a year-round wonderland.
The key? Start small, trust your imagination, and let the magic unfold naturally.
Ready to bring your vision to life? Grab your tools, sketch your layout, and take the first step today! 🌿✨ Your garden’s fairy tale awaits—what will you create next?