Tools
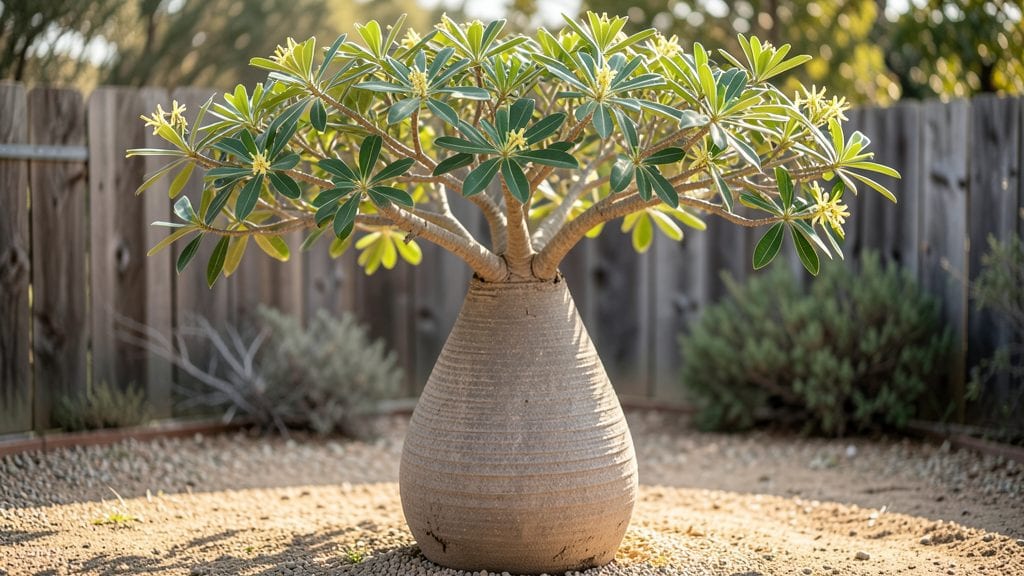
Transforming old glass bottles into a garden bottle tree turns trash into a stunning focal point that adds color and whimsy to any outdoor space. I stumbled on this idea after struggling to dispose of wine bottles and realized they could become something magical instead of recycling bin fodder.
The best part? It’s a project that keeps giving—your tree will look fresh all year with minimal upkeep.
You’ll need clean glass bottles of varying sizes, a sturdy base (like a wooden stump or metal frame), and some basic supplies like wire or strong twine to secure them. Think of it like building a mobile, but instead of wind, gravity holds everything in place.
The bigger the bottles, the more dramatic the effect—imagine a sunroom border or patio corner bursting with jewel-toned glass catching the light.
Once assembled, your bottle tree becomes a canvas for creativity. Paint the bottles with vibrant colors, wrap them in twine for a rustic look, or leave them clear to showcase dried flowers or fairy lights inside.
They’ll stay bright and eye-catching through every season, from spring blooms to winter snowflakes glinting off the glass.
Perfect for small patios, vertical gardens, or even as a playful border along a walkway. The best part? You’re not just decorating—you’re reducing waste and creating something uniquely yours. Ready to turn those empty bottles into art?
📚 In This Guide
- What you need
- Instructions
- Tips and common mistakes
- Wrapping up and next steps
What you need
- ● Glass bottles (8–12): Clean, empty bottles (e.g., wine, soda, or mason jars) with consistent neck sizes. Aim for uniformity for a polished look!
- ● Tree branch or driftwood (1): A sturdy, 3–5 foot branch (dried or live) with a natural fork or split at the top for bottle attachment.
- ● Wire (copper or floral) (1 spool): 18–22 gauge, flexible, and rust-resistant for securing bottles.
- ● Wire cutters (1): Sharp, heavy-duty cutters to trim wire cleanly.
- ○ Drill (optional but helpful): A low-speed drill with a 1/8" bit for pre-drilling bottle holes (if needed).
- ● Sandpaper (medium-grit, 120–150): To smooth rough edges on bottles or branches.
- ○ Non-toxic sealant (optional): Clear outdoor sealant to protect wood/bottles from weather.
- ● Paint or chalkboard paint: For decorating bottles or branches.
- ● Twine or jute string: To add texture or camouflage wire.
- ● LED tea lights or solar-powered lights: For a magical nighttime glow!
- ● Small hooks or clips: To hang ornaments or wind chimes.
Step-by-Step instructions for creating a garden bottle tree
Transform empty glass bottles into a stunning vertical garden that brings life and color to any space.
Gather and Prepare Your Materials
Start by collecting 4 clean, empty glass bottles of varying sizes—think soda bottles, wine bottles, or even old perfume bottles. Remove any labels and rinse thoroughly to eliminate residue. I like to use bottles with wider mouths because they create more planting space for roots. For each bottle, cut a small drainage hole near the base using a glass cutter or heavy-duty scissors. Place a small piece of mesh or a coffee filter over the hole to prevent soil from escaping while still allowing water to drain.
Next, gather 4 small succulents or herbs like sedum, echeveria, or thyme—plants that thrive in tight spaces and minimal soil. Choose plants with similar water needs to keep maintenance simple. If using herbs, pick varieties that grow well in containers, like rosemary or oregano. This ensures your bottle tree stays lush and functional.
Assemble the Bottle Tree Structure
Find a sturdy wooden base or a repurposed wooden board to serve as the foundation for your bottle tree. Sand any rough edges to prevent splinters. Drill 4 evenly spaced holes near the top of the base—just large enough to fit the necks of your bottles snugly. If you don’t have a drill, you can use a hammer and nail to create holes, then widen them with a chisel. The bottles should sit securely but still allow for easy removal if needed.
Insert the bottles into the holes, neck-down, so they hang vertically. For added stability, use a strong adhesive like hot glue or epoxy to secure the bottles in place. If you’re feeling creative, you can also paint the wooden base or wrap it in burlap for a rustic look. This step is all about creating a stable, eye-catching structure that will hold your plants for years.
Plant Your Bottles with Soil and Greenery
Fill each bottle about ¾ full with a lightweight potting mix—one that drains well, like a cactus or succulent mix. Avoid garden soil, as it compacts easily and can clog drainage. Tap the bottles gently on the table to settle the soil, then create a small hole in the center of the mix with your finger. Gently place one plant into each bottle, pressing the soil lightly around the roots to secure it. Leave about 1 inch of space between the soil and the bottle’s rim to allow for watering.
For a fuller look, you can add a few small pebbles or decorative stones on top of the soil. This not only enhances the aesthetic but also helps retain moisture. Water each bottle lightly until the soil is evenly moist but not soggy. Place your bottle tree in a spot with bright, indirect light—like a sunny windowsill or a sheltered patio—to help your plants establish themselves.
Care for Your Bottle Tree Long-Term
Water your bottle tree once a week, or whenever the soil feels dry to the touch. Succulents and herbs stored in bottles dry out faster than those in traditional pots, so it’s important to monitor moisture closely. I like to use a spray bottle for a gentle watering method, which helps prevent overwatering. Avoid letting the soil stay soggy, as this can lead to root rot—especially in glass containers where drainage is limited.
Fertilize lightly every 4-6 weeks during the growing season using a diluted liquid fertilizer. A half-strength dose is plenty for these compact plants. If you notice leaves yellowing or plants looking leggy, they may need more light. Rotate the bottles occasionally to ensure even growth. With proper care, your bottle tree will thrive year-round, offering both beauty and functionality to your garden space.
Tips & tricks for perfect garden bottle tree
Creating a stunning garden bottle tree is all about the little details that make a big difference in how long your plants thrive and how beautiful your vertical garden looks.
Material Selection: When choosing your 4 glass bottles, look for ones with slightly wider mouths—they create more planting space and make it easier to water and care for your plants. I've found that soda bottles with their wider openings work perfectly, while perfume bottles with narrow necks can be tricky to plant in. If you're using wine bottles, the slightly tapered shape actually works well too, but you'll need to be extra careful when watering to avoid spills.
Drainage is Non-Negotiable: The drainage hole you create in Step 1 is absolutely critical. Place it about 1 inch from the base of each bottle to prevent soil from escaping while allowing excess water to drain. I like to use a small piece of mesh or coffee filter over the hole—this keeps soil in while still allowing water to flow through. Without proper drainage, your plants will quickly develop root rot, especially in those glass containers where water can't evaporate easily.
Soil Settling Technique: After filling each bottle with your lightweight potting mix in Step 3, give the bottles a few gentle taps on the table to help the soil settle. This creates a more stable base for your plants and prevents them from toppling over. I also recommend tapping the bottles after planting to ensure the soil makes good contact with the roots. This simple step makes a world of difference in how well your plants establish themselves in their new home.
Light Placement Strategy: The bright, indirect light mentioned in Step 3 is crucial for your plants' health. I've found that placing your bottle tree near an east-facing window gives the perfect balance of morning sun without the harsh afternoon rays. If you notice your plants stretching toward the light or looking leggy, they need more illumination. Rotating the bottles occasionally ensures even growth all around, which is especially important for the herbs that might grow toward the light source.
Pro Tips for Garden Bottle Tree
- Creating a stunning garden bottle tree is all about the little details that make a big difference in how long your plants thrive and how beautiful your vertical garden looks.
- Material Selection: When choosing your 4 glass bottles, look for ones with slightly wider mouths—they create more planting space and make it easier to water and care for your plants.
- Drainage is Non-Negotiable: The drainage hole you create in Step 1 is absolutely critical.
Frequently asked questions
Got questions about creating or caring for your garden bottle tree? You’re not alone! Here are some of the most common queries—and their practical solutions—to help you craft (or troubleshoot) this stunning upcycled art piece with ease.
What’s the best type of glass bottle to use for a bottle tree?
Opt for thick, sturdy glass bottles like soda bottles, beer bottles, or even vintage perfume bottles. Avoid thin or cracked glass—it won’t hold up long-term. If using colored bottles, earthy tones (amber, green) blend beautifully with garden aesthetics. Pro tip: Clean bottles thoroughly to prevent mold or pests!
How long does it take to assemble a garden bottle tree?
Assembly time varies: A small tree with 10–20 bottles may take 2–4 hours, while larger designs (50+ bottles) could require a full day. Factor in drying time for adhesive or sealant (if used). Pro tip: Work in stages—build the base first, then add bottles gradually to avoid strain.
Can a bottle tree survive winter or extreme weather?
Yes! With proper prep, bottle trees are year-round resilient. Seal gaps with waterproof adhesive or silicone, and use rust-resistant hardware for the frame. In freezing climates, add a lightweight tarp during storms. Pro tip: Elevate the base slightly to prevent water pooling.
What are some creative alternatives if I don’t have glass bottles?
No glass? No problem! Try:
- Ceramic jars (paint them for a cohesive look)
- Plastic containers (drill drainage holes)
- Upcycled tin cans (sand edges for safety)
- Terracotta pots (great for herb-themed trees!)
My bottle tree has bugs or mold—how do I fix it?
Act fast! Remove affected bottles, scrub with soapy water, and dry thoroughly. For mold, spray with a vinegar-water mix (1:1 ratio) or hydrogen peroxide. Prevent future issues by:
- Using weatherproof sealant on wood frames
- Avoiding organic debris buildup
- Rinsing bottles before reuse
Wrapping up and next steps
Transforming old glass bottles into a stunning garden bottle tree isn’t just creative—it’s a sustainable way to breathe new life into your outdoor space! 🌿 Whether you’re repurposing forgotten jars or adding a whimsical touch to your garden, this project blends artistry with eco-friendly flair. Start small, experiment with colors, and let your imagination grow!
Ready to take the next step? Grab your supplies, follow your vision, and watch your garden become a one-of-a-kind masterpiece. Share your progress or final look with fellow green thumbs—your bottle tree could inspire the next big trend! 🌟