
Lawn
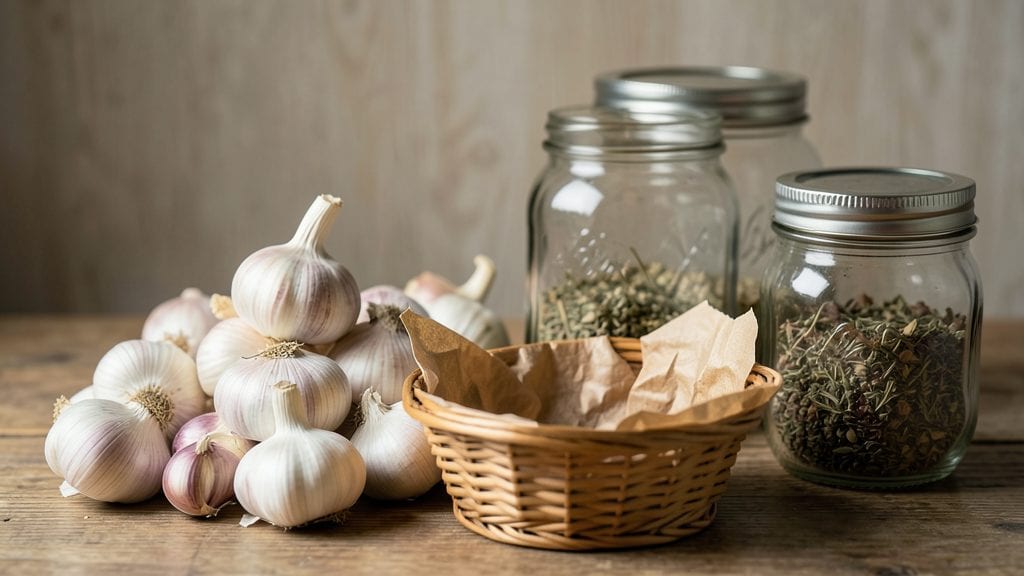
Mastering the art of garden seed storage can double—or even triple—the lifespan of your seeds, but I learned the hard way that damp, airy containers turn them to mush within months. The secret isn’t just cool temperatures—it’s controlling humidity and light exposure to prevent spoilage.
You’ll need airtight containers like mason jars or vacuum-sealed bags, silica gel packets to absorb moisture, and a dark, cool spot (40-50°F is ideal). Labeling with permanent markers and writing the variety name plus year saves headaches later.
For long-term storage, add a desiccant packet to each container—this single step prevents mold that ruins seeds in weeks.
After setting this up, you’ll watch seed packets stay crisp for years instead of drying out or sprouting prematurely. The payoff? A pantry full of rare varieties ready to plant whenever you want, without buying new seeds every season.
Plus, you’ll avoid the heartbreak of opening a packet to find nothing but dust.
Works for both short-term (1-2 years) and long-term (5+ years) storage, whether you’re saving heirlooms or stocking up on favorites. The same principles apply to flower seeds too—just adjust humidity slightly for delicate varieties. Let’s keep those seeds alive and kicking!
📚 In This Guide
- What you need
- Instructions
- Tips and common mistakes
- Wrapping up and next steps
What you need
- ● Humidity-controlled seed storage containers – Choose airtight, moisture-resistant options like: Mylar bags (5–10 mil thickness) with oxygen absorbers
- ● Glass jars with desiccant packs (e.g., silica gel)
- ● Vacuum-sealed containers (for bulk storage)
- ● Desiccant packs – Silica gel or clay-based moisture absorbers (1–2 packs per container, depending on size). Pro tip: 💡 Label packs with "Do Not Eat!"
- ● Oxygen absorbers – 1–2 per container (for long-term storage, >5 years). ✨ Tip: Activate by placing in a sealed bag with seeds before final storage.
- ● Permanent markers or labels – For labeling seed varieties, dates, and storage conditions.
- ○ Fine-mesh breathable bags (optional for pre-storage drying) – Like paper or breathable fabric bags (e.g., 1–2 for initial seed drying).
- ● Small funnel or scoop – For easy seed transfer into containers.
- ● Sealing tools – Tape (for Mylar bags) or jar lids (for glass containers).
- ● Seed viability test kits – For checking germination rates before storage.
- ● Digital hygrometer – To monitor humidity levels (ideal: 30–50%).
- ● Vacuum sealer – For extra-long-term preservation (e.g., 10+ years).
- ● Portable dehumidifier – If storing seeds in a damp climate.
- ● Seed catalog or database – To track varieties and storage notes.
Step-by-Step instructions for creating humidity-controlled seed storage
Here’s how to build a system that keeps seeds viable for years—no fancy equipment needed.
Select the Right Containers and Desiccant Materials
Start with airtight containers—glass jars with rubber seals or food-grade plastic bins work best. I prefer quart-sized mason jars for small batches because they’re easy to label and stack. Avoid metal containers, as they can corrode and introduce moisture over time. Pair each container with a silica gel packet (the kind included in shoe boxes) or uncooked rice as a natural desiccant. For every pint of seed volume, use two silica gel packets or 1 cup of rice to absorb excess humidity.
The key here is airtightness. Test your containers by filling them with water, sealing, and checking for leaks after 24 hours. If water seeps out, the seal isn’t tight enough—replace the container. I also add a small piece of cardboard inside the lid to create a barrier between the seal and the seeds, preventing any condensation from dripping onto them.
Prepare Seeds for Storage
Before sealing, ensure seeds are completely dry. Spread them on a clean, dry paper towel in a single layer and let them air-dry for 24 hours in a cool, dark place (like a basement or pantry). This step is critical—even slightly damp seeds will mold or sprout prematurely inside the container. If you’re storing seeds from a packet, transfer them to a small paper envelope first. Paper breathes slightly, which helps regulate humidity before the final seal.
Label each container with the seed variety, storage date, and germination rate (if known). Use a permanent marker on the jar itself or a separate index card tucked inside the lid. I’ve learned the hard way that handwritten labels fade over time—always duplicate the info on the outside of the container as well. This prevents future confusion when you’re ready to plant.
Layer Seeds and Desiccants for Optimal Humidity
Place the paper envelope with seeds at the bottom of the container, away from the sides. Add the desiccant material (silica gel or rice) on top of the seeds, not directly touching them. For silica gel, I use one packet per pint of container volume; for rice, ½ cup per pint works well. The goal is to create a buffer zone that absorbs moisture before it reaches the seeds. If using rice, place it in a small breathable cloth bag to contain it and prevent seeds from mixing in.
Seal the container tightly but not excessively—over-tightening can cause the seal to fail over time. Store the containers in a cool, dark place with consistent temperatures between 40-50°F. A basement, root cellar, or even a refrigerator’s crisper drawer (if it’s not too humid) are ideal. Avoid attics or garages, where temperatures and humidity fluctuate wildly.
Monitor and Maintain Storage Conditions
Check your seed storage once every 6 months to ensure the desiccant is still effective. Silica gel turns from blue to pink when saturated—replace it immediately if you see this change. For rice, simply shake the container gently—if the rice feels damp or clumps together, replace it with fresh, dry rice. This proactive step prevents seed rot and extends viability by years. I keep a small notebook near my storage area to log checks and desiccant replacements.
If you notice condensation inside the container or a musty smell, open it immediately to air out the seeds and replace the desiccant. Even a slight shift in humidity can reduce seed viability dramatically. For long-term storage (over 5 years), consider adding a small packet of activated charcoal to further absorb any residual odors or gases that could degrade the seeds.
Test Viability Before Planting
Before using stored seeds, conduct a germination test to confirm they’re still viable. Take 10 seeds from the container and place them on a damp paper towel in a ziplock bag. Seal the bag and store it in a warm, dark place (around 70°F) for 7-10 days. Check daily—if at least 50% of the seeds sprout, they’re good to plant. If fewer than half sprout, reduce the number of seeds you plant or consider sourcing fresh ones.
This test is non-destructive if done carefully, but I always label the test seeds separately so I don’t accidentally plant them. If the seeds fail the test, don’t toss them immediately—some may still be viable but slower to germinate. Plant a few extra just in case, and monitor their progress closely. Properly stored seeds can remain viable for decades, but this test ensures you’re not wasting time or resources on seeds that may not perform well.
Tips & tricks for perfect humidity-controlled seed storage
A few key strategies will help you maximize seed viability and prevent common storage pitfalls that could ruin years of work in minutes.
Container Selection Matters: While quart-sized mason jars are ideal for small batches, consider using vacuum-sealed bags for larger quantities—they eliminate air pockets entirely. For maximum protection, choose containers with wide mouths to make the 24-hour leak test easier; narrow openings can create false airtight impressions. I've found that glass jars with silicone seals last longer than plastic because they don't degrade over time. The 24-hour water test in Step 1 is non-negotiable—any container that fails this test will compromise your seeds within weeks.
Desiccant Placement Strategy: When layering seeds and desiccants in Step 3, create a two-tier system: place the first silica gel packet or rice directly on top of the paper envelope, then add a second layer against the container walls. This double barrier ensures moisture is absorbed from all angles. For silica gel specifically, I recommend using food-grade packets only—industrial versions can contain chemicals that harm seeds. The buffer zone concept is critical here; if seeds touch the desiccant directly, they'll lose moisture too quickly and become brittle.
Temperature Consistency is Key: The 40-50°F range specified in Step 3 might seem narrow, but it's essential for preventing condensation. If your storage area fluctuates—like a refrigerator that cycles between 38°F and 55°F—consider adding a small thermometer to monitor conditions. I've seen seeds develop mold within weeks when stored in areas that dip below 40°F or exceed 55°F. For extra protection, place containers on wooden shelves rather than metal racks, which can conduct temperature changes more rapidly.
Labeling System Upgrade: The instructions mention labeling with seed variety and storage date, but I've found that adding a third element—estimated germination percentage—saves time when planting. Use a color-coded system: green for 90%+, yellow for 70-89%, and red for below 70%. This visual cue helps you prioritize which seeds to plant first. For long-term storage beyond 5 years, I also recommend including the harvest year on labels—some heirloom varieties perform better when planted within 10 years of harvest, regardless of storage conditions.
Pro Tips for Garden Seed Storage
- A few key strategies will help you maximize seed viability and prevent common storage pitfalls that could ruin years of work in minutes.
- Container Selection Matters: While quart-sized mason jars are ideal for small batches, consider using vacuum-sealed bags for larger quantities—they eliminate air pockets entirely.
- This double barrier ensures moisture is absorbed from all angles.
Frequently asked questions
Got questions about keeping your garden seeds fresh and ready for planting? Here are some of the most common ones—and their answers—to help you master seed storage like a pro!
How long can I store seeds in humidity-controlled containers?
With the right conditions (cool, dry, and dark), many seeds—like heirloom tomatoes, beans, or lettuce—can last 3–5 years or longer! Vegetable seeds often retain viability for 2–3 years, while flower seeds may last 1–2 years. Always check the seed packet for specific guidelines to avoid surprises.
What’s the best temperature for seed storage?
Aim for 32–41°F (0–5°C)—your fridge’s crisper drawer or a cool basement works great! Avoid freezing (<32°F/0°C) or extreme heat (>77°F/25°C), as moisture and temperature swings can dramatically shorten seed life. A humidity pack in your container keeps things stable!
How do I know if my seeds are still viable?
Test germination by placing 10 seeds on a damp paper towel in a sealed bag for 5–7 days. If 70% or more sprout, they’re good to plant! For old seeds, this "paper towel test" is faster than risking a failed garden bed. Pro tip: Label seeds with storage dates to track freshness!
Can I reuse seed packets for storage?
Yes! Clean, dry packets work well for short-term storage (up to a year), but for long-term viability, switch to airtight containers (like glass jars or Mylar bags with silica packs). Packets can degrade over time, and moisture or pests may sneak in. Bonus: Use egg cartons for small batches of seeds!
How do I prevent mold or pests in stored seeds?
Keep seeds bone-dry (use desiccant packs or uncooked rice in containers) and store them in pest-proof materials like glass jars or metal tins. Avoid cardboard—it absorbs moisture and attracts critters. Freeze-drying seeds briefly (if needed) can also kill potential mold spores!
What’s the best alternative if I don’t have humidity packs?
DIY options work! Try:
- Uncooked rice (place 1–2 tbsp in the container)
- Cat litter (unscented, bentonite clay)—absorbs moisture well
- Dried silica gel (available at craft stores)
- Charcoal briquettes (crushed, in a small cloth bag)
Wrapping up and next steps
Proper garden seed storage doesn’t have to be complicated—just strategic! 🌱 By using humidity-controlled containers and following a few simple steps, you can keep your seeds viable for years, ensuring your garden thrives season after season.
Whether you’re a seasoned gardener or just starting out, taking the time to store seeds correctly is a small effort with big rewards.
Ready to put your new knowledge into action? Start by auditing your current seed collection—organize, label, and store them in the right conditions today! Your future garden (and wallet) will thank you. 🌿