
Tools
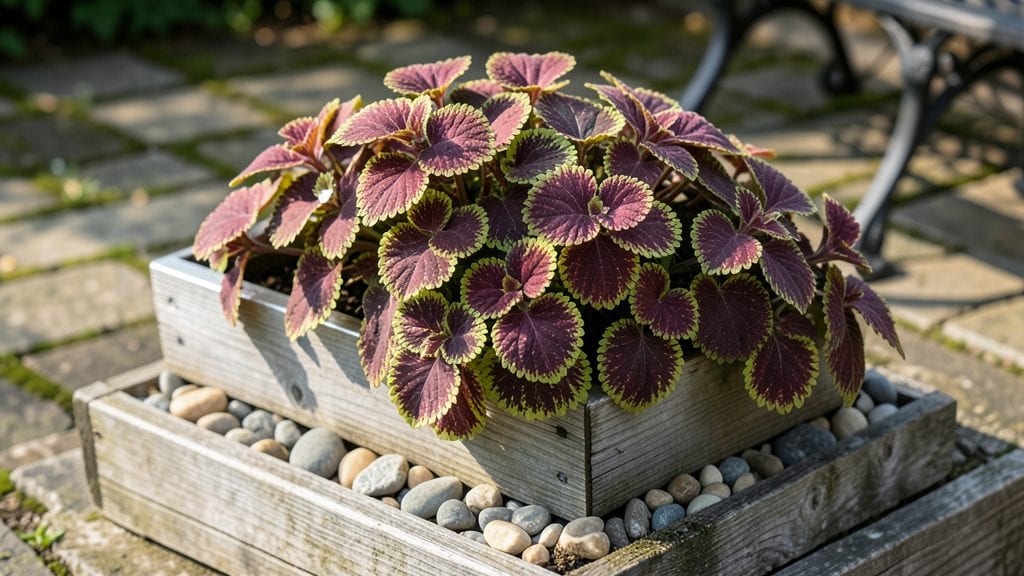
Turn those weathered wooden feed troughs into stylish garden trough planters—a magical way to breathe new life into forgotten materials and create a vibrant vertical garden. 🌿 I stumbled onto this idea while salvaging a weathered wooden feed trough from a farm sale, and now my patio is packed with cascading herbs, trailing flowers, and even dwarf vegetables that would otherwise struggle in tight spaces.
The beauty of trough planters is their versatility—you can use reclaimed wood, galvanized metal, or even ceramic containers if you prefer a more polished look. They’re perfect for small patios, balconies, or even vertical garden walls, giving you instant greenery without needing a traditional garden bed.
Plus, they’re shallow enough that watering is a breeze, and the open sides make it easy to check soil moisture or prune plants.
Imagine the look of fresh thyme spilling over the edges, snapdragons swaying in the breeze, or strawberries dangling just inches from your fingertips. These planters turn dead space into a productive, eye-catching display that grows more beautiful with each passing season.
The best part? You can customize the design to match your home’s aesthetic—rustic, modern, or anything in between.
Whether you’re working with a single trough or creating a tiered vertical garden, the key is choosing plants with similar water needs and sunlight preferences. Herbs, succulents, and trailing flowers are ideal starters, but even small shrubs can thrive in deeper troughs.
Ready to turn an old piece of wood into your next garden centerpiece?
📚 In This Guide
- What you need
- Instructions
- Tips and common mistakes
- Wrapping up and next steps
What you need
- ● Wooden troughs: 1–3 (depending on size; cedar or redwood lasts longest outdoors). Look for vintage feeders, whiskey barrels, or repurposed wooden crates (2–4 ft long, 6–12 in wide).
- ● Drill & drill bits: 1 (1/4" and 1/8" bits for drainage holes).
- ● Screws or nails: 10–20 (deck screws or galvanized nails, 1–1.5" long).
- ● Sandpaper: 80–120 grit (or an electric sander for speed).
- ○ Outdoor paint/stain (optional but recommended): 1 can (waterproof, non-toxic).
- ● Potting soil: 2–5 bags (depends on trough size; use lightweight, well-draining mix).
- ● Drainage material: 1 bag (gravel or landscape fabric to prevent soil clogging).
- ● Plants: 3–10 (trailing or compact varieties like ferns, ivy, or succulents).
- ● Measuring tape: 1 (for precise hole placement).
- ● Paintbrush or roller: 1 (if staining/painting).
- ● Level: 1 (to ensure even mounting).
- ● Hanging hardware: 1–2 sets (brackets, S-hooks, or chains for wall/mounting).
- ● Waterproof sealant: 1 tube (for extra protection if needed).
- ○ Decorative elements (optional): Twine, pebbles, or moss for finishing touches.
How to create stylish garden trough planters
Transform old wooden troughs into stunning vertical gardens with these simple steps.
🪴 Step 1: Select and Prepare Your Troughs
Start with clean, sturdy wooden troughs—salvaged ones add rustic charm while new ones ensure freshness. Sand rough edges and any splinters to prevent injury. I like to line the bottom with a layer of landscape fabric to block soil from draining too quickly, especially if your trough has drainage holes. This also keeps weeds from creeping up through gaps.
Check for leaks by filling the trough with water and letting it sit for 10 minutes. If water pools at the bottom, seal any cracks with waterproof wood glue or silicone caulk. For extra durability, apply a non-toxic wood sealant to protect against moisture and pests. Let everything dry completely before moving to the next step.
🌱 Step 2: Layer Soil and Drainage for Healthy Roots
Fill the bottom of each trough with 2-3 inches of gravel or small rocks—this creates essential drainage and prevents soggy roots. Use the 4 bags of potting mix you’ve set aside, mixing in 1 cup of perlite per bag to lighten the soil and improve airflow. This blend keeps moisture balanced without suffocating roots.
Spread the soil evenly, leaving about 1 inch of space at the top for watering. Press down lightly to remove air pockets, but don’t compact it too tightly—roots need room to grow. If you’re planting succulents or drought-tolerant plants, add a ½ inch layer of coarse sand on top of the gravel for extra drainage.
🌿 Step 3: Plant With Spacing in Mind
Arrange your plants before digging holes to visualize the final look. For 4 trough planters, use a mix of trailing plants like ferns or creeping thyme at the edges and upright varieties like ornamental grasses or lavender in the center. Space plants 6-12 inches apart, depending on their mature size—crowding leads to competition for water and nutrients.
Dig holes just deep enough to accommodate the root ball, then place each plant gently into the soil. Fill the gaps with more potting mix, pressing lightly around the base to secure the plant. Water thoroughly right after planting to help the soil settle and eliminate air pockets. This first deep watering also washes away any excess salts from the potting mix.
☀️ Step 4: Position for Light and Watering Needs
Place your troughs where they’ll receive at least 4-6 hours of sunlight daily, adjusting based on your plants’ needs. Succulents thrive in full sun, while ferns and hostas prefer partial shade. If your troughs are on a deck or balcony, secure them with brackets or weights to prevent tipping in windy conditions.
Water deeply 2-3 times per week, checking the soil moisture by sticking your finger 1 inch down. If it feels dry, it’s time to water. For troughs without drainage, reduce watering slightly to avoid soggy soil. Mulch the surface with ½ inch of organic mulch to retain moisture and suppress weeds—just avoid piling it against plant stems.
✂️ Step 5: Maintain and Refresh Seasonally
Trim back leggy growth or overgrown plants in early spring to encourage bushier, healthier foliage. Fertilize lightly every 4-6 weeks during the growing season with a balanced, slow-release fertilizer to keep plants thriving. I like to use a water-soluble formula mixed at half-strength to avoid burning tender roots.
By late fall, remove any dead or dying plants and refresh the soil with a 1-inch top layer of compost. This replenishes nutrients and prepares the trough for next season. If your troughs are exposed to harsh winters, consider moving them to a sheltered spot or covering them with burlap to protect against freezing temperatures.
Tips & tricks for perfect garden trough planters
Here's what I've learned from turning ordinary wooden troughs into show-stopping vertical gardens—details that make all the difference between good and great results.
Leak Test Matters: That 10-minute water test in Step 1 isn't just about checking for leaks—it's also testing how your trough holds up to moisture. If water pools after 10 minutes, you'll need to seal those cracks immediately. I've seen troughs that looked fine dry but leaked like sieves when wet. Pro tip: Test each trough individually, especially if they're different sizes or materials.
Drainage Layer Secrets: When adding your 2-3 inches of gravel in Step 2, don't just dump it in—create a slight slope toward any drainage holes. This ensures water flows properly even when the trough isn't perfectly level. For extra insurance, add a layer of hardware cloth over the gravel before adding soil to prevent roots from growing into the drainage layer over time.
Plant Placement Pro Tips: In Step 3, think about how plants will grow over time. Place your trailing plants like creeping thyme at the very edges so they can spill over beautifully. For the 4 trough planters, I recommend positioning your tallest plants toward the back (if you're mounting vertically) or center (if horizontal) to create visual balance. Trust me, this makes a huge difference in the final look!
Sunlight Strategy: That 4-6 hours of sunlight recommendation in Step 4 is a guideline, not a rule. Observe your plants after a week—if ferns look stressed, they need more shade; if succulents wilt, they need more sun. I've had to move troughs twice in my first year of gardening because I misjudged the light conditions. A little flexibility goes a long way!
Pro Tips for Garden Trough Planters
- Here's what I've learned from turning ordinary wooden troughs into show-stopping vertical gardens—details that make all the difference between good and great results.
- Leak Test Matters: That 10-minute water test in Step 1 isn't just about checking for leaks—it's also testing how your trough holds up to moisture.
- Drainage Layer Secrets: When adding your 2-3 inches of gravel in Step 2, don't just dump it in—create a slight slope toward any drainage holes.
Frequently asked questions
Got questions about transforming old wooden troughs into stunning vertical gardens? Here are some of the most common queries—and their answers—to help you get started with confidence!
What’s the best type of wood to use for garden trough planters?
Opt for untreated cedar, redwood, or cypress—they’re naturally rot-resistant and durable. Avoid pressure-treated wood (toxic chemicals) or pine (prone to warping). If reusing old troughs, ensure they’re free of mold or chemical stains. Sand them smooth for a polished look!
How often should I water plants in a garden trough planter?
Watering depends on your climate and plants, but troughs dry out faster than ground soil. Check moisture daily in hot weather—aim for consistent dampness (not soggy). Drip irrigation or self-watering systems work best. Pro tip: Group drought-tolerant plants (like succulents or lavender) together to reduce maintenance!
Can I line my trough planter to prevent soil loss?
Yes! Use landscape fabric or burlap to hold soil in place while allowing drainage. Avoid plastic liners—they trap moisture and suffocate roots. For extra stability, add a layer of gravel at the bottom before the fabric. Just ensure your trough has drainage holes (or drill them) to avoid root rot.
What plants thrive in garden trough planters?
Choose shallow-rooted, trailing, or compact plants like sedum, ferns, herbs (thyme, oregano), or petunias. Avoid heavy feeders (e.g., tomatoes) or deep-rooted shrubs. Mix textures and colors for visual appeal—just ensure they share similar water and light needs!
How do I fix a trough planter that’s warping or leaking?
For warping, reinforce with metal brackets or screws (pre-drill holes to avoid splitting). Leaks? Seal gaps with outdoor-grade caulk or silicone. If the wood is damaged, replace sections with matching untreated lumber. Prevention tip: Elevate troughs slightly off the ground to improve airflow and drainage!
Wrapping up and next steps
Garden trough planters are a fantastic way to blend creativity, sustainability, and beauty into your outdoor space! With just a few materials and a little elbow grease, you can transform old wooden troughs into stunning vertical gardens that add charm and life to any yard.
Whether you're a seasoned gardener or a beginner, these upcycled planters offer a rewarding project that yields lush, vibrant results.
Ready to get started? Grab your tools, pick a design, and let your green thumb shine! 🌿✨ What will you plant first?