
Tools
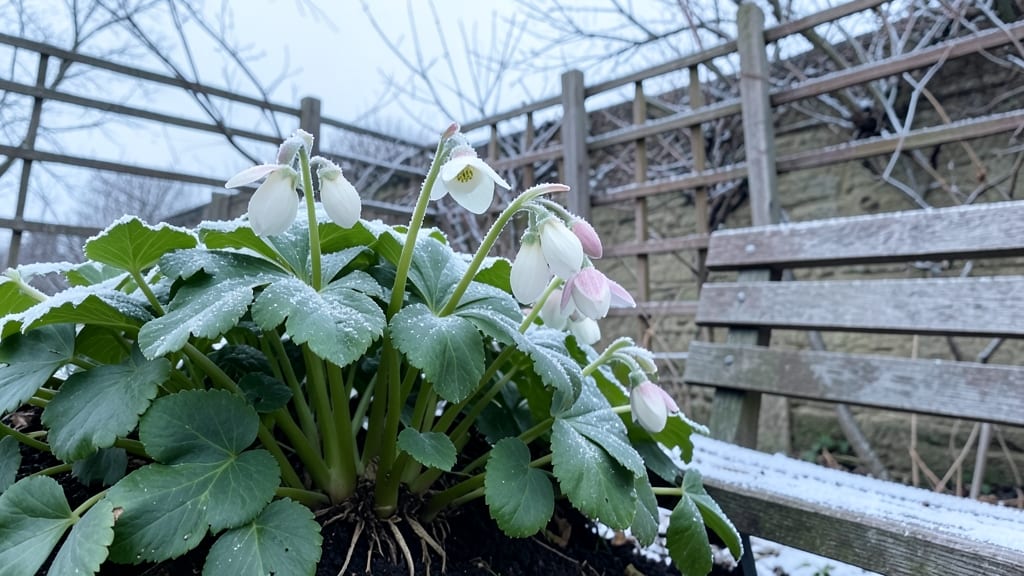
Gardening in January isn't about waiting—it's about setting up spring's foundation while everything else sleeps. 🌱 I've spent more Januarys than I can count planning, pruning, and even starting seeds indoors, and every year, the early prep pays off in explosive growth by May.
The key is focusing on tasks that thrive in cold weather: sharpening tools, dividing perennials, and protecting tender plants from frost.
You don't need fancy equipment—just a few basics like gloves, shears, and a notebook for planning. My favorite January project is cleaning up garden beds: removing dead foliage, adding compost, and marking where spring crops will go.
Even in freezing temps, the soil benefits from this prep work, and you'll avoid muddy messes later when everything wakes up.
By February, you'll see the difference in your garden's health—plants that survived winter will be stronger, your soil will be richer, and you'll have a clear map for what to plant where.
The best part? You're working outside without the summer bugs or scorching sun, just crisp air and the quiet satisfaction of progress.
Works for both cold climates and mild winters—just adjust timing based on your first frost date. Whether you're in the Northern Hemisphere or down under, January is the perfect month to get ahead while others are still shoveling snow. Let's get to it!
📚 In This Guide
- What you need
- Instructions
- Tips and common mistakes
- Wrapping up and next steps
What you need
- ● Garden Gloves: 1 pair of waterproof, insulated gloves (look for 100% cotton or synthetic blends with reinforced palms).
- ● Pruners: Bypass pruners (for clean cuts) or anvil pruners (for tougher branches). Sharpen them before use!
- ● Trowel: 1 stainless-steel or heavy-duty trowel (6–8" blade) for digging and transplanting.
- ● Garden Fork: 1 heavy-duty fork (for aerating soil or turning compost).
- ● Wheelbarrow or Bucket: A 5-gallon plastic bucket or small wheelbarrow for hauling debris or compost.
- ● Shovel: 1 round-point shovel (for moving soil or snow) and 1 square-point shovel (for edging).
- ● Rake: 1 bow rake (for clearing leaves/snow) and 1 leaf rake (for finer debris).
- ● Hose or Watering Can: A frost-resistant hose with a shutoff valve or a 5-gallon watering can for winter watering.
- ● Soil Amendments: Compost (2–3 bags), peat moss (for acidic soil), or aged manure (1–2 cubic yards).
- ● Mulch: Straw or wood chips (1–2 bags) to protect soil and retain moisture.
- ● Cold Frames or Row Covers: For extending the season (check local frost dates!).
- ● Garden Journal: A notebook or app to track soil prep, plant notes, and winter tasks.
- ● Knee Pads: Garden-specific knee pads for comfort during long sessions.
- ● Hand Trimmer: For trimming perennials or shrubs (battery-operated for ease).
Instructions for January gardening prep
Here’s how to set yourself up for a productive spring—without breaking a sweat in the cold.
🌱 Step 1: Plan Your Planting Schedule
January is all about strategy, not action. Pull out your calendar and mark your last frost date—this determines what you can plant directly in the ground. For most regions, this falls between mid-April and early May, so count backward 8-10 weeks to identify your spring planting window. This is when you’ll start seeds indoors for cool-season crops like lettuce, spinach, or peas.
Jot down your garden layout on paper or a digital tool. Sketch where you’ll place perennial plants, vegetable beds, and flower borders—this helps avoid overcrowding later. I like to include sun exposure notes (e.g., "6+ hours of sun for tomatoes") right on the sketch. This step prevents last-minute scrambling when it’s time to plant.
☀️ Step 2: Assess and Protect Your Soil
Even in winter, soil health is top priority. Grab a garden trowel and dig a small hole—6 inches deep—in your intended planting area. Check the moisture: if it feels dry, add 1-2 inches of compost or well-rotted manure to improve fertility. If it’s soggy, mix in sand or perlite to boost drainage. January is the perfect time to amend heavy clay or sandy soils without rushing.
Cover bare soil with straw mulch or leaves to protect it from erosion and freeze-thaw cycles. This also suppresses weeds and keeps nutrients locked in. I spread a 2-3 inch layer over garden beds and pathways—just enough to block light but still allow water to seep through. Avoid plastic or thick mulch, which can suffocate soil microbes.
✂️ Step 3: Prune and Clean Up Perennials
Now’s the time to prune back dead foliage from perennials like roses, lavender, and ornamental grasses. Use clean, sharp pruners to cut stems ½ inch above a leaf node or at ground level for grasses. Avoid heavy pruning on spring-blooming plants like peonies—they set buds over winter. Instead, focus on cleaning up debris from last season’s growth to prevent disease.
Dispose of diseased plant material in the trash (not compost)—this stops fungal spores from overwintering. I also rake up fallen leaves from under roses and hydrangeas to reduce slug hiding spots. If you’re dealing with woody shrubs, wait until late winter (after the worst cold snaps) to prune, as new growth can be damaged by late frosts.
🪴 Step 4: Organize and Inventory Supplies
Take stock of what you have on hand: seeds, soil amendments, tools, and containers. Check seed packets for expiration dates—old seeds may not germinate well. If you’re short on potting mix, order it now while sales are active. I like to label and store seeds in airtight containers with a moisture absorber (like silica packets) to keep them viable for years.
Sharpen pruners, trowels, and shears with a file or sharpening stone—dull tools tear plant tissue, inviting infections. Clean tools with rubbing alcohol to sterilize them. Organize garden gloves, hoses, and stakes in a shed or garage bin so they’re ready when spring arrives. This small effort saves time and frustration later.
⏰ Step 5: Start Cold-Hardy Seedlings Indoors
If you’re eager to grow, cool-season crops like kale, broccoli, and onions can start indoors now. Fill seed trays with sterile seed-starting mix and sow seeds at the depth listed on the packet. Place trays on a seedling heat mat (set to 65-75°F) to speed up germination. Most of these seeds sprout in 7-14 days, so have your grow lights ready.
Once seedlings emerge, move them under 12-14 hours of light daily—a south-facing window or grow light works. Avoid overwatering; let the top ½ inch of soil dry out between waterings. Harden off seedlings 2 weeks before transplanting by gradually exposing them to outdoor conditions. This prepares them for the chilly spring air.
Tips & tricks for perfect January gardening prep
Winter prep sets the foundation for a thriving spring garden—here’s how to avoid common pitfalls and maximize your efforts.
Planting Schedule Precision: That 8-10 week countdown from your last frost date is key, but don't forget to check your local agricultural extension service for microclimate adjustments. I always verify my zone's specific frost dates—some areas can have unexpected late frosts in May. For example, if your last frost is May 10th, start counting back from May 1st rather than the 15th to ensure you're not too late with your cool-season crops. This timing ensures you're ready to plant when the weather actually cooperates.
Soil Assessment Shortcut: When testing your soil moisture in Step 2, squeeze a handful of soil—if it crumbles easily, it's dry and needs compost. If it sticks together like clay, it's too wet and needs sand or perlite. I keep a small trowel and soil sample bag in my gardening bin so I can test multiple spots in my garden without backtracking. This quick check helps me determine exactly where to focus my soil amendments for optimal results.
Pruning Safety: The ½ inch above a leaf node rule is crucial, but here's what nobody tells you—always prune on a dry day. Wet tools or plants can spread disease more easily. I like to wipe my pruners with rubbing alcohol between cuts on the same plant to prevent cross-contamination. For woody shrubs, wait until after the last hard frost in your area (usually late February to early March) to avoid frost damage to new growth.
Seed Starting Success: While 65-75°F is ideal for seedling heat mats, don't stress if your home runs cooler. Most seeds still germinate fine at room temperature (around 70°F), though it may take 2-3 days longer. The critical factor is consistency—keep that heat mat temperature stable. I've found that placing my seed trays on top of my fridge (not inside) gives a steady warm environment without overheating. Once seedlings emerge, that 12-14 hours of light becomes non-negotiable for preventing leggy, weak plants.
Pro Tips for Gardening In January
- Winter prep sets the foundation for a thriving spring garden—here’s how to avoid common pitfalls and maximize your efforts.
- Planting Schedule Precision: That 8-10 week countdown from your last frost date is key, but don't forget to check your local agricultural extension service for microclimate adjustments.
- Soil Assessment Shortcut: When testing your soil moisture in Step 2, squeeze a handful of soil—if it crumbles easily, it's dry and needs compost.
Frequently asked questions
Got questions about winter gardening?
Here are some of the most common concerns—and practical answers—to help you make the most of January in your garden.
Can I still plant anything in January?
While most plants prefer warmer soil, January is perfect for cold-hardy crops like kale, spinach, broccoli, and peas. For regions with mild winters, consider garlic, onions, and hardy herbs. Check your USDA Plant Hardiness Zone to guide your choices.
How do I protect my garden from freezing temperatures?
Use row covers, cold frames, or even old blankets to shield tender plants. Mulch around perennials and shrubs with straw or leaves to insulate roots. For containers, wrap them in bubble wrap or move them to a sheltered spot. Pro tip: Avoid watering before a freeze—wet soil conducts cold better!
Is January too early to start seeds indoors?
It depends on your climate! Start slow-growing plants like tomatoes, peppers, and eggplants 8–10 weeks before your last frost date. For faster growers (like lettuce or radishes), wait until February. Use grow lights if natural light is scarce—seedlings need 12–16 hours of light daily.
What should I do with dead or damaged plants?
Remove diseased plants immediately to prevent soil-borne pathogens. For dead annuals, cut them back to the ground and compost (unless pests are present). Leave dormant perennials alone—they’re storing energy for spring! Prune woody plants only if they’re bleeding sap (like maples).
What tools do I need for January garden tasks?
Stock up on:
- A sharp shovel for dividing perennials
- Pruners (sterilized!) for cleanup
- A thermometer to monitor soil temps
- Gloves and layers—winter work is chilly!
- Seed trays and grow lights for indoor starts
Wrapping up and next steps
January might feel like the quietest month in the garden, but your prep work now is the secret to a thriving spring harvest! From planning your layout to nurturing cold-hardy crops, these steps set the stage for success—even when the ground is still frozen. You’ve got this!
Ready to take the next step? Start small:
- 📝 Sketch your garden design on paper or a digital tool.
- 🛒 Order seeds or bulbs from trusted suppliers.
- 🌱 Check soil health with a quick test kit or local extension office.