Landscaping
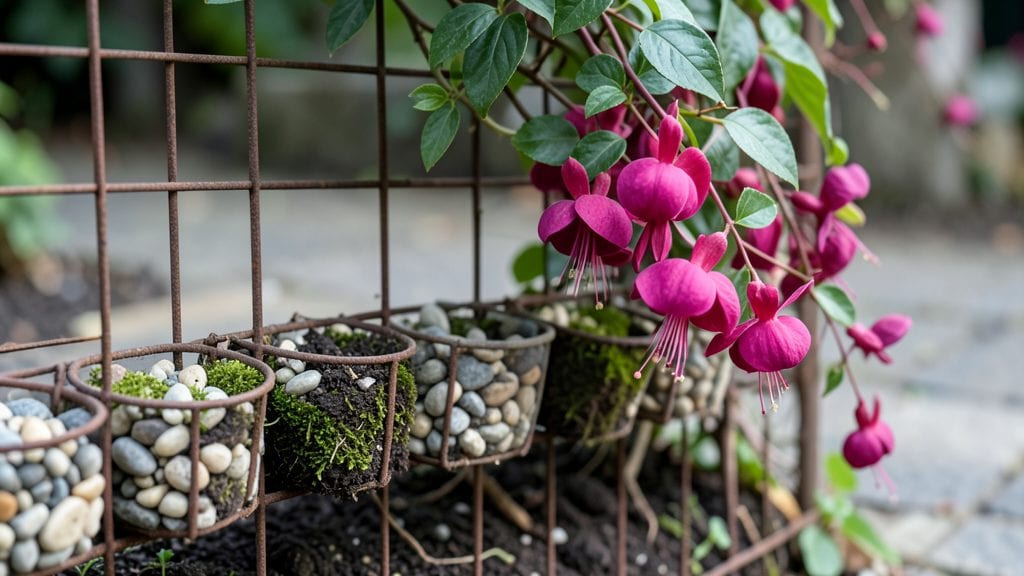
A hanging fence garden transforms bare vertical space into a lush, living tapestry of vines and blooms—ideal for small yards or urban patios where every inch counts.
I first spotted one at a neighbor’s house, and it changed how I saw my own backyard fence: suddenly, it wasn’t just a barrier, but a blank canvas for growth. The best part?
You don’t need a green thumb or deep pockets to make it happen—just a few basic supplies and the right plant choices.
Start with a sturdy fence (wood, chain-link, or even a trellis) and add pockets, fabric planters, or DIY wire baskets for planting. Trailing plants like nasturtiums, sweet potatoes, or creeping thyme thrive in these setups, while climbers like morning glories or jasmine add height and fragrance.
The key is spacing: leave 6–12 inches between plants so they don’t crowd each other out as they grow. Watering’s the trickiest part—hanging gardens dry out faster, so check soil moisture daily in hot weather.
By midsummer, your fence will burst with color and texture, creating a private retreat or a stunning backdrop for your patio. The best installations blend function with beauty: herbs like mint or basil grow well in hanging pockets, while flowers attract pollinators and add fragrance.
With minimal upkeep, you’ll have a vertical garden that’s both practical and breathtaking—no yard required.
Want to take it further? Mix materials like terracotta pots, macramé hangers, or even repurposed colanders for a boho-chic look. The possibilities are endless, and the payoff—fresh greenery at eye level—is priceless. Let’s get your fence growing!
📚 In This Guide
- What you need
- Instructions
- Tips and common mistakes
- Wrapping up and next steps
What you need
- ● Fence: A sturdy, flat, or slightly textured fence (wood, metal, or vinyl) with enough space for mounting. Note: Avoid rotten or warped wood.
- ● Garden fabric or landscape fabric: 1 roll (3–4 ft wide) to block weeds and retain moisture.
- ● Waterproof growing pockets: 20–50 pockets (depending on fence length; ~6–12 inches deep). Tip: Choose breathable fabric pockets for aeration.
- ● Staple gun + staples: Heavy-duty staples (1/4 inch) to secure fabric and pockets.
- ● Drill + screws: 1/4-inch deck screws (6–8 screws per pocket) and a masonry bit if attaching to brick/metal.
- ● Measuring tape + level: For precise pocket placement and alignment.
- ● Pruning shears: For trimming plants as they grow.
- ● Climbing plants: 3–5 vines per linear foot (e.g., ivy, jasmine, or clematis). Pro tip: Start with young plants for easier establishment!
- ● Drip irrigation kit: Automate watering for hassle-free maintenance.
- ● LED grow lights: If your fence gets minimal sunlight, supplement with solar-powered lights.
- ● Decorative trim: Wooden borders or metal edging to enhance aesthetics.
- ● Slow-release fertilizer: Mix into soil for a nutrient boost.
- ● Plant supports: Small trellises or stakes for heavier vines.
Step-by-Step instructions for building a hanging fence garden
Transform any fence into a lush vertical garden with this simple, space-saving design.
Gather Materials and Prepare the Fence
Start by measuring your fence length and mark where you'll hang each pocket. I like to space mine 12-18 inches apart for even growth. Use a level to ensure pockets hang straight—crooked pockets will look uneven and may not support plants properly. If your fence is wooden, pre-drill holes for screws to prevent splitting. For metal or vinyl fences, use heavy-duty hooks rated for 10-15 pounds each.
Choose 4-6 gallon-sized plastic pockets for each plant (more if you're growing vining plants like morning glories or nasturtiums). These pockets should have drainage holes at the bottom—if they don’t, poke a few with a nail or drill. Line the pockets with landscape fabric to prevent soil from washing out while still allowing water and roots to pass through. Cut the fabric to fit snugly, leaving a 2-inch overlap at the top to secure with a twist tie.
Fill and Hang the Garden Pockets
Fill each pocket ¾ full with lightweight potting mix—avoid garden soil, which is too heavy and compacts easily. Mix in 1 cup of perlite per 4 gallons of soil to improve drainage and prevent root rot. This is especially important in hanging gardens where water drains quickly. Leave 2-3 inches of space at the top for watering and to prevent spills when you water.
Hang the pockets using zip ties or sturdy garden wire through the pre-drilled holes or hooks. For extra stability, add a second zip tie diagonally if your fence gets windy. Test each pocket by gently tugging—it should hold firm but not feel rigid. Arrange pockets in a staggered pattern to create visual interest and maximize space efficiency.
Plant and Water Your Climbing Plants
Select fast-growing climbing plants like morning glories, nasturtiums, or clematis for quick results. Plant 1-2 seeds or a single young plant per pocket, placing them 1-2 inches deep in the soil. If using seeds, press them lightly into the soil and cover with a thin layer of potting mix. Water immediately after planting to settle the soil and remove any air pockets around the roots.
Water deeply every 2-3 days until the soil feels dry to the touch 1 inch below the surface. Hanging gardens dry out faster than ground-level ones, so check moisture frequently, especially in hot weather. Avoid overhead watering—it can wash soil out of the pockets. Instead, water at the base or use a watering can with a long spout. You’ll notice new growth within 7-10 days if conditions are right.
Train Vines and Maintain Growth
Once your plants reach 4-6 inches tall, gently guide the vines onto the fence using soft plant ties or twine. Avoid wrapping ties too tightly—they can damage stems as plants grow. For aggressive climbers like morning glories, train them in a spiral pattern to encourage even coverage. Prune any leggy growth by pinching back the tips to promote bushier, fuller plants.
Fertilize lightly every 4-6 weeks with a balanced, water-soluble fertilizer diluted to half strength. Too much fertilizer can burn roots in hanging gardens. Watch for pests like aphids or spider mites, which love the tender new growth. Spray plants with neem oil at the first sign of trouble—it’s gentle but effective. With proper care, your fence garden will thrive all season long.
Tips & tricks for perfect hanging fence gardens
Here are the key strategies I've learned to help your vertical garden thrive without the common pitfalls that trip up beginners.
Pocket Placement is Everything: The 12-18 inch spacing between pockets in Step 1 isn't just about looks—it's about root competition. Plants in adjacent pockets will naturally spread toward each other, creating a lush curtain effect. For aggressive climbers like morning glories, reduce spacing to 10-12 inches to encourage faster coverage. Always use a level when marking positions to prevent uneven growth patterns that can make your garden look unbalanced.
Drainage Makes or Breaks Your Garden: When filling pockets with lightweight potting mix in Step 2, resist the urge to pack it down tightly. The soil should feel like damp sand when you squeeze it—this creates air pockets that roots need. The 2-3 inch headspace at the top isn't just for watering; it's a critical buffer zone that prevents soil from spilling out when you water. If you notice soil escaping after watering, add a small piece of landscape fabric as a final layer at the top before planting.
Watering Wisdom for Hanging Gardens: The "every 2-3 days" guideline in Step 3 works best when you check soil moisture first. Stick your finger 1 inch down—if it feels dry, water thoroughly until you see water running out the drainage holes. Morning watering prevents evaporation during the day, and using a watering can with a long spout lets you water at the base without disturbing the plants. I've found that adding a layer of mulch (like shredded bark) on top of the soil helps retain moisture between waterings.
Training Vines for Maximum Impact: When your plants reach 4-6 inches in Step 4, don't just tie them to the fence—create a visual pathway. Start at the bottom and spiral vines upward in a gentle curve, leaving about 6 inches between each loop. This not only looks intentional but also prevents vines from tangling. For plants that grow faster than others, use soft plant ties to gently guide them rather than forcing them into position, which can damage delicate stems.
Pro Tips for Hanging Fence Garden
- Here are the key strategies I've learned to help your vertical garden thrive without the common pitfalls that trip up beginners.
- Pocket Placement is Everything: The 12-18 inch spacing between pockets in Step 1 isn't just about looks—it's about root competition.
- Drainage Makes or Breaks Your Garden: When filling pockets with lightweight potting mix in Step 2, resist the urge to pack it down tightly.
Frequently asked questions
Got questions about creating your own hanging fence garden? You’re not alone! Here are answers to the most common queries to help you get started with confidence.
What types of plants work best in a hanging fence garden?
A hanging fence garden thrives with climbing plants like clematis, ivy, jasmine, or morning glories. Opt for lightweight vines with strong tendrils or aerial roots (e.g., Boston ferns, string of pearls). Avoid heavy foliage—think trailing over bushy! For edibles, try cucumbers, beans, or peas.
How long does it take for a hanging fence garden to grow?
Visible growth depends on the plant! Fast growers like morning glories may cover your fence in 2–4 weeks, while slower climbers (e.g., clematis) take 1–2 seasons. Start with young plants or cuttings for quicker results. Patience pays off—think of it as a living tapestry!
Do I need special soil or fertilizer for a hanging fence garden?
Use a well-draining potting mix (avoid garden soil—it compacts and causes rot). Add perlite or coconut coir for aeration. Feed with a balanced liquid fertilizer (10-10-10) every 4–6 weeks during growing season. Pro tip: Mulch with bark chips to retain moisture!
What if my fence isn’t sturdy enough to hold the garden?
No worries! Reinforce weak spots with metal brackets or L-bolts before attaching the garden. For lightweight setups, use plastic-coated wire or a pre-made trellis system. If your fence is temporary (e.g., chain-link), opt for a freestanding vertical planter instead.
How do I keep pests away from my hanging fence garden?
Prevent pests with neem oil or insecticidal soap. Encourage beneficial bugs like ladybugs. Prune regularly to improve airflow (pests love damp, crowded spaces). For slugs/snails, use copper tape around the edges. Bonus: Plant marigolds nearby—they repel aphids naturally!
Wrapping up and next steps
A hanging fence garden is more than just a creative solution—it’s a vibrant, low-maintenance way to transform empty vertical space into a lush, thriving oasis.
Whether you’re a seasoned gardener or a beginner with limited room, this project brings nature closer while adding charm and functionality to your outdoor (or indoor!) space. 🌿
Ready to turn your fence into a green escape? Start small—pick a few hardy climbers like ivy, jasmine, or morning glories—and let your creativity grow! Your future garden awaits—what will you plant first?