
Watering
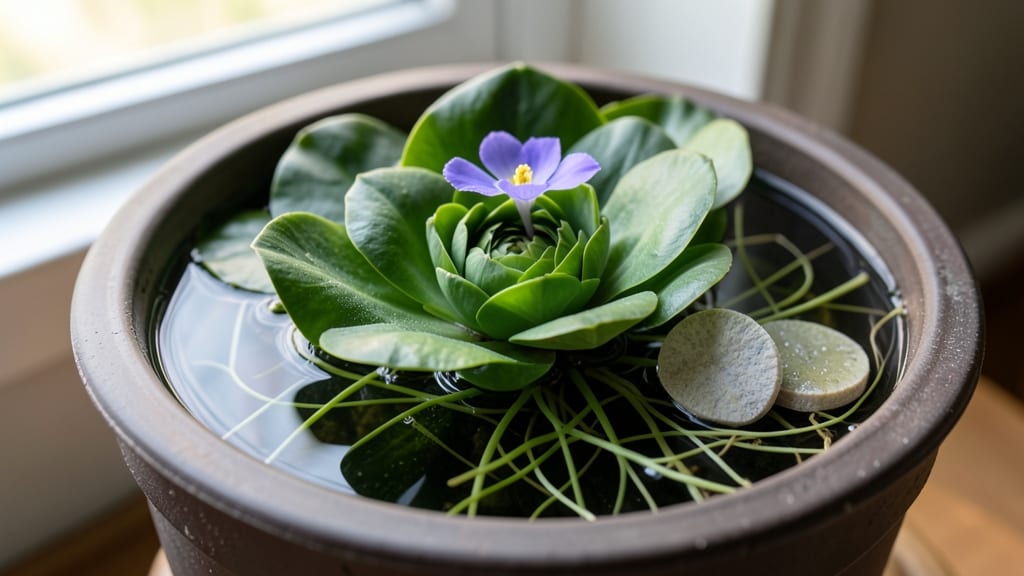
A water garden in a container transforms even a tiny balcony into a tranquil escape. 💚 I’ve turned my 3-foot-wide ceramic planter into a lily-padded haven with just a few simple steps—no messy drainage or heavy equipment required.
The key is matching the right plants to the container size and water depth, so you avoid the common pitfalls of stagnant water or wilted foliage.
You’ll need a container with at least 12 inches of depth, a small submersible pump (or battery-operated fountain for movement), and plants like water hyacinths or dwarf lotus that thrive in confined spaces.
Most urban water gardens use less than 5 gallons of water, making them easy to maintain without a dedicated hose setup. The best part? You can move it to follow the sun or protect it from winter frosts.
By the end of the setup, you’ll have a self-sustaining ecosystem that hums with life—floating leaves, delicate blooms, and the soothing sound of water trickling. My container garden attracts dragonflies and stays crystal clear with just weekly leaf skimming.
The aesthetic? Pure mid-century modern meets zen retreat, all without breaking the bank.
Works for patios, decks, or even indoor sunrooms with the right lighting. Here’s how to pick the perfect plants and keep the water fresh without the hassle of traditional ponds.
📚 In This Guide
- What you need
- Instructions
- Tips and common mistakes
- Wrapping up and next steps
What you need
- ● Container: A large, sturdy pot, tub, or basin (10–30 gallons, depending on plant size). Pro tip: 💡 Choose one with drainage holes or line the bottom with a waterproof liner if needed.
- ● Water: Dechlorinated water (use a water conditioner or let tap water sit for 24 hours).
- ● Substrate: 2–3 inches of small gravel or aquarium substrate for drainage.
- ● Plants: 3–5 aquatic plants (e.g., water hyacinth, lotus, or floating plants like duckweed). Check local regulations: ✨ Some plants are invasive!
- ● Tools: Garden trowel or scoop
- ● Measuring cup or ruler
- ● Pebbles or smooth stones (for decoration and plant anchoring)
- ● Pump & fountain: Small solar-powered or battery-operated pump for movement (adds tranquility!).
- ● Fish: Hardy species like guppies or goldfish (if your container is large enough).
- ● Decor: Rocks, driftwood, or ceramic figurines for a personalized touch.
- ● Lighting: Solar-powered LED lights for nighttime ambiance.
- ● Water testing kit: To monitor pH and nutrients (especially if adding fish).
Step-by-step instructions for creating a container water garden
Here's how to craft a self-contained aquatic haven that thrives without drainage headaches.
🪴 Step 1: Select and Prepare Your Container
Choose a container with a minimum depth of 12 inches—deeper means more stability for aquatic plants and room for roots. I like wide, shallow bowls for oxygenating plants and deeper pots for marginal species. Clean thoroughly with mild soap and rinse well to remove any residue that could harm fish or plants.
For containers without built-in drainage, add a layer of 1 inch of small gravel at the bottom. This creates space for roots while preventing soil from clogging drainage holes. If using a completely sealed container, skip gravel and use a liner—just be prepared to top off water more often.
💧 Step 2: Layer Soil and Add Water
Fill the bottom third of the container with aquatic plant soil, pressing lightly to remove air pockets. This layer anchors marginal plants while keeping roots oxygenated. For sealed containers, use a soil mix specifically formulated for water gardens—regular potting mix compacts and suffocates roots.
Add water until it reaches 1 inch below the container's rim. Use dechlorinated water (let tap water sit uncovered for 24 hours or use bottled water) to avoid harming sensitive aquatic life. For sealed containers, fill completely—water evaporation is your only maintenance task.
🌿 Step 3: Plant Marginal and Floating Species
Start with marginal plants like water hyacinth or water lettuce—they thrive at the water's edge. Plant them in the soil layer, spacing them 3-4 inches apart to allow room for growth. For floating plants like duckweed or water lilies, simply place them on the water's surface where they'll spread naturally.
Here's the thing—balance is key. Too many floating plants block sunlight from reaching submerged species. Aim for 30% coverage at most. You'll see roots develop within 2-3 weeks, signaling healthy establishment.
⏰ Step 4: Maintain Water Quality and Balance
For open containers, add a small water feature or bubbler to increase oxygen circulation. This prevents stagnation and keeps water fresh longer. In sealed containers, a tiny air stone connected to a quiet aquarium pump works wonders—just run it 4-6 hours daily to avoid disturbing plants.
Feed fish or snails sparingly—overfeeding creates waste that fouls water. Watch for algae growth (green film on surfaces) as your first sign of imbalance. A handful of barley straw or a small dose of liquid algae control added to the water solves this quickly.
☀️ Step 5: Position and Protect Your Water Garden
Place your container where it gets 4-6 hours of indirect sunlight daily. Direct sun encourages algae blooms while too little light weakens plants. A shaded patio or under a tree with dappled light works perfectly. Rotate the container weekly to ensure even light exposure—you'll notice plants leaning toward the sun if they're not getting balanced light.
In cooler months, move containers indoors near a bright window or under grow lights. Most aquatic plants enter dormancy at 50°F or below, so expect slower growth until spring. A thin layer of mulch over soil helps insulate roots during temperature swings.
Tips & tricks for perfect container water gardens
Creating a thriving water garden in a container is easier than you think—these tips will help you avoid common pitfalls and create a balanced, beautiful ecosystem.
The Container Depth Matters: That 12-inch minimum depth isn't just a suggestion—it gives roots room to establish and prevents your garden from becoming top-heavy. For marginal plants like water lettuce, aim for containers at least 14 inches deep to accommodate their root systems. If using a shallow bowl, focus on floating plants that don't need deep soil layers.
Soil Selection is Critical: Never use regular potting soil—it compacts when wet and suffocates roots. Look for aquatic plant soil mixes that contain perlite or vermiculite to improve drainage. For sealed containers, I've had great success with a mix of 50% aquatic soil and 50% coconut coir to prevent compaction. Press the soil firmly but don't pack it down completely—this creates tiny air pockets for oxygen exchange.
Water Quality is Everything: The 24-hour dechlorination step is non-negotiable if you're using tap water. Chlorine and chloramine can harm plants and fish. For sealed containers, I recommend changing 25% of the water weekly to prevent nutrient buildup. Add a pinch of liquid seaweed fertilizer to the fresh water to support plant growth without overloading the system.
Light Balance Prevents Algae: Those 4-6 hours of indirect sunlight are your sweet spot—any more and you'll battle algae, any less and your plants will grow leggy. If your garden starts showing green film on the water's surface, it's your first warning sign. Reduce light exposure immediately and add a handful of barley straw to the water. For indoor gardens, supplement with a grow light on a timer for 8-10 hours daily during winter months when natural light is scarce.
Pro Tips for Make A Water Garden In A Container
- Creating a thriving water garden in a container is easier than you think—these tips will help you avoid common pitfalls and create a balanced, beautiful ecosystem.
- The Container Depth Matters: That 12-inch minimum depth isn't just a suggestion—it gives roots room to establish and prevents your garden from becoming top-heavy.
- Soil Selection is Critical: Never use regular potting soil—it compacts when wet and suffocates roots.
Frequently asked questions
Got questions about creating your own container water garden? You’re not alone! Here are some of the most common concerns—and their simple solutions—to help you dive in with confidence.
Can I use any container for a water garden?
Not all containers work! Opt for food-grade plastic, fiberglass, or ceramic containers with at least 10 gallons of capacity (bigger is better for stability and plant health). Avoid metal containers (they rust) and ensure the container has drainage holes or a liner to prevent leaks. If using a decorative pot without holes, add a waterproof liner or place it inside a larger, leak-proof tray.
How often do I need to refill the water?
Evaporation and plant uptake mean you’ll need to top off the water every 1–3 days, depending on your climate and sun exposure. In hot, sunny weather, check daily! Use dechlorinated water (let tap water sit out for 24 hours or use a water conditioner) to protect your plants and fish (if added). A small water feature or solar fountain can also reduce evaporation.
Can I add fish to a container water garden?
Yes, but only small, hardy species like guppies, bettas, or goldfish (limit to 1–2 fish per 10 gallons). Avoid overcrowding, as container gardens have limited filtration. Use an air pump or sponge filter to keep water oxygenated, and perform weekly water changes (20–30%) to maintain water quality. Pro tip: Start with plants first—they’ll help stabilize the ecosystem before adding fish!
What’s the best way to keep my container water garden from freezing in winter?
If you live in a cold climate, drain and store your container (or move it indoors) when temperatures drop below 32°F (0°C). For hardy plants like water lilies or irises, leave them in with 1–2 inches of water and cover with floating foam or bubble wrap to insulate. Avoid ice damage by adding a small solar-powered fountain to keep water moving slightly—this prevents a solid ice sheet from forming.
How do I fix murky or smelly water?
Murky or smelly water usually means excess algae or decaying matter. Start by removing debris (leaves, dead plants) and doing a 50% water change with dechlorinated water. Add beneficial bacteria (like Barley Straw or Seachem Stability) to break down waste. If algae persists, reduce sunlight exposure (move the container to partial shade) or add a few hardy plants (like water hyacinth) to outcompete algae. Avoid overfeeding fish!
Wrapping up and next steps
Creating a water garden in a container is easier than you think—and the rewards are endless! With the right materials, a little planning, and a dash of creativity, you’ve got a serene, low-maintenance oasis that brings nature’s tranquility to your space.
Whether you’re a beginner or a plant enthusiast, this project is a fantastic way to add beauty and calm to your home or patio.
Ready to dive in? Start small, experiment with plants, and enjoy the process! Once your container garden is thriving, consider expanding with more containers or even a DIY water feature like a tiny fountain. Happy gardening! 🌿💦