
Tools
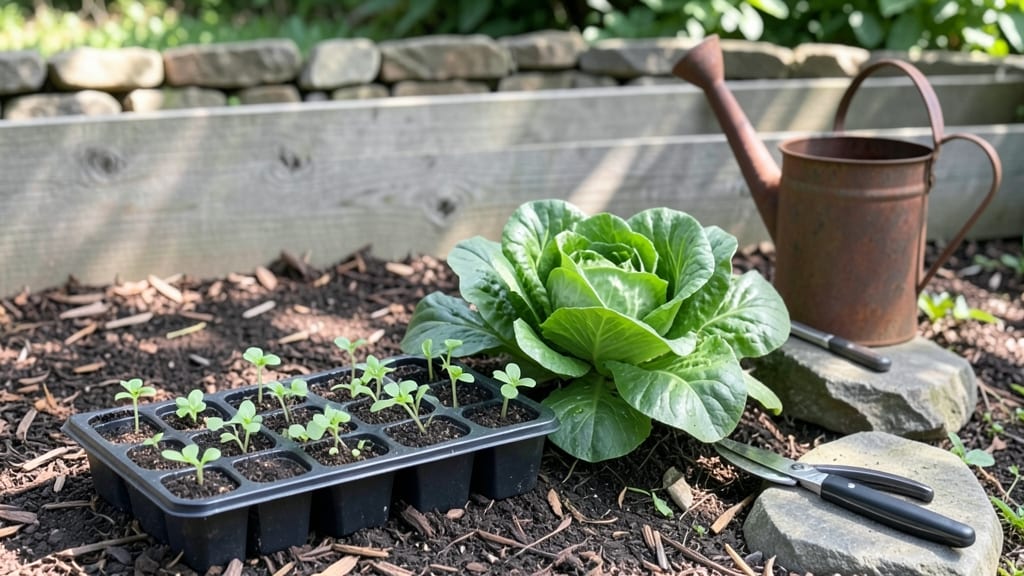
This introduction to gardening doesn’t have to feel like rocket science—just roll up your sleeves, dig in, and watch life bloom from the ground up. I’ve helped dozens of beginners turn brown thumbs green with just a few simple steps and the right mindset.
The key isn’t perfection; it’s progress, and even a single pot of herbs counts as a win.
You’ll need basic tools like gloves, a trowel, and a watering can—nothing fancy. A sunny spot, some soil, and seeds or starter plants are all you really need to begin.
I’ll show you how to pick plants that thrive in your climate and won’t demand constant attention, so you can enjoy the process without stress. The first harvest will feel like magic.
This isn’t about growing a perfect prize-winning garden—it’s about confidence. You’ll learn how to read soil, spot early signs of trouble, and troubleshoot common mistakes before they become disasters.
By the end, you’ll know exactly what your plants need to thrive, and that knowledge sticks with you for every garden after.
Whether you’re working with a backyard plot, containers on a balcony, or even just a sunny windowsill, the principles stay the same. Let’s turn that curiosity into real, growing results—one seed at a time.
📚 In This Guide
- What you need
- Instructions
- Tips and common mistakes
- Wrapping up and next steps
What you need
- ● Garden Space: A sunny spot (6+ hours of sunlight daily) with well-draining soil. Containers (5+ gallon pots) work too!
- ● Soil: 1 bag (2–3 cubic feet) of high-quality potting mix or garden soil (avoid dirt from your yard—it’s often too compacted).
- ● Seeds or Seedlings: Beginner-friendly picks: lettuce, cherry tomatoes, basil, or marigolds (3–5 plants max to start).
- ○ Optional: Transplant trays or biodegradable pots for seedlings.
- ● Watering Tools: Watering can (1–2 gallons) or a hose with a gentle spray nozzle.
- ● 1–2 spray bottles (for seedlings or small pots).
- ● Basic Hand Tools: 1 trowel (for digging small holes).
- ● 1 hand pruners (for trimming or harvesting).
- ● 1 gloves (gardening or work gloves).
- ● Mulch (straw or shredded bark) to retain moisture and suppress weeds.
- ● Fertilizer: Slow-release granules or organic compost (1 small bag).
- ● Stakes or cages (for tomatoes/peppers—3–4 per plant).
- ● Knee pad or small stool for comfort.
- ● Notebook + pen to track planting dates and progress!
Step-by-Step instructions for starting your first garden
Here’s how to launch your garden with confidence—no green thumb required.
Choose Your Planting Spot
Pick a location that gets at least 6 hours of sunlight daily for most vegetables and flowers. Observe the area for a few days to track sunlight patterns—shady spots work for leafy greens like lettuce or herbs like parsley, but sun-loving plants like tomatoes or marigolds will struggle without full sun. Avoid low-lying areas where water pools after rain, as soggy soil invites root rot. If your yard has limited sun, consider containers that you can move closer to a window or patio during peak daylight hours.
Test the soil by digging a small hole and feeling its texture. Sandy soil drains too quickly, while clay feels dense and compact. Amend heavy soil with 2-3 inches of compost (if available) to improve drainage and fertility. You’ll know you’ve picked a good spot when plants thrive without wilting or yellowing leaves—this is your garden’s foundation.
Prepare the Soil
Loosen the top 6-8 inches of soil with a garden fork or tiller to break up compaction and encourage root growth. Work the soil gently—over-tilling can damage beneficial microbes and create a powdery texture that repels water. If your soil is rocky or hardpan, focus on amending the top layer rather than forcing deeper changes. Sprinkle a balanced, slow-release fertilizer (like 10-10-10) over the area at the rate recommended on the package, then mix it into the top few inches of soil.
For container gardens, fill pots with high-quality potting mix (not garden soil) to ensure proper drainage. Tap the sides of the container lightly to settle the mix, then water it until moisture runs out the drainage holes. This preps the soil to hold water without drowning roots. You’ll notice healthy plants grow faster in well-prepared soil—roots spread easily, and nutrients are readily available.
Select and Plant Your First Crops
Start with easy-to-grow plants like lettuce, radishes, or marigolds—they forgive beginner mistakes like inconsistent watering. Check seed packets for spacing recommendations (usually printed on the back) and plant seeds at a depth of twice their diameter. For example, radish seeds (about ¼ inch wide) should go ½ inch deep. Use your finger to create small holes, drop in 2-3 seeds per spot, then cover lightly with soil. Press gently to ensure good seed-to-soil contact, which helps germination.
Water the soil thoroughly after planting, keeping it consistently moist but not waterlogged until seeds sprout. A simple way to test moisture is to stick your finger 1 inch into the soil—if it feels dry, water again. Avoid wetting the leaves, as this can spread disease. You’ll see the first signs of success when tiny green shoots push through the soil in 5-10 days, depending on the plant.
Maintain Your Garden
Water deeply once or twice a week, aiming for 1 inch of water per week (check with a rain gauge or tuna can). Early morning is the best time to water, as it reduces evaporation and fungal risks. Mulch around plants with 2-3 inches of straw or shredded leaves to retain moisture, suppress weeds, and regulate soil temperature. Mulch also keeps soil from splashing onto leaves during watering, which helps prevent disease.
Watch for pests like aphids or slugs—handpick larger pests or hose them off with a strong stream of water. If leaves yellow or wilt, check for overwatering or underwatering. Most garden problems stem from too much or too little water, so adjust based on the soil’s moisture level. You’ll learn to read your plants’ needs over time, and each season will get easier.
Harvest and Learn
Harvest vegetables when they’re ripe—pick leafy greens when they reach 3-4 inches tall, and harvest root crops like carrots when their tops are 4-6 inches high. Flowers should be cut in the morning when dew is present for the longest vase life. Use clean scissors or pruners to avoid damaging the plant. Regular harvesting encourages more production, so don’t wait until the plant looks stressed.
Take notes on what worked and what didn’t—track which plants thrived, which struggled, and why. Adjust next year’s garden based on your observations. For example, if tomatoes struggled with blight, choose disease-resistant varieties or plant them in a different spot. Celebrate your progress, no matter how small. Every gardener starts somewhere, and your first garden is just the beginning.
Tips & tricks for perfect first-time gardening
Here’s what I’ve learned from years of gardening mishaps—and how you can skip the trial-and-error phase.
Sunlight Secret: The 6 hours of sunlight requirement is non-negotiable for most plants, but timing matters just as much. Track sunlight patterns for a full week before planting—morning sun (before 10 AM) is gentler on tender seedlings, while afternoon sun (after 2 PM) can scorch delicate leaves. If you’re using containers, rotate them daily to ensure even light exposure on all sides. This simple habit prevents lopsided growth and keeps your plants thriving from the start.
Soil Prep Pro Tip: When loosening that 6-8 inch layer of soil in Step 2, think of it like fluffing a pillow—you want to create air pockets for roots, not turn it into powder. Use a garden fork rather than a shovel to avoid compacting the soil further. For rocky soil, focus on amending just the top 3-4 inches with compost—deep tilling can actually make things worse by bringing up buried weed seeds and disturbing beneficial microbes. A little effort here pays off with stronger root systems down the road.
Planting Precision: That rule about planting seeds twice their diameter deep is your best friend, but here’s the trick: make the holes just slightly larger than needed. Press the soil gently around the seeds to ensure good contact, but don’t pack it down too tightly. For radishes, I like to create tiny furrows instead of individual holes—this makes planting and covering multiple seeds much easier. After planting, give the soil a light mist with a spray bottle to settle things without disturbing the seeds.
Watering Wisdom: The 1-inch-per-week watering guideline is perfect, but how you deliver that water makes all the difference. Water at the soil level rather than overhead to prevent fungal diseases. In Step 4, consider using a soaker hose or drip irrigation system—it delivers water directly to the roots where plants need it most, without wasting a drop. And always water in the morning; this gives plants all day to dry out, reducing the risk of mildew and other moisture-related problems.
Pro Tips for Introduction To Gardening
- Here’s what I’ve learned from years of gardening mishaps—and how you can skip the trial-and-error phase.
- Sunlight Secret: The 6 hours of sunlight requirement is non-negotiable for most plants, but timing matters just as much.
- Soil Prep Pro Tip: When loosening that 6-8 inch layer of soil in Step 2, think of it like fluffing a pillow—you want to create air pockets for roots, not turn it into powder.
Frequently asked questions
Got questions about diving into gardening? You’re not alone—every beginner does! Here are answers to the most common queries to help you grow with confidence.
What’s the best time of year to start a garden?
Timing depends on your climate! In most regions, spring (after the last frost) is ideal for planting cool-season crops like lettuce or peas. Warm-season veggies (tomatoes, peppers) thrive when soil warms to 60°F+—usually late spring or early summer. Check your local frost dates to plan ahead!
How much does beginner gardening actually cost?
Costs vary, but you can start small! A basic setup (seeds, soil, pots, tools) runs $50–$150. Repurposing containers (milk jugs, old buckets) or swapping seeds with neighbors slashes expenses. Pro tip: Buy seeds in bulk or save from store-bought produce (like tomatoes) to cut costs further!
What do I do if pests attack my plants?
Don’t panic! Start with physical barriers (row covers, netting) or homemade sprays (soapy water or neem oil). For severe infestations, research organic pest controls or consult local garden centers. Prevention (healthy soil, crop rotation) is key—pests hate thriving plants!
Can I garden in small spaces like apartments or balconies?
Container gardening
is perfect for tiny spaces. Use herbs (basil, mint), leafy greens (spinach), or dwarf veggies (cherry tomatoes) in pots with good drainage. Hang baskets for trailing plants (like strawberries) or try vertical gardens on walls or trellises.
Do I need a green thumb to be successful?
Nope! Gardening is about patience and learning. Start with low-maintenance plants (succulents, zucchini, or marigolds) and track what works. Failures are just lessons—even experts kill plants sometimes! Keep a journal to refine your skills over time.
Still curious? Drop your questions below—we’re happy to help you grow!
Wrapping up and next steps
Gardening is an incredibly rewarding journey—whether you’re growing fresh herbs, vibrant flowers, or a full vegetable patch. You’ve now got the tools, tips, and confidence to start small, stay consistent, and watch your green thumb flourish! 🌱
Ready to dive in? Pick one plant or task from this guide and take that first step today—your future garden (and future you) will thank you!