How To
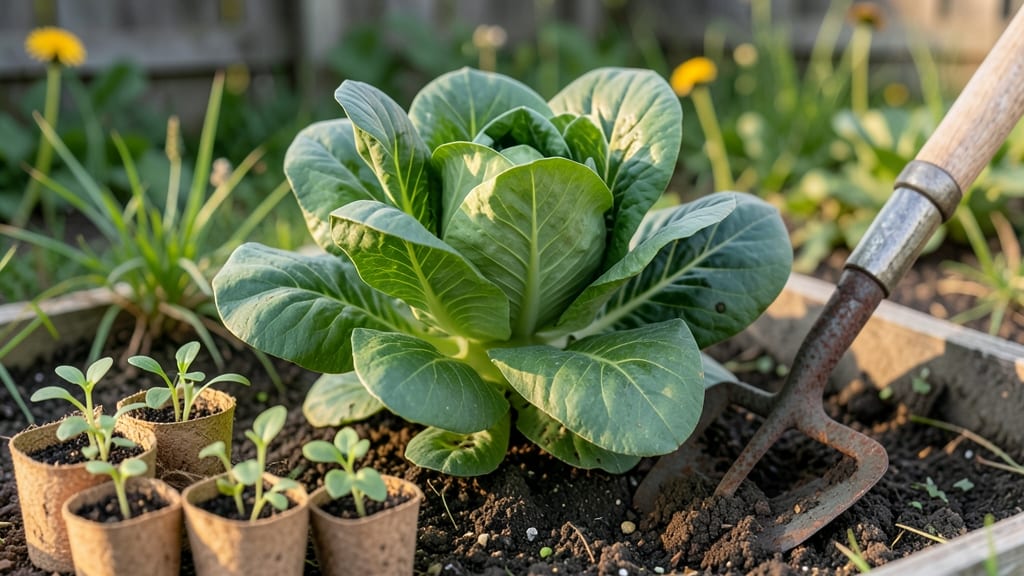
Preparing your soil properly is the foundation of every successful garden—without it, even the hardiest plants struggle to thrive. I learned this the hard way when my first tomato plants wilted despite perfect watering, only to discover the roots were suffocating in compacted, nutrient-poor soil.
The right mix transforms barren ground into a fertile canvas where roots can breathe, nutrients flow freely, and plants grow with vigor.
Start with a simple soil test kit to check pH and organic matter levels—most garden centers sell them for under $20. For in-ground beds, till in 2-3 inches of compost or well-aged manure, then mix in coarse sand or perlite if drainage is poor.
Container gardens need a lighter blend: equal parts potting soil, perlite, and compost to prevent compaction. The key is balance: loose enough for roots to spread, rich enough to feed plants for months, and structured to hold moisture without drowning delicate stems.
Once amended, your soil should crumble easily between fingers like a moist sponge, with a dark, almost velvety appearance. Vegetables crave slightly acidic soil (pH 6.0-7.0), while blueberries and azaleas thrive in the 4.5-5.5 range—adjust with lime or sulfur as needed.
After planting, top-dress with mulch to preserve moisture and feed the soil over time. This isn’t just preparation; it’s an investment that pays off in every harvest.
Adapt this approach for raised beds by mixing soil components in layers, or for heavy clay by amending gradually over seasons. The goal isn’t perfection—it’s progress. Even small improvements in soil structure can double your plant’s growth potential. Let’s get your garden growing on solid ground.
📚 In This Guide
- What you need
- Instructions
- Tips and common mistakes
- Wrapping up and next steps
What you need
- ● Garden soil (topsoil or native soil) – 2-4 inches deep (depending on plant type). Use compost or loam for best results.
- ● Organic matter – 2-3 inches of compost or well-rotted manure (per square foot). Cow, horse, or chicken manure work well (avoid fresh manure—it can burn plants!).
- ● Perlite or vermiculite – 1-2 cups per 5-gallon bucket of soil mix (for aeration and moisture retention).
- ● Peat moss or coconut coir – 1 part per 3 parts soil (improves drainage and structure).
- ● Slow-release fertilizer – 10-10-10 NPK ratio (follow package instructions for application rates).
- ● Garden fork or tiller – For deep loosening (6-12 inches) before planting.
- ● Garden rake – Bow rake (for fine finishing) or leaf rake (for debris removal).
- ● Garden hose with spray nozzle – For even watering after amending soil.
- ● pH testing kit – To check soil acidity/alkalinity (ideal range: 6.0-7.0 for most plants).
- ● Gloves and knee pads – Because comfort matters (trust us!).
- ● Worm castings – ½ cup per square foot (boosts microbial activity naturally).
- ● Biochar – 1 part per 10 parts soil (improves water retention and nutrient availability).
- ● Mulch (straw, wood chips, or shredded leaves) – 2-3 inches (retains moisture and suppresses weeds).
- ● Soil conditioners – Like kelp meal (for micronutrients) or gypsum (for clay soils).
- ● Handheld soil probe – To check drainage depth (poke holes every 12 inches).
Step-by-Step guide to preparing soil for a thriving garden
Here’s how to create the perfect foundation for your plants—light, fertile, and ready for growth.
Clear and Loosen the Existing Soil
Start by removing weeds, rocks, and debris from the garden bed. Use a garden fork or tiller to break up compacted soil to a depth of 6-12 inches. This helps roots penetrate easily and improves drainage. If your soil is extremely hard, add water first to soften it before loosening.
Work the soil gently to avoid creating a dusty, powdery texture. You’ll know it’s ready when it crumbles easily between your fingers—like damp sand. Avoid overworking the soil, as this can disrupt soil structure and harm beneficial organisms.
Amend with Organic Matter
Spread a 2-4 inch layer of compost evenly over the loosened soil. This adds nutrients, improves moisture retention, and encourages healthy microbial activity. Mix it in thoroughly with a garden fork or shovel, ensuring it blends evenly with the existing soil.
For heavier clay soils, add peanut hulls or coarse sand to improve drainage. If your soil is sandy, incorporate peat moss or coconut coir to help retain moisture. The goal is a balance—soil that holds water but doesn’t stay soggy.
Balance pH and Test for Nutrients
Use a soil test kit to check the pH and nutrient levels. Most vegetables thrive in slightly acidic to neutral soil (pH 6.0-7.0). If your soil is too acidic, add lime to raise the pH. For alkaline soil, mix in sulfur or peat moss to lower it.
Add a slow-release fertilizer or bone meal if the test shows low phosphorus, or kelp meal for potassium. Work these amendments into the top 6 inches of soil and water lightly to help them integrate. Avoid over-fertilizing, as this can harm plants.
Fluff and Level the Soil
Use a rake to create a smooth, even surface. Remove any remaining clumps or large particles. This step ensures seeds or transplants sit at the right depth and water drains properly. Press down lightly to eliminate air pockets but don’t compact the soil again.
For raised beds, add a 1-2 inch layer of mulch (like straw or wood chips) on top to retain moisture and suppress weeds. Mulch also keeps soil temperatures stable, which is especially helpful in hot or cold climates.
Water and Let It Settle
Give the soil a deep watering to help amendments settle and encourage microbial activity. Let it rest for 1-2 weeks before planting. This allows the soil to stabilize and for any sharp chemical adjustments to balance naturally.
During this time, monitor moisture levels. The soil should feel like a damp sponge—neither bone-dry nor waterlogged. If it’s too dry, water lightly; if it’s too wet, wait a few days before checking again. This final step ensures your soil is ready for planting.
Tips & tricks for perfectly prepared garden soil
Creating the ideal foundation for your garden isn't just about following steps—it's about understanding the little details that make all the difference. Here's what I've learned after years of trial and error in my own garden.
Depth Matters: When loosening soil in Step 1, aim for that 6-12 inch depth consistently across your garden bed. I've found that using a garden fork in vertical motions (rather than horizontal) creates better channels for roots. If you're working with particularly hard soil, consider renting a rototiller for large areas—it saves time and energy while achieving the same depth.
Compost Quality Check: In Step 2, don't just grab any compost from the bag. The best results come from well-aged, dark brown compost with visible decomposition. I look for compost that's crumbly and smells earthy (not sour or ammonia-like). For raised beds, I often mix in a 50/50 blend of store-bought compost and homemade leaf mold for extra structure.
pH Testing Tips: The pH 6.0-7.0 range mentioned in Step 3 is perfect for most vegetables, but some plants prefer different conditions. For example, blueberries thrive in acidic soil (pH 4.5-5.5). Always test your soil before amending—some garden centers offer free testing services. I've learned the hard way that adding lime to already neutral soil can actually make your garden bed less productive.
Mulch Strategy: When adding that 1-2 inch layer of mulch in Step 4, leave a small gap around plant stems to prevent rot. I use straw for vegetable gardens (it breaks down faster) and wood chips for perennial beds (longer-lasting). For hot climates, apply mulch thicker (3-4 inches) to protect roots from temperature swings. This simple adjustment has saved many of my plants from heat stress.
Pro Tips for Properly Prepared Soil For Gardening
- Creating the ideal foundation for your garden isn't just about following steps—it's about understanding the little details that make all the difference.
- Depth Matters: When loosening soil in Step 1, aim for that 6-12 inch depth consistently across your garden bed.
- Compost Quality Check: In Step 2, don't just grab any compost from the bag.
Frequently asked questions
Got questions about getting your soil just right? You’re not alone—preparing the perfect gardening base can feel tricky! Here are answers to the most common queries to help you grow with confidence.
How do I test if my soil is ready for planting?
Press a handful of damp soil—if it crumbles easily, it’s ready! For a deeper check, grab a soil test kit (available at garden centers) or send a sample to your local extension office. Aim for a pH of 6.0–7.0 for most veggies and flowers. Pro tip: Dark, spongy soil that holds moisture but drains well is your golden ticket!
When is the best time to prepare garden soil?
Start 6–8 weeks before planting for cool-season crops (like lettuce or peas) or 4–6 weeks before warm-season plants (tomatoes, peppers). In fall, prep beds for spring planting—just cover with mulch to protect over winter. Troubleshooting: If soil is waterlogged in spring, wait until it’s workable (not muddy!).
Can I skip compost and use only fertilizer?
Not ideal! Fertilizers provide quick nutrients, but compost improves soil structure, water retention, and microbial life—think of it as the "glue" that keeps soil healthy long-term. Mix 3–4 inches of compost into the top 12 inches of soil for best results. Budget hack: Use free green waste (grass clippings, leaves) in a compost bin first!
What if my soil has too many weeds or pests?
First, remove weeds by hand or smother them with cardboard + mulch for 4–6 weeks. For pests, till in organic matter like aged manure or neem cake to deter critters. Avoid chemical pesticides—they harm beneficial soil organisms. Prevention tip: Plant companion crops (like marigolds) to naturally repel pests!
How often should I re-prep my garden soil?
Every 1–2 years for active gardens, or after heavy crops (like tomatoes). Top-dress with 1–2 inches of compost annually to replenish nutrients. After harvest, loosen soil and add organic matter to prevent compaction. Sign it’s time: Plants struggle, weeds take over, or soil feels hard when squeezed.
What’s the deal with clay or sandy soil?
| Soil Type | Fix It With... | How to Improve |
|---|---|---|
| Clay | Organic matter | Work in peat moss, compost, or aged manure to loosen and aerate. Avoid tilling when wet! |
| Sandy | Water-holding amendments | Mix in compost, coconut coir, or leaf mold to boost moisture retention. Mulch heavily! |
Wrapping up and next steps
Preparing your soil properly is the foundation of a thriving garden—it ensures your plants grow strong, healthy, and bountiful. 🌱 By testing, amending, and maintaining nutrient-rich, well-draining soil, you’re setting yourself up for success with every seed you plant.
Now that you’re equipped with the knowledge, it’s time to roll up your sleeves and transform your garden into a flourishing paradise!
Your next step? Pick a plant (or two!) and start digging—literally. Whether you’re growing veggies, flowers, or herbs, your soil is now ready to support their growth. Happy gardening! 🌿