
Tools
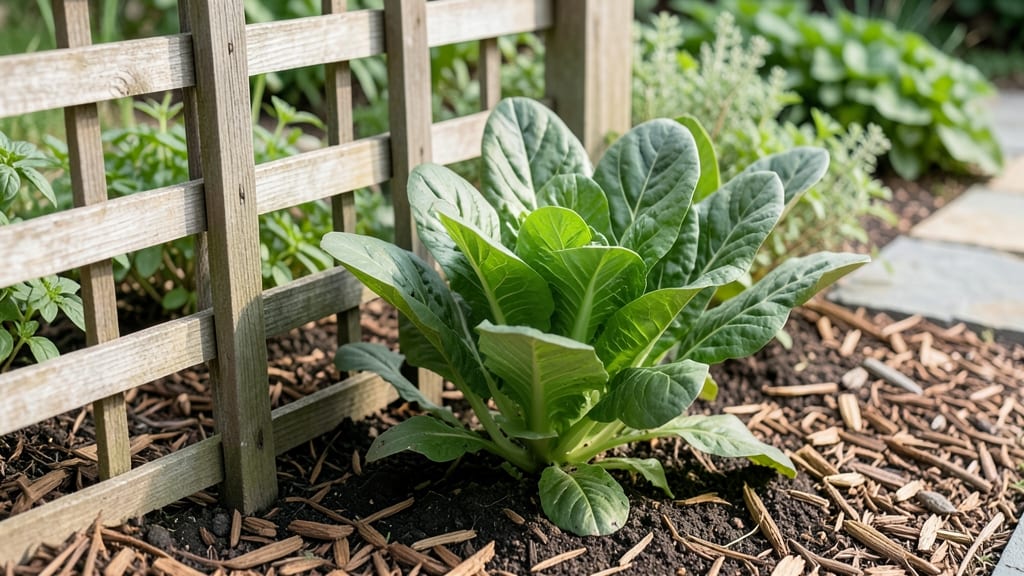
A potager garden layout transforms your yard into a lush, productive kitchen garden where every square foot works for you. 🌱 I designed mine after realizing my vegetable beds were too scattered—now I harvest fresh herbs, tomatoes, and greens within arm's reach of my cooking area.
The French four-square method organizes plants by height, season, and function, creating a garden that's both beautiful and efficient.
The magic happens in the layout: tall plants like trellised beans or sunflowers go in the north corners, mid-height crops (peppers, bush beans) fill the center squares, and low growers (lettuce, radishes) hug the edges.
Pathways of gravel or stepping stones make weeding and harvesting a breeze, while companion planting—pairing basil with tomatoes or marigolds with carrots—keeps pests at bay. Even beginners can pull this off with just a tape measure, some stakes, and a little planning.
By summer, your garden will be a riot of color and texture, with fragrant herbs brushing your arm as you pluck ripe tomatoes. The real win? You'll harvest 30-50% more than in traditional rows because every plant gets optimal sunlight and support.
Plus, the design makes it easy to swap out crops as seasons change—no wasted space, just endless abundance.
Works in any yard size, from city balconies (scaled down) to sprawling backyards. The key is starting small—one square at a time—and letting the layout evolve as your confidence grows. Ready to turn your yard into a French-inspired feast?
📚 In This Guide
- What you need
- Instructions
- Tips and common mistakes
- Wrapping up and next steps
What you need
- ● Garden Plot: 4 square sections (minimum 4’x4’ each, expandable to 6’x6’ or larger for bigger yields).
- ○ Optional: Raised beds (6”–12” tall, untreated cedar or composite wood) for better soil control.
- ● Soil: 6–12 cubic yards of high-quality garden soil (mix of topsoil, compost, and organic matter).
- ● 1–2 bags of compost (per square) for nutrient boost.
- ● 1–2 bags of bulk compost (for ongoing amendments).
- ● Essential Tools: 1 broadfork (for aerating soil).
- ● 1 garden hoe (for weeding and soil prep).
- ● 1 hand trowel (for planting and transplanting).
- ● 1 wheelbarrow (for hauling soil/compost).
- ● 1 garden hose with adjustable nozzle (for irrigation).
- ● 1 pruners (for trimming herbs/veggies).
- ● Pathways: Gravel, mulch, or stepping stones (to define sections and reduce weeds).
- ● Irrigation: Drip irrigation kit or soaker hoses (for efficient watering).
- ● Rainwater collection barrel (to save on water costs).
- ● Support Structures: Trellises, cages, or stakes (for climbing plants like beans or cucumbers).
- ● Seasonal Add-Ons: Cold frames or row covers (to extend growing seasons).
- ● Shade cloth (for delicate greens in hot climates).
How to design a four-square French potager garden
Here's the classic structure that balances beauty with productivity—perfect for both beginners and seasoned gardeners.
🪴 Step 1: Divide Your Space into Four Equal Quadrants
Start by marking your garden bed into four equal squares using string lines or a garden hose. Each quadrant should be roughly 4 feet by 4 feet for manageable scale. I like to use wooden stakes at each corner to anchor the lines—this makes it easy to adjust before digging. The French potager tradition assigns each square a distinct purpose: herbs, flowers, vegetables, and fruits.
Measure diagonally to ensure all four squares are perfectly symmetrical. Uneven divisions will throw off your planting rhythm later. If your space isn't perfectly square, adjust the proportions slightly but maintain equal area—this keeps the design balanced and functional.
🌱 Step 2: Assign Plant Categories to Each Quadrant
Dedicate one square to herbs (like basil, rosemary, and parsley), another to flowers (marigolds, nasturtiums, and calendula), one for vegetables (tomatoes, lettuce, and carrots), and the final for fruits (strawberries, raspberries, or dwarf fruit trees). This layout maximizes pollination, pest control, and visual harmony. I always place the herb square adjacent to the vegetable quadrant—it's the most practical pairing for companion planting.
Sketch a rough map before planting. Label each quadrant with stakes so you remember where everything goes. The flower quadrant should include both edible blooms and pollinator-friendly varieties to attract beneficial insects naturally. This isn't just decoration—it's an ecosystem.
☀️ Step 3: Plan Rows and Pathways Within Each Square
Within each quadrant, create raised beds or low mounds with 12-inch wide rows separated by 6-inch wide pathways. This gives you easy access to every plant without stepping on beds. Use a string line and stakes to mark row centers before digging. The pathways should be wide enough for a wheelbarrow if you're hauling compost or tools frequently.
For the vegetable quadrant, arrange plants by height—tall plants like tomatoes at the north edge, medium-height plants (peppers, bush beans) in the middle, and low-growing crops (lettuce, radishes) at the south edge. This prevents shading issues and makes harvesting easier. I always leave a 2-foot gap between the vegetable and herb quadrants for flexibility in expanding rows.
🌿 Step 4: Integrate Companion Planting and Seasonal Layers
In the vegetable quadrant, pair plants that benefit each other—like basil with tomatoes or carrots with onions. Use the herb quadrant to fill gaps between vegetable rows with low-growing companions like thyme or oregano. The flower quadrant should include plants that deter pests naturally, such as marigolds around the perimeter of the vegetable square.
Plan for seasonal succession by designing each quadrant in layers. For example, in the vegetable square, plant fast-growing crops like radishes in early spring, then follow with lettuce, then taller plants like corn or pole beans as the season progresses. This keeps the space productive year-round without fallow periods.
✂️ Step 5: Add Permanent Structures and Finishing Touches
Install a small trellis in the fruit quadrant for climbing varieties like raspberries or cucumbers. Place a compost bin near the vegetable quadrant for easy access to nutrients. I like to add a simple arbour or pergola at the center where all four quadrants meet—it creates a focal point and can support climbing flowers or vines that connect the squares visually.
Finally, add edging around each quadrant using bricks, stones, or low wooden borders. This defines the space clearly and prevents soil from mixing between quadrants. Mulch pathways with straw or wood chips to suppress weeds and retain moisture. The finished layout should feel intentional—like a carefully curated garden rather than a haphazard collection of plants.
Tips & tricks for perfect potager garden layout
Creating a functional and beautiful potager garden takes more than just dividing space—it's about intentional design that maximizes productivity and aesthetics. Here's what I've learned after designing several French-inspired potagers myself.
Symmetry Matters: When dividing your space into four equal quadrants in Step 1, use a diagonal measurement to verify perfect squares. I've seen many gardeners assume visual symmetry is enough, but a 1-inch difference in diagonal measurement can create noticeable imbalances. For extra precision, use a tape measure to check both diagonals—they should be identical. This ensures your pathways and planting areas remain consistent throughout the season.
Pathway Planning: The 6-inch pathways you create in Step 3 are more important than they seem. If you're frequently hauling heavy loads like compost or tools, widen them to 8-10 inches. I installed 8-inch pathways in my second potager and never regretted it—the extra width made wheelbarrow access effortless. Consider adding a slight crown to pathways to help with drainage during rainy seasons.
Companion Planting Secrets: In Step 4, go beyond the basic pairings mentioned. For example, plant dill in your flower quadrant—it attracts beneficial wasps that prey on tomato hornworms in your vegetable square. I also interplant nasturtiums between tomato plants; they deter aphids while adding vibrant color. These subtle pairings create a self-regulating ecosystem that reduces the need for chemical interventions.
Seasonal Layering Strategy: The key to year-round abundance lies in your planting layers from Step 4. Start with cold-hardy crops like spinach and kale in early spring, then transition to lettuce and radishes as temperatures warm. In late summer, plant fast-maturing crops like bush beans or zucchini in the same spaces. This succession planting keeps your vegetable quadrant productive without requiring additional space. I've maintained this rotation for three years and never had a fallow period.
Pro Tips for Potager Garden Layout
- Creating a functional and beautiful potager garden takes more than just dividing space—it's about intentional design that maximizes productivity and aesthetics.
- Symmetry Matters: When dividing your space into four equal quadrants in Step 1, use a diagonal measurement to verify perfect squares.
- Pathway Planning: The 6-inch pathways you create in Step 3 are more important than they seem.
Frequently asked questions
Got questions about designing your potager garden?
You’re not alone! Here are some of the most common queries—and their practical solutions—to help you get started with confidence.
What’s the best time of year to start planning my potager layout?
Spring (March–April) is ideal for planning and sketching your layout, while early spring or late summer are great for breaking ground. However, you can start designing anytime—just adjust planting schedules based on your climate. Pro tip: Use raised beds in colder regions to extend your growing season!
How do I decide which crops to plant in each square of the four-square potager?
The classic four-square layout divides space into:
- Herbs & Greens (e.g., basil, parsley, lettuce)
- Root Vegetables (carrots, beets, radishes)
- Fruiting Plants (tomatoes, peppers, cucumbers)
- Alliums (onions, garlic, leeks)
Is a potager garden more expensive than a traditional vegetable garden?
Not necessarily! While raised beds or decorative edging may add upfront costs, potagers maximize space and yield, saving money long-term. Start small with affordable materials like untreated wood or cinder blocks, and reuse containers. Pro tip: Skip pricey ornamentals—focus on functional, high-yield crops!
How do I keep pests out of my potager without chemicals?
Companion planting (e.g., marigolds with tomatoes) and crop rotation deter pests naturally. Use row covers for early planting, handpick pests early, and encourage beneficial insects like ladybugs. Pro tip: Interplant strong-scented herbs (like rosemary) to repel pests!
Can I adapt a potager layout to a small urban space or balcony?
Scale down using vertical gardening (trellises for beans, peas), container pots, or even window boxes. A "mini potager" can fit herbs, microgreens, and compact veggies like bush beans. Pro tip: Prioritize sun exposure—most potager crops need 6+ hours of light daily!
Wrapping up and next steps
Designing your potager garden with the classic four-square French layout isn’t just about aesthetics—it’s a delicious roadmap to year-round abundance! 🌱 Whether you’re a seasoned green thumb or a curious beginner, this structured approach simplifies planting, maximizes space, and keeps your harvests thriving.
Start small, experiment with herbs, greens, and seasonal veggies, and watch your garden (and confidence!) grow.
Ready to dig in? Sketch your first square today—grab a notebook, measure your space, and let the joy of fresh, homegrown flavors inspire your next steps. À vos fourches! 🍅🥕