
Tools
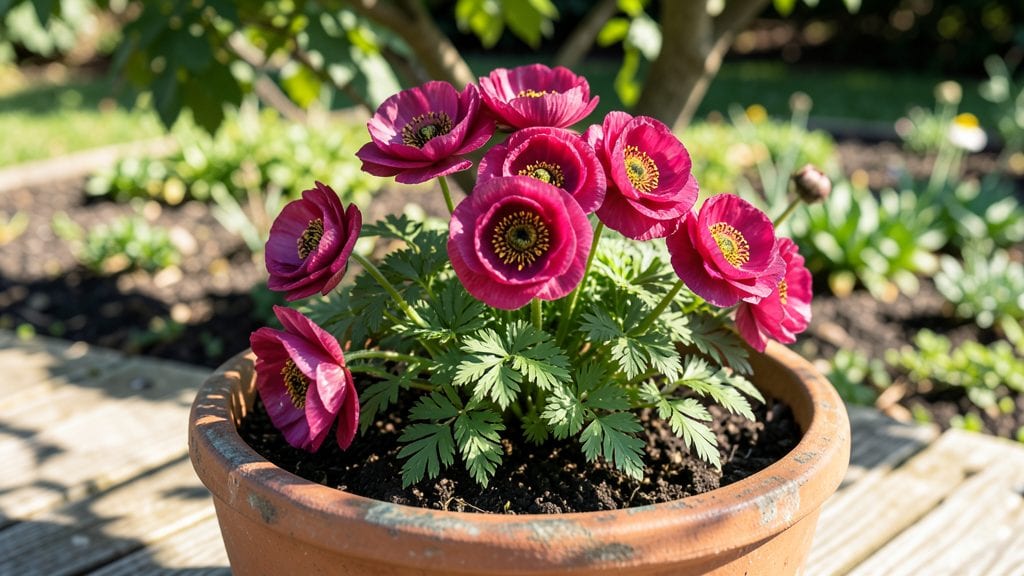
Ranunculus blooms transform gardens into storybook scenes with their layered, ruffled petals that dance in the breeze. 🌸 I fell for them after seeing a cottage garden overflowing with colors—soft pinks, creamy whites, and deep burgundies—that lasted from early spring through summer.
These flowers aren’t just pretty; they’re the secret weapon for adding texture and whimsy to any design, whether you’re going for rustic charm or refined elegance.
The magic happens in how you mix them. Pair their delicate layers with bold foliage like hostas or ornamental grasses to create contrast, or tuck them alongside roses for a romantic border.
For containers, combine them with trailing plants like sweet alyssum or dusty miller to fill gaps and extend their display. They thrive in full sun to partial shade, making them adaptable to almost any spot in your yard.
Imagine cutting stems for bouquets that last a week in vases, their petals unfolding like tiny, intricate fans. The key is deadheading spent blooms to encourage more flowers, and choosing varieties that match your color palette—whether you want a soft pastel palette or dramatic jewel tones.
With the right placement, ranunculus will become the star of your garden, season after season.
They’re perfect for cottage gardens, pollinator-friendly borders, or even as a focal point in containers. The best part? Their versatility means you can experiment without fear—just plant them where they’ll get good light, keep the soil well-draining, and let their natural charm do the rest.
Ready to bring this whimsical beauty to your outdoor space?
📚 In This Guide
- What you need
- Instructions
- Tips and common mistakes
- Wrapping up and next steps
What you need
- ● Ranunculus bulbs: Choose Ranunculus asiaticus or Ranunculus persicus (10–50 bulbs, depending on desired coverage). Opt for large, firm bulbs for the most vibrant blooms.
- ● Well-draining potting mix or garden soil: 5–10 gallons (for containers) or amended garden beds (for in-ground planting). Mix in perlite or sand (20–30% by volume) to improve drainage.
- ● Organic compost: 1–2 cups per square foot to enrich soil fertility.
- ● Slow-release fertilizer: 10-10-10 or 12-12-18 (1–2 tbsp per bulb or per square foot).
- ● Balanced liquid fertilizer: 20-20-20 (for foliar feeding during growth).
- ● Trowel or bulb planter: For precise planting (6–8 inches deep).
- ● Garden gloves: To protect your hands from sharp bulb edges.
- ● Watering can or hose with a gentle spray nozzle: Ranunculus bulbs hate soggy soil!
- ○ Container pots (optional): 6–12 inches deep with drainage holes (for patio displays).
- ○ Mulch (optional): Straw or shredded bark (1–2 inches) to retain moisture and suppress weeds.
- ● Pruning shears: For trimming spent blooms or shaping plants.
- ● Sunlight: Full sun (6–8 hours daily) for optimal blooming. Partial shade (4–6 hours) works in hot climates.
- ● Climate: Plant in early fall (8–10 weeks before last frost) for spring blooms. Zones 3–9 (adjust timing for your region).
- ● Watering routine: Keep soil consistently moist but never waterlogged until buds form, then reduce slightly.
- ● Patience: Ranunculus bulbs take 10–12 weeks to bloom—worth every wait!
How to design a stunning ranunculus garden
Turn your garden into a dreamy display with these delicate blooms—layered for drama and lasting beauty.
🌱 Step 1: Choose Your Ranunculus Varieties
Pick 4-5 different ranunculus varieties to create visual interest. For year-round elegance, mix early bloomers like ‘Strawberry and Cream’ (spring) with midseason favorites like ‘Pink Champagne’ and late-season ‘White Pearl’. I always include at least one deep color—‘Burgundy’ or ‘Maroon’—to anchor the palette.
Check bloom times on seed packets or plant tags. You’ll want 3-4 weeks of overlap between varieties so your garden never looks bare. If you’re planting from bulbs, choose small, medium, and large sizes—this creates natural height variation and prevents a flat, uniform look.
☀️ Step 2: Select the Perfect Sunlight Spot
Ranunculus thrive in full sun to partial shade—at least 6 hours of direct sunlight daily. I’ve found the sweet spot is morning sun with afternoon shade, especially in hot climates. If your garden only gets 4-5 hours of sun, focus on shade-tolerant varieties like ‘White Fantasy’ or ‘Pink Fantasy’—they’ll still bloom beautifully.
Test your spot for a week before planting. Mark where sunlight hits at midday and late afternoon—this helps you position taller varieties toward the north and shorter ones toward the south. Avoid low-lying areas where water pools, as ranunculus hate soggy roots.
🪴 Step 3: Prepare the Soil for Optimal Growth
Ranunculus need well-draining, fertile soil with a slightly acidic to neutral pH (6.0-7.0). Before planting, mix 2-3 inches of compost into the top 6-8 inches of soil—this loosens the earth and adds nutrients. I also add a handful of perlite or coarse sand to prevent compaction, especially in clay-heavy gardens.
Dig a hole twice as wide as the bulb or root ball but only as deep as the bulb’s height. If planting from seed, sow at a depth of ½ inch, covering lightly with soil. Space bulbs 3-4 inches apart for small varieties and 6 inches apart for larger ones. Press the soil gently around each plant—just enough to hold them in place without crushing the roots.
💧 Step 4: Water and Mulch for Long-Lasting Blooms
Water deeply right after planting to settle the soil and encourage root growth. Then, water every 2-3 days until the first shoots appear—about 3-4 weeks. Once blooms emerge, reduce watering to once a week, giving 1 inch of water per week. Overwatering causes rot, and ranunculus hate wet feet.
Apply a 2-inch layer of mulch (like shredded bark or straw) around the base of the plants, keeping it 2 inches away from the stems. Mulch retains moisture, suppresses weeds, and regulates soil temperature. Replenish mulch every 2-3 months or after heavy rains to maintain its effectiveness.
✂️ Step 5: Maintain and Extend the Blooming Season
Deadhead spent blooms immediately by snipping the stem just above the next set of leaves. This encourages more flowers and prevents the plant from wasting energy on seed production. I do this every 2-3 days during peak bloom—it’s a small effort for big rewards.
Fertilize lightly once a month with a balanced, water-soluble fertilizer (10-10-10) during the growing season. Avoid high-nitrogen fertilizers—they promote leafy growth at the expense of flowers. In late summer, reduce watering gradually to prep the plants for dormancy, then cut back foliage to 2 inches tall before winter.
Tips & tricks for perfect ranunculus garden design
Creating a stunning ranunculus display takes a little strategy—here’s how to elevate your garden from pretty to showstopping.
Color Layering Secret: In Step 1, when selecting your 4-5 varieties, place the tallest blooms (like ‘White Pearl’) at the back of your garden bed, medium-height varieties (such as ‘Pink Champagne’) in the middle, and smaller varieties (like ‘Strawberry and Cream’) toward the front. This creates depth and prevents a flat, crowded look. I’ve found that adding a deep color like ‘Burgundy’ in the center draws the eye and makes lighter blooms pop even more.
Soil Prep Pro Tip: In Step 3, when amending your soil with 2-3 inches of compost and perlite, don’t skimp on the perlite—especially if you have heavy clay soil. I’ve seen gardens where the roots struggled because the soil didn’t drain properly, leading to rot. Mix in about 1 part perlite to 3 parts compost for that perfect balance of drainage and nutrients. The extra effort makes a huge difference in root health!
Watering Wisdom: The 2-3 days of watering in Step 4 is crucial, but timing matters just as much. Water in the early morning—before 9 AM—so the foliage has time to dry out completely. Wet leaves overnight can lead to fungal issues, and ranunculus are particularly susceptible. I’ve had to replant entire sections because of this mistake, so trust me when I say consistency in timing is key!
Deadheading Hack: When you’re deadheading every 2-3 days in Step 5, use clean, sharp pruners or even a small pair of scissors. Snipping just above a leaf node (where leaves grow) encourages new blooms to form from that spot. I’ve noticed that plants I deadhead with clean tools produce about 20% more flowers than those I pinch off by hand—it’s worth the small investment!
Pro Tips for Ranunculus In Garden
- Creating a stunning ranunculus display takes a little strategy—here’s how to elevate your garden from pretty to showstopping.
- This creates depth and prevents a flat, crowded look.
- Soil Prep Pro Tip: In Step 3, when amending your soil with 2-3 inches of compost and perlite, don’t skimp on the perlite—especially if you have heavy clay soil.
Frequently asked questions
Got questions about growing and styling ranunculus in your garden?
Here are some of the most common queries—plus expert-friendly answers to help you create stunning displays with ease!
When is the best time to plant ranunculus bulbs for spring blooms?
Plant ranunculus bulbs in early fall (8–10 weeks before your first frost) for spring blooms. In warmer climates, you can also plant in late winter. Chill the bulbs for 8–12 weeks in the fridge if planting outside their natural growing zone. Timing ensures vibrant, synchronized blooms!
How often should I water ranunculus, and do they need special care?
Water ranunculus moderately—keep soil moist but not soggy, especially during bulb growth (fall/winter) and flowering (spring). Once established, they’re drought-tolerant but appreciate consistent moisture. Pro tip: Reduce watering as blooms fade to encourage longevity. Mulch lightly to retain moisture and protect bulbs.
Can I grow ranunculus in containers, and what’s the best setup?
Ranunculus thrives in containers with well-draining soil and a mix of compost for nutrients. Use pots at least 8–12 inches deep and place them in full sun to partial shade. Group bulbs closely (3–4 inches apart) for a lush, layered effect. Drainage holes are a must to prevent rot.
Why are my ranunculus leaves turning yellow or wilting?
Yellowing leaves often signal overwatering or fungal issues (like botrytis). Ensure pots/containers have drainage, and avoid wet foliage. Wilting can also mean heat stress—provide afternoon shade in hot climates. Quick fix: Trim affected leaves and adjust watering. Most issues resolve with proper airflow and care!
Are there ranunculus alternatives for longer-lasting flowers?
If you love ranunculus but want longer blooms, try peony (lush, fragrant) or tulips (bold colors). For delicate, layered looks, anemones or dahlia pompons are great substitutes. All thrive in similar conditions but offer extended seasonal interest!
Wrapping up and next steps
Incorporating ranunculus into your garden is a delightful way to add year-round elegance with their layered, papery petals and vibrant hues. Whether you’re a seasoned gardener or just starting, these versatile blooms bring whimsy and charm to any space—perfect for borders, containers, or cut flower arrangements.
Now that you’re armed with design tips and troubleshooting advice, why not take the next step?
🌱 Your Next Step: Plant & Experiment!
Start small—plant a few ranunculus bulbs in a sunny spot and watch your garden transform! Mix colors, textures, and companion plants to create your signature look. Need inspiration? Browse seasonal trends or join gardening communities to share your progress. Happy planting—your garden’s masterpiece awaits! 🌸