
Tools
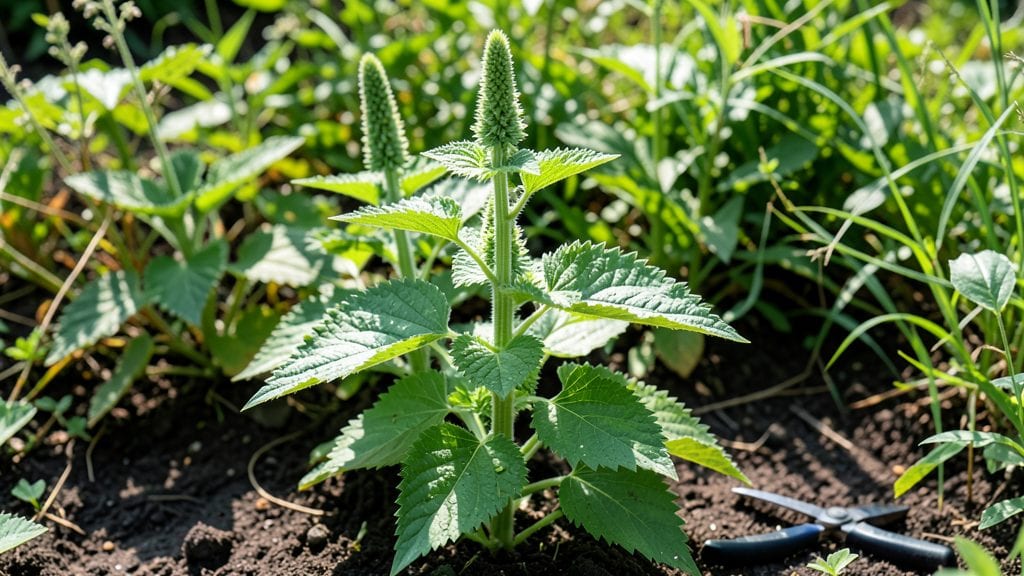
A stinging nettle garden isn’t just a bold statement—it’s a thriving ecosystem that feeds pollinators, repels pests, and even puts fresh greens on your plate. 🌿 I’ve turned mine into a lush, year-round border that does double duty as a living fence and a medicinal pantry, all while looking intentionally wild.
The key? Strategic placement where the sting won’t bother you, but the benefits will.
Start with a sunny, slightly damp spot along a fence or property line—nettles spread fast but stay contained with a sturdy barrier. Pair them with comfrey for extra fertility or lavender to soften the edges.
The sting fades after harvesting, so wear gloves when working, but let pollinators buzz freely—they adore the flowers. By summer, you’ll have a privacy screen that’s also a pollinator magnet.
Harvest young leaves for pesto, tea, or soups, or dry them for winter remedies—nettles are packed with iron and vitamins. The roots make a natural dye, and the fibers?
Perfect for cordage. Every season brings something new: spring greens, summer flowers, autumn seeds, and winter evergreen texture. It’s the garden that keeps giving, even when everything else sleeps.
Fair warning: nettles aren’t for every yard, but if you want a low-maintenance, high-reward border that works harder than your average hedge, this is it. Just keep the kids (and curious pets) at arm’s length until they learn the ropes.
The payoff? A garden that’s as functional as it is beautiful.
📚 In This Guide
- What you need
- Instructions
- Tips and common mistakes
- Wrapping up and next steps
What you need
- ● Stinging Nettle Seeds or Young Plants: 20–50 seeds (or 5–10 young plants) per linear foot of border, depending on desired density.
- ● Pro tip: Buy organic, non-GMO seeds from a trusted supplier for the best growth!
- ● Garden Soil: Well-draining, slightly acidic to neutral soil (pH 6.0–7.5).
- ● Amend with compost (5–10 gallons per 10 sq. ft.) for nutrient-rich soil.
- ● Basic Gardening Tools: Trowel or hand shovel (for planting).
- ● Garden fork (for loosening soil).
- ● Watering can or hose with a gentle spray nozzle.
- ● Pruning shears (for harvesting and maintenance).
- ○ Mulch (Optional but Helpful): Straw, wood chips, or leaves (2–3 inches thick) to retain moisture and suppress weeds.
- ● Gloves: Heavy-duty gardening gloves (nettles do sting—protect those hands! 😅).
- ● Compost Tea or Fertilizer: Organic liquid fertilizer (e.g., fish emulsion) to boost growth.
- ● Edging Materials: Stones, bricks, or metal edging to define your nettle border neatly.
- ● Pest Deterrents: Companion plants like marigolds or basil to keep pests at bay.
- ● Harvesting Tools: Sharp knife or scissors for clean cuts when harvesting leaves.
How to create a stinging nettle living border
This hardy perennial thrives in neglected corners—let’s turn it into a functional, low-maintenance border.
🌱 Step 1: Select and Prepare the Planting Site
Stinging nettles grow best in partial to full shade with moist, slightly acidic soil. I always choose a spot along a fence, property line, or between other plants where their 3-4 foot spread won’t be intrusive. Avoid direct sun—it stresses the plants and makes handling them more uncomfortable.
Clear any weeds or grass from the area using a hoe or trowel. Loosen the top 6 inches of soil to improve drainage, but don’t till deeply—nettles prefer loose, fertile soil without compaction. If your soil is heavy clay, mix in 2-3 inches of compost to lighten it up.
🌱 Step 2: Plant Nettle Crowns or Seeds
For fastest results, plant nettle crowns (bare-root divisions) in early spring or fall. Space them 18-24 inches apart—this gives them room to establish without overcrowding. Dig a hole twice as wide as the root ball but only as deep as the crown sits naturally.
If starting from seed, scatter them lightly over the prepared soil in early spring. Press them ¼ inch deep—they don’t need light to germinate, but don’t bury them too deeply. Water gently afterward to settle the soil. Seeds take 2-4 weeks to sprout, so be patient.
💧 Step 3: Water and Mulch for Establishment
Keep the soil consistently moist for the first 4-6 weeks after planting. Water deeply 2-3 times per week, especially during dry spells. Nettles hate drought, and wilting stresses them—you’ll see limp, yellowing leaves if they’re thirsty.
Apply a 2-inch layer of mulch (like shredded leaves or straw) around the base to retain moisture and suppress weeds. Avoid piling mulch against the stems—keep it 2 inches away to prevent rot. Once established, nettles are drought-tolerant but will produce more tender shoots with regular watering.
☀️ Step 4: Maintain and Harvest Year-Round
Nettles are perennial, meaning they’ll return every year with minimal care. In early spring, trim back dead growth to encourage fresh shoots. Cut stems back to 6 inches tall in late fall to keep the patch tidy and prevent self-seeding where you don’t want it.
Harvest young leaves (before flowering) by snipping the top 6-8 inches of the stem. Wear gloves—the sting fades when dried, but fresh leaves pack a punch! Use fresh leaves in teas, soups, or pest-repellent sprays. The more you harvest, the bushier the plant grows.
✂️ Step 5: Divide and Expand as Needed
Every 3-4 years, nettles get woody and less productive. Dig up the entire plant in early spring, divide the crown into 3-4 sections, and replant them in new spots. Each division should have 2-3 healthy shoots—this keeps them vigorous.
Use the divisions to fill gaps in your border or share with neighbors. Nettles spread quickly, so check the edges of your patch monthly and trim any stray shoots. With proper care, your living border will thrive for decades—zero fuss, endless utility.
Tips & tricks for perfect stinging nettle living borders
Between us, I’ve planted nettle gardens that thrived and others that flopped—here’s what separates the winners from the "I’ll try again next year" attempts.
Site Selection is Everything: I learned this the hard way after planting nettles in full sun where they withered and stung like crazy. Stick to partial to full shade—think dappled sunlight under trees or along north-facing walls. The 3-4 foot spread mentioned in Step 1 means they’ll fill gaps beautifully, but only if they’re happy. Test your spot by observing how other shade-loving plants grow there first.
Soil Prep Shortcuts: Don’t have compost? No problem. Mix in 2-3 inches of well-rotted manure instead—it works just as well for breaking up heavy clay. The key is improving drainage without compacting the soil further. I’ve even used leaf mold (shredded leaves decomposed for 6+ months) for that same loose, fertile texture nettles crave. Just avoid fresh grass clippings—they can burn the roots.
Planting Crowns vs Seeds: Crowns give you instant gratification, but seeds are cheaper and more fun to watch sprout. Here’s my secret: if using seeds, soak them overnight before planting. This speeds up germination from 2-4 weeks to just 10-14 days. Just don’t over-soak—they’ll rot if submerged too long. For crowns, plant them as soon as you get them—they dry out fast!
Harvesting Without the Sting: The top 6-8 inches harvest rule works, but here’s how to make it sting-free: wear thin rubber gloves (they’re more flexible than heavy gardening gloves) and harvest on a cool morning after dew has dried. The sting is strongest when leaves are warm and wilted. Always cook or dry your harvest immediately—fresh nettles lose their sting when heat-treated.
Pro Tips for Stinging Nettle Garden
- Between us, I’ve planted nettle gardens that thrived and others that flopped—here’s what separates the winners from the "I’ll try again next year" attempts.
- Site Selection is Everything: I learned this the hard way after planting nettles in full sun where they withered and stung like crazy.
- Soil Prep Shortcuts: Don’t have compost?
Frequently asked questions
Got questions about growing and using stinging nettles in your garden?
Here are some of the most common ones—plus practical answers to help you get the most out of this versatile plant!
Can I grow stinging nettles in containers or small spaces?
Stinging nettles thrive in containers as long as the pot is at least 12 inches deep and has drainage holes. Choose a sunny spot, keep the soil moist, and harvest regularly to encourage bushier growth. Just be mindful of their aggressive roots—place containers on a tray or in a designated area to prevent spreading.
How long does it take for stinging nettles to grow and become harvestable?
Young nettles (the best for eating!) can be harvested as early as 4–6 weeks after planting, once they reach about 12 inches tall. For a continuous harvest, sow seeds in successive batches every 2–3 weeks during spring and summer. Older plants (over a year) are tougher but still useful for fiber or tea.
How do I protect myself from the sting when handling nettles?
Wear long sleeves, gloves, and thick pants when working with nettles—even young plants can sting! To minimize irritation, harvest on a cloudy day (stings are less potent) or wear gardening gloves. After handling, wash your skin with cool water and vinegar to soothe any stings.
What can I do if my stinging nettles spread too aggressively?
Nettles are perennial and invasive, so containment is key. Trim back foliage regularly, or plant them in a deep container with a root barrier. For existing patches, dig up roots in early spring or late fall. If you’re not using them, consider mulching heavily to suppress regrowth.
Are there alternatives to stinging nettles for edible or medicinal uses?
If you’re avoiding nettles, try lamb’s quarters (edible leaves), dandelion greens (nutrient-rich), or purslane (high in omega-3s). For fiber, hemp or flax are great substitutes. However, nettles are unique for their high iron and vitamin K—so if you love their benefits, they’re worth the effort!
Wrapping up and next steps
Creating a stinging nettle garden isn’t just about adding a touch of wild beauty—it’s a practical, sustainable choice that brings year-round benefits to your outdoor space. Whether you’re drawn to its edible potential, eco-friendly perks, or low-maintenance charm, this living border is a game-changer for any garden. 🌿
Ready to take the next step? Start small—plant a few nettles in a sunny spot, experiment with companion plants, or even share your newfound knowledge with fellow gardening enthusiasts. Your garden (and maybe even your dinner plate!) will thank you.