Picking
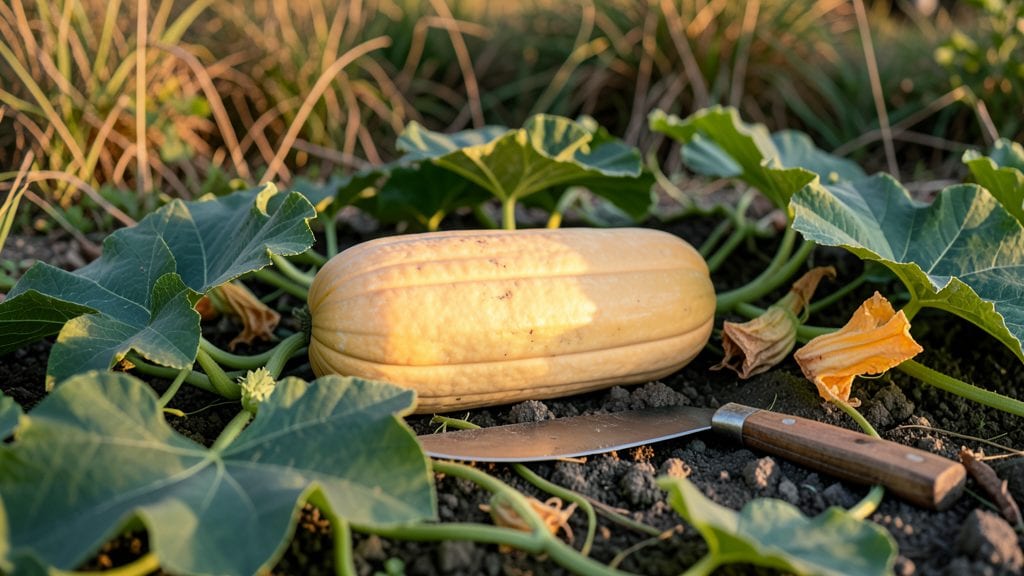
Knowing when to harvest spaghetti squash from the garden at the right time ensures tender, noodle-like strands instead of flavorless pulp—so timing is everything.
Picking too early gives you tough, unpalatable strands, while waiting too long turns them into a mushy mess. The key is catching it in that narrow window when the rind dulls to a pale yellow and the stem dries out just enough to tug free.
This guide breaks down the three foolproof signs to watch for—plus how to test ripeness without cutting into your squash—and when to act in USDA Zone 6a to avoid frost ruining your harvest.
You’ll leave here knowing exactly when to pull yours for that perfect al dente texture, whether you’re harvesting in late summer or early fall.
3 Visual signs your spaghetti squash is ready for harvest
Timing the harvest of your spaghetti squash can be tricky—unlike its orange cousins, this winter squash doesn’t ripen on the vine like a pumpkin. Instead, it matures gradually, and missing the window means tough strands or overripe mushiness.
The good news? Nature gives you clear visual cues if you know what to look for. Here’s how to spot the perfect moment to harvest for that ideal noodle-like texture.
Spaghetti squash thrives in warm-season gardens, typically reaching maturity between 80–100 days after planting. But relying on days alone isn’t enough—you need to check these three unmistakable signs to ensure your squash is ready.
Ignoring these cues can lead to underripe squash with bitter, fibrous flesh or overripe squash that’s past its prime. Let’s break down the telltale indicators so you can harvest at peak perfection.
First up, the rind color is your most obvious clue. When your spaghetti squash starts as a vibrant green, it’s not ready—think of it like a zucchini still on the vine.
But as it matures, the color fades to a dull yellow or beige, almost like the skin of a butternut squash. This shift happens gradually, so check weekly once your plant hits 60 days. A quick way to test?
Press your thumbnail into the skin—if it doesn’t leave a dent, your squash is on track.
Next, focus on the stem and vine. A ripe spaghetti squash will have a stem that’s dried out and brown at the base. Try gently twisting it—if it separates cleanly (or with minimal resistance), your squash is ready.
This is a critical sign because the stem’s condition directly reflects the squash’s internal maturity. Wait too long, and the stem may shrink and shrivel, while the squash inside becomes grainy and waterlogged.
Finally, pay attention to the vine and leaves. As your spaghetti squash nears harvest, the vine will start to yellow and die back, especially in cooler climates. This is your plant’s way of signaling it’s redirecting energy to the squash.
If the leaves are still lush and green, your squash needs more time. But if the vine looks wilted or brown, it’s a good sign your squash is nearly ready—just double-check the rind and stem first.
Harvesting at the right time isn’t just about taste—it’s also about storage life. A perfectly ripe spaghetti squash can last 2–3 months in a cool, dark place, while an underripe one spoils quickly.
Overripe squash, on the other hand, turns soft and seedy, losing its prized noodle texture. To maximize shelf life, harvest in the morning after a cool night and let the squash cure for 7–10 days in a warm, dry spot before storing.
One common mistake gardeners make is harvesting based on size alone. While a mature spaghetti squash typically weighs 4–8 pounds, some varieties stay small but still reach peak ripeness. Always prioritize the visual cues over size—your squash might be fully ripe even if it’s smaller than expected.
For example, the ‘Honey’ variety often stays compact but delivers the same tender strands when harvested at the right time.
If you’re growing spaghetti squash in a container, keep an eye on these signs too, but be extra vigilant. Potted plants can dry out faster, which might speed up ripening.
Water consistently, but reduce frequency as the squash nears harvest to avoid over-moisture stress, which can dull the rind’s color and delay maturity. A well-balanced 5-10-10 fertilizer applied mid-season also helps ensure your squash develops the right internal texture.
Remember, the goal is to harvest your spaghetti squash when it’s firm yet mature, not rock-hard or mushy.
Once you’ve confirmed all three signs—dull rind, dry stem, and dying vine—grab your pruners or a sharp knife and cut the squash from the vine, leaving a 1–2 inch stem attached. This small stem helps the squash cure properly and prevents rot during storage.
With these visual cues in mind, you’ll never second-guess your harvest again. And when you finally slice into that perfect spaghetti squash, you’ll be rewarded with tender, strand-like flesh that’s ideal for roasting, baking, or even spiralizing. Happy harvesting!
How to test spaghetti squash ripeness before harvesting
Harvesting your spaghetti squash at the perfect moment ensures tender, flavorful strands instead of tough or mushy flesh. The key is testing maturity without cutting into the squash prematurely. I’ve used these three foolproof methods—thump test, nail-poke technique, and vine inspection—for years, and they never fail.
These tricks save you from guessing and ensure your squash reaches peak ripeness for the best harvest.
Start by examining the vine and stem. A mature spaghetti squash will show clear signs of readiness here, including a dried stem base and yellowing leaves. Combine this with physical tests like the thump or nail-poke to confirm ripeness.
The goal is to avoid harvesting too early—when the squash is still hard and underdeveloped—or too late, when it becomes overripe and prone to spoilage. Let’s break down each test step-by-step.
Step-by-Step Ripeness Tests
Timing your harvest right also depends on your climate and frost dates. In warmer regions, spaghetti squash typically matures between 80–100 days after planting, while cooler areas may need an extra week or two.
If frost is approaching, harvest even if the squash isn’t fully ripe—it’ll ripen indoors with a few days of warm storage. Use a sharp knife or pruners to cut the squash from the vine, leaving a 1-inch stem attached to prevent rot.
Once harvested, store your spaghetti squash in a cool, dry place (around 50–55°F) for up to 2–3 months. Avoid refrigerating until you’re ready to cook, as cold temperatures can degrade its quality.
With these tests, you’ll always know when to harvest for the perfect noodle-like texture—no guesswork required!
Pro tip: If you’re unsure, harvest a few squash a week apart to test their readiness. This way, you’ll get a sense of the ideal timing for your specific growing conditions. Happy harvesting!