
Tools
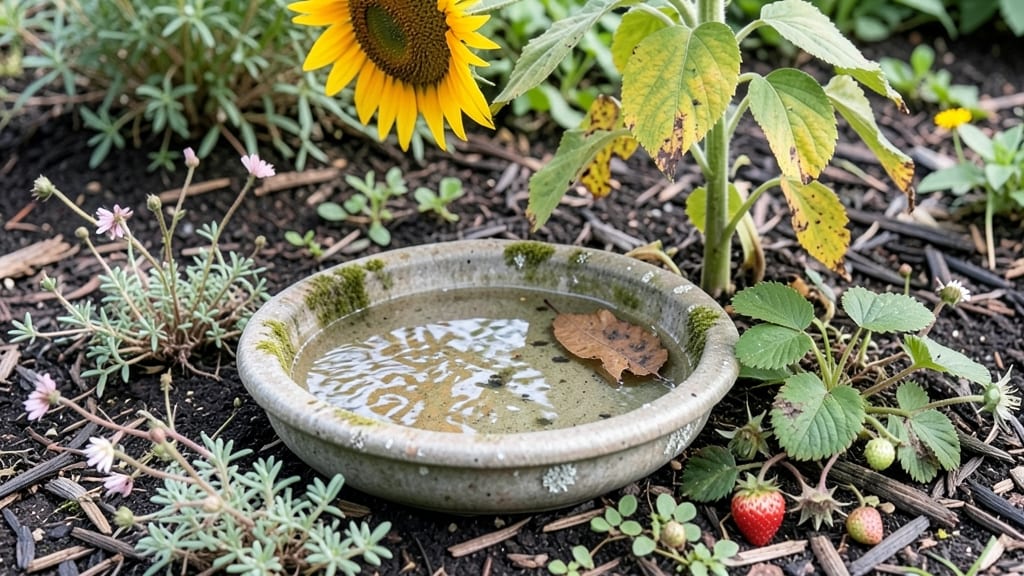
A birdbath fairy garden turns a simple water feature into a tiny, magical world that feels like stepping into a storybook.
I built mine in my backyard last summer, and now it’s the first place guests look when they visit—especially the kids, who swear they see fairies hiding in the moss.
The secret isn’t just the birdbath; it’s the way you layer in textures, tiny plants, and just enough whimsy to make it feel alive.
You’ll need a shallow birdbath (6–12 inches wide works best), pebbles for drainage, and a mix of miniature plants like succulents, tiny hostas, or creeping thyme. Add a few pebbles or a tiny bridge for scale, and let your imagination guide the rest—maybe a miniature mushroom or two.
The goal is to create a space that looks intentional but still feels like it belongs in nature. Maintenance is easy: just top off the water weekly and trim plants as they grow.
What you’ll end up with is a spot that attracts real wildlife—birds will drink from the bath, butterflies will land on the flowers, and you’ll feel like you’ve tucked a secret garden into your yard.
The best part? It’s not just decorative; it’s a functional piece of your garden that keeps giving back. Once you see how it transforms your space, you’ll wonder why you didn’t do this years ago.
This works for any outdoor space, from a sunny patio to a shady corner of your garden. If you’re in a drier climate, opt for drought-tolerant plants and a deeper bath to retain water. The key is to keep it simple—fairy gardens thrive on charm, not complexity. Let’s get started!
📚 In This Guide
- What you need
- Instructions
- Tips and common mistakes
- Wrapping up and next steps
What you need
- ● Birdbath: A shallow, decorative birdbath (6–12 inches in diameter; ceramic, stone, or plastic).
- ● Fairy garden container: A small planter, pot, or tray (8–12 inches wide) to hold the garden.
- ● Potting soil: 2–3 gallons of well-draining, organic soil (mix in perlite or sand for extra drainage).
- ● Miniature plants: 1–2 small succulents (e.g., hens & chicks or sedum).
- ● 1–3 tiny ferns or moss (for texture).
- ● 1–2 creeping thyme or miniature ivy (for trailing effects).
- ● Decorative elements: 1–2 tiny mushrooms (ceramic or resin).
- ● 1–3 pebbles or sand (for base layer).
- ● 1–2 fairy figurines or tiny garden accessories (e.g., a bridge, lantern, or toadstool).
- ○ Water source: A small water pump (optional but recommended for a flowing effect) or a drip irrigation kit.
- ● Garden tools: Small trowel or spoon (for planting).
- ● Pair of scissors (for trimming plants).
- ● Spray bottle (for misting plants).
- ○ Optional enhancements: Fairy lights (battery-operated, waterproof).
- ● Twinkling LED stars or solar-powered lights.
- ● A tiny water feature (e.g., a mini fountain or bubbler).
- ● Natural elements like pinecones, acorns, or bark chips.
- ● A sunny or partially shaded outdoor space (6+ hours of sunlight daily for most plants).
- ● Access to water (for filling the birdbath and hydrating plants).
- ● Basic gardening knowledge (or willingness to learn!).
- ● Patience! Fairy gardens evolve over time—let them grow into their magical potential. 🌟
Step-by-Step instructions for building your birdbath fairy garden
Here's how to create a magical water feature that attracts fairies and birds alike—simple steps for a dreamy outdoor space.
Choose and Prepare Your Birdbath Base
Start with a shallow birdbath that holds at least 2 gallons of water—this gives fairies plenty of room while keeping it safe for small birds. Clean the basin thoroughly with soapy water and scrub away any algae or debris. Rinse it well and let it dry completely before moving to the next step. I like to place a small layer of pebbles at the bottom to create a natural look and prevent the container from cracking if temperatures drop below freezing.
Pick a spot in your garden that receives partial sunlight—fairies and birds prefer dappled shade over harsh midday sun. Ensure the area is level so water doesn’t pool unevenly, which could create mosquito breeding grounds. If your birdbath has a saucer, place it underneath to catch any overflow and keep the area tidy.
Add Water Features and Fairy Touches
Fill the birdbath with dechlorinated water—tap water can harm delicate fairy garden plants and small wildlife. Add a small solar-powered fountain or a gentle bubble stone to create movement, which fairies love. If you don’t have electricity nearby, a simple dripper stone placed at the edge will work just as well. The sound of trickling water adds to the enchantment and attracts birds for a drink.
Now, it’s time for the fairy magic. Place a few miniature mushrooms or tiny pebbles around the edges of the birdbath to create a natural border. Add a small fairy house or two—these can be as simple as hollowed-out acorns or tiny wooden cottages. I like to hide a few glowing solar lights beneath the pebbles for a magical nighttime effect. These will charge during the day and illuminate the garden after dark.
Plant Fairy-Friendly Flora
Select small, low-growing plants that thrive in moist conditions, like miniature hostas, creeping thyme, or tiny ferns. These will add greenery without overpowering the birdbath. Plant them around the edges, leaving enough space for fairies (and birds) to access the water. I like to use a small hand trowel to dig tiny holes—just enough to hold the roots without disturbing the pebbles or water feature.
Add a few wildflower seeds or tiny succulents for extra charm. If you want to include edible elements, miniature strawberries or dwarf blueberries work beautifully and attract pollinators. Water the plants lightly after planting, but avoid overwatering—the birdbath already provides moisture, so the soil should stay damp but not soggy.
Create Pathways and Hideaways
Use small stepping stones or flat river rocks to create winding pathways leading to and from the birdbath. This encourages fairies to explore and adds to the whimsical feel. Place a few tiny logs or branches nearby for fairies to rest on or use as bridges. If you have space, add a miniature bench made from a slice of wood or a hollowed-out stone for a cozy seating area.
To make the garden feel complete, scatter a few fairy-sized accessories like tiny wind chimes (made from seashells or beads) or miniature lanterns. These details make the space feel lived-in and magical. Finally, add a small sign or engraved stone with a fairy-themed message—like "Welcome, Little Ones"—to tie everything together.
Maintain and Enjoy Your Fairy Garden
Check the birdbath every few days to ensure the water is fresh and free of debris. Top off the water as needed, especially during hot weather when evaporation happens quickly. In colder months, empty the birdbath or add floating plants to prevent freezing and cracking. I like to keep a small watering can nearby for quick top-ups and to mist the plants if they look thirsty.
Watch as your fairy garden comes to life! Birds will visit for a drink, and you might even spot butterflies or bees exploring the flowers. The key to a thriving fairy garden is gentle care—let nature do the work while you enjoy the magic. Over time, you can expand the space with more plants, accessories, or even a tiny bridge for fairies to cross.
Tips & tricks for perfect birdbath fairy garden
Creating a fairy garden that feels truly magical takes a few thoughtful touches that make all the difference. Here's what I've learned from building my own enchanted spaces over the years.
Location is Everything: When choosing your spot in Step 1, look for areas with natural shade from nearby trees or shrubs. Morning sun is ideal—it gives fairies gentle warmth without the harshness of afternoon heat. I've found that fairy gardens near hosta plants or under flowering bushes thrive best because the plants provide extra shade and moisture. Also, avoid placing your birdbath near high-traffic areas where children or pets might accidentally disturb it.
Water Quality Matters: In Step 2, dechlorinated water is absolutely essential for your fairy ecosystem. If you don't have a dechlorinator, let tap water sit uncovered in a container for 24 hours before using—this allows the chlorine to evaporate. For an extra magical touch, I like to add a few drops of food-grade essential oil (like lavender) to the water—it creates a subtle, pleasant scent that fairies are said to enjoy. Just be sure to use oils that are safe for wildlife.
Fairy House Placement: When adding your fairy houses in Step 2, position them near the water's edge but not directly in the water. Fairies prefer to be close to their water source but still have dry ground to build their tiny paths. I've noticed that placing houses on slightly elevated pebbles creates a more natural look and makes them easier to spot. For extra whimsy, try arranging them in a circle around the birdbath to create a fairy gathering spot.
Seasonal Maintenance: The care routine in Step 5 needs adjustment based on your climate. In summer, I check my birdbath water daily during heatwaves, sometimes even twice a day. For winter preparation, I recommend adding a layer of pebbles on top of the water before freezing temperatures arrive—this creates an insulating layer that prevents complete freezing. You can also move your birdbath to a sheltered location if you expect hard freezes.
Pro Tips for Birdbath Fairy Garden
- Creating a fairy garden that feels truly magical takes a few thoughtful touches that make all the difference.
- Location is Everything: When choosing your spot in Step 1, look for areas with natural shade from nearby trees or shrubs.
- Water Quality Matters: In Step 2, dechlorinated water is absolutely essential for your fairy ecosystem.
Frequently asked questions
Got questions about creating your own birdbath fairy garden? We’ve got answers!
Whether you’re a beginner or just looking for tips to elevate your project, this FAQ covers the most common concerns—from setup to maintenance. Dive in to make your magical outdoor space even more enchanting!
What’s the best time of year to install a birdbath fairy garden?
The ideal time is spring or early fall when temperatures are mild. Installing in spring ensures birds and fairies (or pollinators!) have water as they return, while fall sets up a cozy winter retreat. Avoid extreme heat or frost—both can damage materials or dry out your water feature too quickly.
How do I keep birds from making a mess around my fairy garden?
Birds love birdbaths, but their droppings can be tricky! Place the bath on a non-porous surface (like a stone or plastic tray) for easy cleanup. Add a small fountain or dripping feature to create movement—birds prefer still water but are less likely to perch on it. A shallow design (1–2 inches deep) also minimizes splashes.
Can I use a solar-powered fountain instead of a traditional birdbath?
Solar fountains add movement and charm while attracting birds and butterflies. Opt for a low-flow model (like a bubbler or gentle stream) to conserve water and reduce mess. Just ensure it’s placed where it gets 6+ hours of sunlight daily. Bonus: The sound of trickling water enhances the fairy garden’s magical vibe!
What if my fairy garden gets overgrown or looks messy?
Overgrowth happens—especially with succulents, moss, or creeping plants! Trim back wild growth every 4–6 weeks to keep the whimsical look intact. For moss, gently mist it daily to encourage lushness. If weeds pop up, use a hand trowel or vinegar spray (avoid harsh chemicals near water features). A little maintenance goes a long way for that storybook charm!
How do I winterize my birdbath fairy garden?
Freezing temps can crack stone or damage pumps. Drain the bath completely, store it in a covered, dry place, and wrap electronics (like solar fountains) in bubble wrap. For plants, move potted fairy garden elements indoors or mulch ground covers with straw. In spring, give everything a good rinse and refill to welcome back your feathered and magical visitors!
Wrapping up and next steps
Creating a birdbath fairy garden is more than just a charming addition to your outdoor space—it’s a magical invitation for wildlife, a creative outlet, and a serene retreat for you! Whether you’re a seasoned gardener or a beginner, this whimsical project brings joy, movement, and enchantment to your backyard. 🌿✨
Ready to dive in? Start small—gather your supplies, sketch a design, and let your imagination flow. Next, pick a sunny spot, assemble your materials, and watch your fairy garden transform into a sparkling oasis for birds, bees, and maybe even a few curious fairies! 🐦💧