
Tools
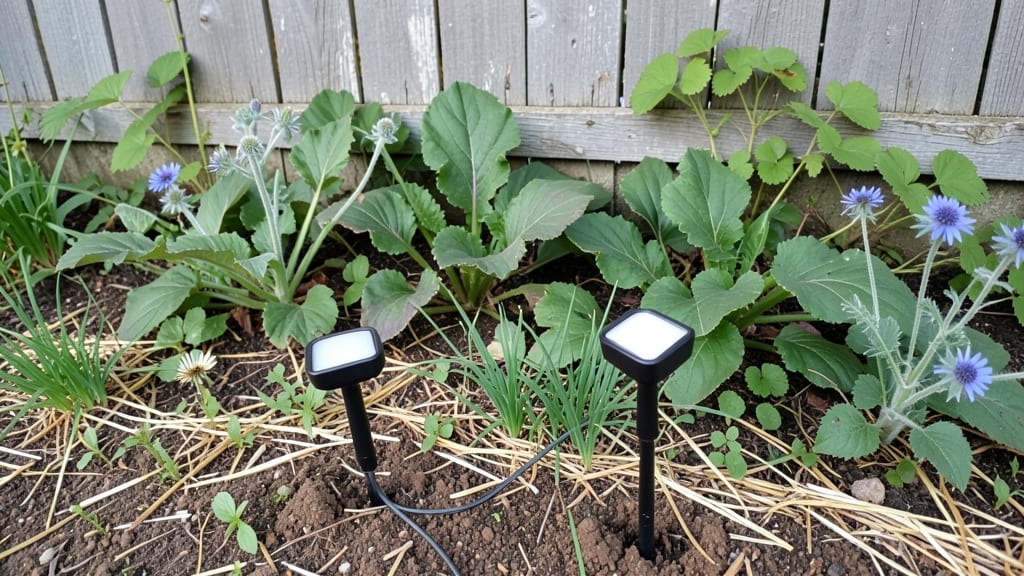
Transforming your garden into a nighttime haven starts with the right garden bed lights—solar-powered options that eliminate cords and create effortless ambiance. I’ve tested dozens of setups, and the best ones blend seamlessly into any landscape while highlighting textures, from velvety hostas to delicate orchids.
The glow doesn’t just look stunning; it extends your gardening hours safely and invites evening strolls through your own enchanted space.
You’ll need solar-powered LED string lights (or stake lights for targeted illumination), a few hours to plan placement, and basic tools like zip ties or garden clips. Solar options are foolproof—just stake them near plants or drape them along fences, and they’ll charge all day for nighttime magic.
For modern gardens, sleek battery-operated puck lights tucked into mulch create a clean, contemporary look, while cottage-style gardens thrive with fairy lights wound through shrubs or trellises.
The payoff is immediate: your garden becomes a showpiece after dark, with shadows softened and focal points—like a topiary or water feature—glowing with intentional warmth. Safety improves too; well-lit paths prevent trips, and the soft illumination deters nocturnal pests.
Even better, solar lights reduce energy costs and last for years with minimal upkeep.
Adapt this setup to any style—tropical gardens love color-changing LEDs, while minimalist spaces benefit from single-stem solar candles. The key is balancing brightness and placement: avoid overpowering plants with harsh light, and always position fixtures where they’ll catch the most sunlight during the day.
Let’s make your garden shine—literally.
📚 In This Guide
- What you need
- Instructions
- Tips and common mistakes
- Wrapping up and next steps
What you need
- ● Solar-powered LED lights (10-20 units) – Choose waterproof, low-voltage lights (e.g., 3V-5V, 100-300 lumens). Look for stake-style or flexible string lights for easy placement.
- ● Stakes or garden spikes (10-20 units) – Galvanized steel or plastic stakes (6-12 inches long) to secure lights in soil.
- ○ Battery-operated solar charger (optional but recommended) – A 12V solar panel kit (e.g., 5W-10W) if your lights don’t have built-in solar cells.
- ○ Weatherproof wire (optional, for custom setups) – 18-22 AWG silicone-coated wire (5-10 feet) if connecting lights in series.
- ● Garden bed soil or mulch – Ensure your bed is well-drained to prevent water damage to lights.
- ● Garden trowel or spade – For planting stakes without damaging roots.
- ● Wire cutters (if using custom wiring) – To trim wire or light strands.
- ● Measuring tape – For spacing lights evenly (aim for 12-18 inches apart).
- ○ Gloves (optional) – To protect hands while handling stakes or soil.
- ● ✅ A sunny garden spot – Lights need 4-6 hours of direct sunlight daily to charge.
- ● ✅ Clear 6+ inches of space between plants to avoid shading lights.
- ● ✅ Low-traffic area – Prevents accidental damage to stakes or wires.
Step-by-Step guide to installing solar-powered garden bed lights
Transform your garden into an enchanting evening retreat with this simple, energy-efficient lighting system.
Plan Your Light Placement for Maximum Impact
Begin by sketching your garden layout on paper, marking the locations where you want ambient glow and accent lighting. I recommend spacing lights 12-18 inches apart along pathways and 24 inches apart around plant beds to create even illumination. For focal points like trees or shrubs, place lights 6-12 inches from the trunk or foliage to highlight textures.
Consider the height of your plants when positioning lights. For low-growing herbs or ground covers, use 4-6 inch stakes with lights positioned 2-3 inches above the foliage. Taller perennials or small shrubs benefit from 8-12 inch stakes with lights 4-6 inches above the canopy. This ensures light reaches the leaves without casting harsh shadows.
Prepare the Lighting Stakes and Solar Panels
Insert each galvanized steel stake into the soil at your planned locations, driving them in until 2-3 inches remain above ground level. The stakes should stand firmly without wobbling—if they feel unstable, add a small amount of concrete mix around the base to anchor them. For pathways, angle the stakes slightly toward the garden bed to create a welcoming glow.
Attach the solar panel to each stake using the provided zip ties. Position the panel at a 30-45 degree angle facing south (in the Northern Hemisphere) to maximize sunlight exposure. If your garden faces east-west, mount panels vertically on the north side of stakes for optimal energy capture. Test each panel's stability by gently tugging—it should hold firmly without slipping.
Connect the Lights and Test Solar Charging
Thread the waterproof wiring from each solar panel down the stake to the light fixture, securing it with additional zip ties every 12 inches to prevent wind damage. For buried connections, use the garden-safe conduit to protect wires from moisture and pests. Connect the wires to the light fixture according to the manufacturer's polarity markings—positive to positive, negative to negative—to ensure proper function.
Before finalizing, test each light during daylight hours. Place a small white cardstock near the fixture to observe the light's spread and intensity. Adjust the angle of the solar panel if a light appears dimmer than others—it may need better sun exposure. Leave the system connected for 24-48 hours to fully charge the batteries before evaluating nighttime performance.
Secure and Finalize the Installation
Once you're satisfied with the light output, use landscape fabric to neatly cover any exposed wiring at the base of stakes. This prevents tripping hazards and protects connections from soil moisture. For added security, apply a weatherproof sealant around the base of each stake where wires enter the ground, creating a moisture barrier that extends the system's lifespan.
Finally, arrange the lights in a pattern that complements your garden's design. For a soft glow, space lights 18-24 inches apart along borders. To create dramatic highlights, cluster 3-4 lights near focal points like benches or water features. Turn on the lights at dusk and observe how they transform your space—you'll notice the magic unfold as the garden takes on a whole new character after dark.
Maintain for Long-Lasting Performance
Check the solar panels monthly during low-light seasons (late fall through early spring) to ensure they're free of debris and angled correctly. Wipe panels with a damp microfiber cloth to remove dust or pollen that reduces efficiency. If a light dims noticeably, clean the LED lens gently with a soft brush—dirt buildup can block up to 30% of light output.
Replace batteries annually or when lights fail to stay illuminated for 4+ hours after a full charge cycle. Store spare batteries in a cool, dry place away from direct sunlight to preserve their lifespan. If you notice flickering or inconsistent lighting, inspect the wiring connections at the stake base—loose connections are the most common cause of intermittent performance.
Tips & tricks for perfect solar-powered garden bed lighting
Creating a magical nighttime garden starts with thoughtful placement and careful installation—here's how to elevate your setup beyond basic functionality.
Precision in Placement: In Step 1, when spacing lights 12-18 inches apart along pathways, consider using a small measuring tape or even a ruler to ensure consistent distances. For the 24-inch spacing around plant beds, I recommend using a 2-foot level as a guide—it helps maintain perfect straight lines while keeping lights properly aligned. The 2-3 inch height difference for low-growing versus tall plants makes a surprising visual impact when done consistently.
Stability is Key: During Step 2, when inserting galvanized steel stakes, I've found that gently tapping them with a rubber mallet creates more consistent depth than using a hammer. For the 2-3 inches remaining above ground, use a small straightedge to verify they're perfectly vertical—this prevents wobbling and ensures your solar panels will capture maximum sunlight at the recommended 30-45 degree angle. The concrete mix anchoring technique works best when applied while the stake is still slightly damp from installation.
Wiring Best Practices: In Step 3, when threading waterproof wiring every 12 inches with zip ties, I recommend using a small utility knife to trim excess zip tie material flush with the stake. This prevents the ties from catching on garden tools or becoming tripping hazards. For buried connections, I've had excellent results using garden-safe conduit that's slightly larger than the wire diameter—this makes future maintenance much easier if you need to access connections later.
Testing Protocol: The 24-48 hour testing period in Step 3 is crucial for identifying underperforming lights before final installation. I've developed a simple test: after the initial 24 hours, check each light's brightness against a reference light (like your brightest fixture). If any light appears 30% dimmer, adjust its solar panel angle by 5 degrees at a time until brightness matches. This small adjustment can make a dramatic difference in nighttime performance.
Pro Tips for Garden Bed Lights
- Creating a magical nighttime garden starts with thoughtful placement and careful installation—here's how to elevate your setup beyond basic functionality.
- Precision in Placement: In Step 1, when spacing lights 12-18 inches apart along pathways, consider using a small measuring tape or even a ruler to ensure consistent distances.
- Stability is Key: During Step 2, when inserting galvanized steel stakes, I've found that gently tapping them with a rubber mallet creates more consistent depth than using a hammer.
Frequently asked questions
Got questions about garden bed lights?
You’re not alone! Here are some of the most common queries—plus quick, practical answers to help you light up your garden like a pro.
What’s the best time of year to install solar garden bed lights?
Install them in early spring or late fall for ideal results. Spring ensures they’re ready for summer evenings, while fall avoids heat stress on solar panels. If you’re in a mild climate, you can install anytime—but avoid extreme temperatures during setup!
How long do solar garden bed lights last on a full charge?
Most high-quality solar lights last 8–12 hours per full charge, depending on sunlight exposure. Place them in direct sunlight for 6–8 hours daily to maximize battery life. Overcast days? No worries—they’ll still glow, just for a shorter duration.
Can I use LED string lights instead of solar lights for my garden bed?
LED string lights are a great alternative—they’re energy-efficient, customizable, and often more affordable. However, solar lights are hands-free and eco-friendly. For a mix, try solar-powered string lights or pair them with a small solar charger!
Why won’t my solar garden bed lights turn on?
Troubleshoot with these steps:
- Check the solar panel—ensure it’s clean and facing south (Northern Hemisphere) or north (Southern Hemisphere).
- Test the batteries—some lights have replaceable batteries (usually CR2032).
- Verify the sensor—if it’s a motion-activated light, cover the sensor to see if it triggers.
- Charge them manually—some kits include a USB cable for backup power.
Do solar garden bed lights attract pests like bugs or deer?
Generally, no—solar lights are low-wattage and don’t emit heat or strong UV light, which typically attracts pests. However, bright white lights may draw moths. Opt for warm or amber tones to keep your garden pest-free while still creating a cozy glow.
Wrapping up and next steps
Transforming your garden into a magical nighttime retreat is easier than ever with solar-powered garden bed lights—no wires, no fuss, just pure ambiance! 🌙✨ Whether you’re enhancing curb appeal, creating a cozy outdoor space, or adding safety with soft lighting, these DIY-friendly solutions are a game-changer.
With the right materials and a little creativity, you’ll enjoy glowing pathways, highlighted plants, and a serene evening atmosphere for years to come.
Ready to take the next step? Grab your supplies, follow the steps, and let your garden shine! Start small—try a single bed or pathway—and expand as your confidence (and glow!) grows. Happy lighting! 🌿💡