
Tools
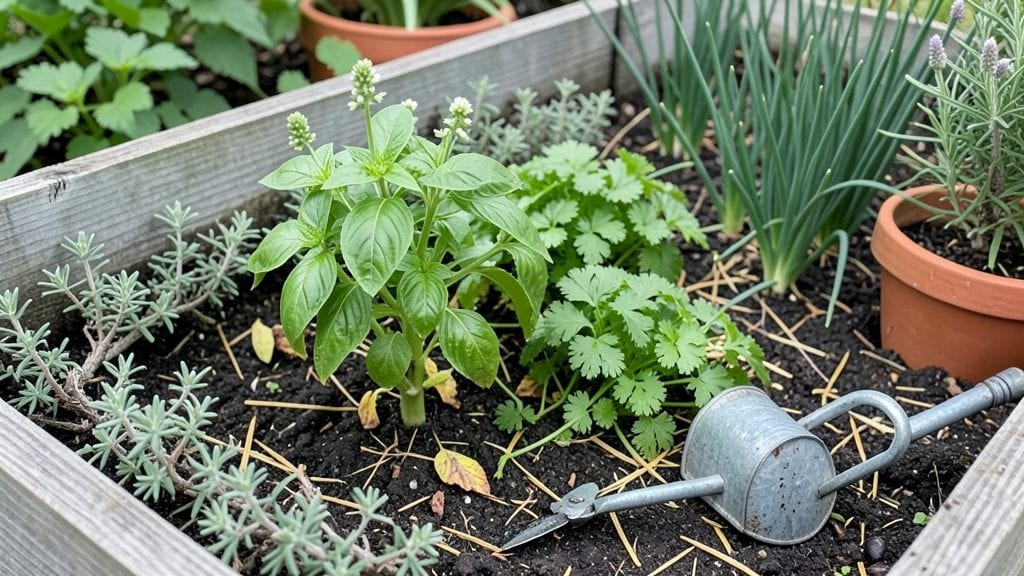
My kitchen garden revival started when I realized my 4x8-foot patch was producing more weeds than tomatoes. 🌱 The key wasn't expanding—it was rearranging what I already had to work smarter, not harder, with every inch counting.
What began as a neglected corner turned into a year-round production zone using simple layouts that cut waste and boosted harvests.
I swapped the old rows for a zero-waste spiral that fits herbs, greens, and root crops in concentric circles—no empty space, no wasted sunlight. The trick is grouping plants by their needs: shallow-rooted herbs near the center, taller veggies on the outer edges.
A small compost bin tucked into the corner handles kitchen scraps daily, so nothing goes to waste.
By summer, I was harvesting fresh basil, kale, and carrots within arm's reach of the kitchen door. The spiral stays productive through winter with cold-hardy greens, and the layout makes weeding a breeze.
No more guessing which plants belong where—just a system that works whether you're a first-time gardener or a seasoned grower.
This approach works for balconies, backyards, or even a sunny windowsill. The only rule? Start small, observe what thrives, and adjust as you go. Your kitchen garden doesn’t need more space—it needs a smarter design.
📚 In This Guide
- What you need
- Instructions
- Tips and common mistakes
- Wrapping up and next steps
What you need
- ● Growing Containers: 1-2 raised beds (4’ x 8’ x 12” deep, cedar or untreated wood)
- ● 5-10 gallon pots (with drainage holes, 12”+ diameter for root crops)
- ● 1 vertical planter (wall-mounted or freestanding, 3’+ tall)
- ● Soil & Amendments: 2-3 cubic yards of organic compost (or 5+ bags of high-quality potting mix)
- ● 1 50-lb bag of worm castings (for nutrient boost)
- ● 1 bag of perlite or vermiculite (for drainage)
- ● Tools: 1 sturdy garden fork (for soil aeration)
- ● 1 hand trowel (with serrated edge)
- ● 1 pruners (bypass for clean cuts)
- ● 1 watering can (2+ gallon capacity) or drip irrigation kit
- ● 1 pH test kit (to monitor soil health)
- ● 1 compost bin (for closed-loop waste recycling)
- ● 1 seedling heat mat (for cold starts)
- ● 1 row cover fabric (to extend growing seasons)
- ● 1 plant marker set (reusable or biodegradable)
- ● 1 soil thermometer (for precision planting)
How to design a zero-waste kitchen garden layout
Here's the practical approach I use to create a productive, sustainable kitchen garden that works year-round.
🌱 Step 1: Assess Your Space and Sunlight
Start by mapping your available area and sunlight patterns. Measure the dimensions of your garden bed or containers, noting any permanent structures like fences or sheds that might cast shade. I always sketch a rough outline on paper—this helps visualize plant placement before digging.
Observe sunlight exposure at different times of day. Most kitchen gardens need at least 6 hours of direct sun for vegetables, while herbs can tolerate 4-6 hours. Mark these zones on your sketch. North-facing areas get less sun, so I reserve them for shade-tolerant crops like lettuce or spinach.
🪴 Step 2: Plan Zero-Waste Plant Placement
Design your layout to maximize space and minimize waste by grouping plants with similar needs. Place tall plants like tomatoes or trellised cucumbers along the north side of beds to avoid shading shorter crops. I arrange my garden in three functional layers:
Top layer: Vertical growers (pole beans, peas, or trellised vines) Middle layer: Bushy plants (peppers, eggplants, or compact tomatoes) Bottom layer: Sprawling crops (lettuce, herbs, or radishes)
Leave 12-18 inches of walkways between beds for easy access and airflow. This prevents soil compaction and reduces disease spread. I also incorporate compost bins near the garden edges to recycle kitchen scraps directly into the soil.
☀️ Step 3: Implement Seasonal Rotation
Divide your garden into 4 equal sections and rotate crops annually to prevent soil depletion and pest buildup. In spring, plant cool-season crops like peas or spinach in sections 1 and 2. By summer, move these to sections 3 and 4 while planting tomatoes or peppers in the now-cooled spring beds.
I keep a simple chart tracking what grew where each year. This helps me avoid planting the same family (like nightshades) in the same spot twice in a row. For year-round productivity, I intersperse fast-growing crops like radishes or lettuce between slower-maturing plants like carrots or broccoli.
💧 Step 4: Install Water-Efficient Irrigation
Use drip irrigation or soaker hoses to deliver water directly to plant roots, reducing waste by up to 30%. Run lines along bed edges and space emitters 12-18 inches apart for even coverage. I bury the lines slightly to prevent evaporation and shield them from sunlight with mulch.
Add a rainwater collection barrel near your garden to capture runoff from gutters. This free water source cuts outdoor faucet use dramatically. I also install a simple timer to water early in the morning, which minimizes evaporation and fungal diseases.
✂️ Step 5: Maintain with Sustainable Practices
Mulch beds with 2-3 inches of straw or wood chips to retain moisture, suppress weeds, and return nutrients to the soil as it breaks down. I reuse cardboard boxes from kitchen deliveries as weed barriers—just lay them flat under mulch before planting.
Harvest regularly to encourage continuous production. When plants finish their cycle, compost them on-site instead of discarding. I also save seeds from heirloom varieties to replant next season, further reducing waste. A small compost bin tucked into the garden keeps scraps out of landfills while feeding the soil.
Tips & tricks for perfect zero-waste kitchen garden layouts
Here's what I've learned after years of trial and error to keep my kitchen garden thriving without waste.
Sunlight Mapping: Use a simple app or even your phone's camera to track sunlight patterns throughout the day. I take photos every few hours to identify which areas get morning sun, afternoon shade, or full sun all day. This helps me place sun-loving plants like tomatoes in the right spots while reserving cooler areas for lettuce or herbs. Don't guess—measure and mark those zones on your sketch!
Layering Strategy: When implementing the three-layer system in Step 2, start with your tallest plants first. I always place my trellised cucumbers along the north edge of my beds to give them maximum light without shading the middle layer. For the bottom layer, I use shallow-rooted herbs like thyme or oregano—they thrive in the drip irrigation's runoff while not competing with deeper-rooted vegetables.
Seasonal Rotation Records: Create a simple chart using free tools like Google Sheets or even paper. I track each year's crop rotations by section, noting not just what I planted but also yield and any pest issues. This helps me spot patterns—like when my tomato section always gets blight—and adjust next year's rotation. Think of it as your garden's medical history!
Water Efficiency Hacks: For drip irrigation, I use PVC connectors to create a modular system that can be rearranged as my garden layout evolves. The key is spacing emitters 12-18 inches apart—this ensures even coverage without water waste. I also bury the lines just below the soil surface and cover with mulch to prevent evaporation and protect from sunlight damage.
Pro Tips for Kitchen Garden Revival
- Here's what I've learned after years of trial and error to keep my kitchen garden thriving without waste.
- Sunlight Mapping: Use a simple app or even your phone's camera to track sunlight patterns throughout the day.
- Layering Strategy: When implementing the three-layer system in Step 2, start with your tallest plants first.
Frequently asked questions
Got questions about reviving your kitchen garden?
Here are answers to the most common ones—so you can grow confidently, whether you're a beginner or a seasoned green thumb.
What’s the best layout for a zero-waste kitchen garden?
A square-foot gardening or keyhole design works best for small spaces. Use vertical planters for herbs and vining plants (like cucumbers or beans) to maximize space. Compost bins should be central to recycle scraps, and raised beds help manage soil waste efficiently. Rotate crops yearly to prevent depletion!
When is the ideal time to start a kitchen garden?
Start in early spring (after the last frost) for most veggies, but cool-season crops (like kale or spinach) can go in fall or winter in mild climates. For year-round gardens, stagger plantings every 2-3 weeks to ensure continuous harvests. Herbs and microgreens grow fast—perfect for quick wins!
Can I start a kitchen garden on a budget?
Use repurposed containers (old buckets, pallets, or tires) for planters. Save seeds from store-bought produce (if organic) or swap with neighbors. Compost kitchen scraps instead of buying fertilizer. Even a windowsill herb garden cuts grocery costs—start small!
How do I deal with pests naturally in a zero-waste garden?
Prevent pests with companion planting (e.g., basil + tomatoes, marigolds + veggies). Use neem oil or soapy water sprays for bugs. Encourage beneficial insects (like ladybugs) by planting dill or fennel. Avoid chemical pesticides—they harm soil and pollinators long-term.
What if I live in a cold climate? Can I still have a year-round garden?
Yes! Use cold frames or low tunnels to extend seasons. Hardy greens (spinach, Swiss chard) and root veggies (carrots, beets) thrive in cooler weather. For winter, grow garlic, onions, or kale under row covers. Indoor microgreens are a great backup too!
Wrapping up and next steps
The kitchen garden revival isn’t just a trend—it’s a sustainable, rewarding way to grow fresh food year-round while cutting waste. By designing smart layouts, repurposing materials, and embracing zero-waste practices, you’re not only feeding your family but also nurturing a greener future. 🌱
Ready to take the next step? Start small—whether it’s a single raised bed, a vertical planter, or even a windowsill herb garden. Your harvest (and the planet) will thank you!