
Tools
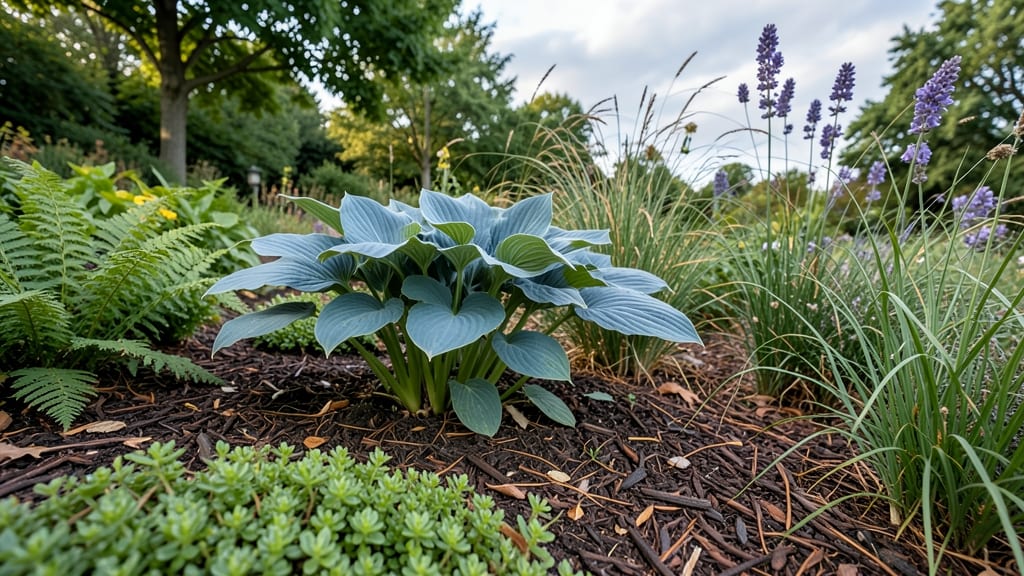
A layered garden turns every inch of vertical space into a thriving, textured tapestry—perfect for small yards where square footage feels impossible. 🌿 I used to think my tiny urban plot was doomed to look like a postage stamp, but stacking plants in tiers transformed it into a lush, multi-season showpiece.
The magic happens when you pair tall perennials with mid-height shrubs and low-spreading ground covers, creating depth that tricks the eye into seeing more space than you actually have.
The best part? You don’t need a green thumb or a budget—just a few strategic plants and a little creativity.
Start with a 5-foot-tall ornamental grass like fountain grass for drama, then add 3-foot shrubs like hydrangeas or butterfly bush, and fill the gaps with 1-foot ground covers like creeping thyme or ajuga.
This combo works in containers, raised beds, or directly in the ground, and the color shifts with each season keep things fresh.
By summer, you’ll have a garden that feels like it stretches for miles—even if your yard is just 4 feet wide. The layered approach also cuts down on weeds, retains moisture better, and gives pollinators multiple levels to explore.
Plus, the play of light and shadow creates visual interest that flat planting never could. Ready to see how this works in your space?
Works in any climate, from deserts to rainforests, and scales from window boxes to full backyards. The key is starting small—one layer at a time—and watching your garden grow upward instead of outward.
📚 In This Guide
- What you need
- Instructions
- Tips and common mistakes
- Wrapping up and next steps
What you need
- ● Vertical Garden Structure: 1–3 wall-mounted planters (e.g., fabric pockets, modular panels, or wooden crates) – 12"–18" deep for root space.
- ● OR 1 freestanding trellis (metal or PVC, 4'–6' tall with lattice or mesh).
- ● Growing Medium: 1–2 bags of high-quality potting mix (lightweight, with perlite/vermiculite for drainage).
- ○ Optional: Coco coir or hydroponic clay pebbles for moisture control (great for succulents!).
- ● Plants: 3–5 varieties (mix of trailing, medium-height, and top-tier plants). Examples: Trailing: Sweet potato vine, strawberries, or creeping thyme.
- ● Medium: Herbs (basil, mint), peppers, or dwarf tomatoes.
- ● Top: Dwarf citrus trees, ferns, or ornamental grasses.
- ● Hardware & Extras: Sturdy wall anchors or brackets (for mounting structures).
- ● 1–2 gallons of slow-release fertilizer (or liquid feed for frequent waterers).
- ● Spray bottle (8–16 oz) for misting delicate plants.
- ● Drip Irrigation Kit (automates watering—perfect for busy bees!).
- ● LED Grow Lights (for indoor setups or low-light areas).
- ● Decorative Elements: Mini fairy lights (solar-powered for eco-friendliness!).
- ● Paint or stain for wooden planters (weatherproof sealant included!).
- ● Self-Watering Reservoir (adds to planters for drought-prone plants).
Instructions: how to build a thriving layered garden
This method turns limited space into lush productivity using four distinct layers.
🌿 Step 1: Plan Your Vertical Structure
Start with a sturdy base like a large planter or raised bed—something at least 12 inches deep to accommodate your tallest plants. I like to use cedar because it naturally resists rot and pests. Place it where you'll get 6+ hours of sunlight daily—most layered gardens thrive in full sun.
Sketch a rough layout before planting. The top layer (tall plants like sunflowers or trellised beans) should go in the center. Mid-height plants (bush beans, peas, or compact tomatoes) go around them, while low-growing herbs and greens (basil, lettuce, or thyme) form the outer ring. This creates natural shade for the bottom layer while maximizing sunlight exposure.
🪴 Step 2: Build the Foundation Layers
Fill the bottom 6 inches of your container with a mix of garden soil and compost (I use a 50/50 blend). This layer is for your root crops and low-growing plants—they need the most nutrients and space. Press it down lightly to remove air pockets but don’t compact it too tightly.
Add a 1-inch layer of mulch on top to retain moisture and suppress weeds. I use shredded bark because it breaks down slowly and adds organic matter over time. This is also where you’ll plant your shade-tolerant greens like lettuce or spinach—they’ll appreciate the cooler, moister conditions near the base.
☀️ Step 3: Add Mid-Height and Climbing Plants
In the middle layer, create small mounds or hills using additional soil to elevate your mid-height plants. This gives them better drainage and prevents their roots from competing directly with the bottom layer. Plant your bush beans or compact tomatoes here—they’ll benefit from the extra airflow and won’t overpower the smaller plants below.
For climbing plants like peas or pole beans, install trellises or stakes now. I like to use bamboo stakes because they’re sturdy and blend naturally into the garden. Secure them firmly so they don’t topple when plants start growing. Water gently after planting to settle the soil around the roots, but avoid soaking—you want the roots to establish before heavy watering.
🌱 Step 4: Top With Tall, Sun-Loving Plants
Place your tallest plants in the center of the structure. Sunflowers, corn, or trellised cucumbers will reach for the sky while providing shade to the lower layers. Dig holes just deep enough to cover the roots completely—no need to bury the stems. Press the soil gently around each plant to remove air gaps.
Here’s the trick: space your tall plants slightly apart so they don’t block light from reaching the mid-height layer. You’ll see this work when the sunflowers start to leaf out—their foliage will naturally filter light downward, creating perfect conditions for the plants below. Water deeply after planting to encourage strong root growth.
⏰ Step 5: Maintain and Monitor Growth
Check your layered garden daily during the first week to ensure all plants are getting enough water. The top layer may dry out faster, so focus on keeping the soil moist but not soggy. You’ll know it’s right when the top inch of soil feels slightly damp to the touch but doesn’t feel wet.
As plants grow, prune any leggy stems or overgrown foliage to encourage bushier growth. This also helps air circulate better, reducing the risk of fungal diseases. Every few weeks, add a light layer of compost to the top to replenish nutrients—your layered garden will reward you with continuous harvests from top to bottom.
Tips & tricks for perfect layered gardens
Here's what I've learned after years of experimenting with vertical gardening—these tricks will help you maximize every inch of your layered garden.
Location is Everything: While 6+ hours of sunlight is ideal, pay attention to how the sun moves across your space. If your garden gets intense afternoon sun, place heat-sensitive plants like lettuce on the north or east side of the container. I've seen spinach bolt in just days when placed in full southern exposure—trust me on this. Rotate your garden every few weeks during peak sun months to give all layers equal light exposure.
Soil Strategy for Each Layer: The 50/50 garden soil and compost blend in the bottom layer is non-negotiable for root crops, but you can customize the upper layers. For the mid-height plants, mix in some perlite or vermiculite to improve drainage, especially for tomatoes. In the top layer, add a handful of worm castings for a nutrient boost—your sunflowers will thank you with taller stems and bigger blooms.
Climbing Plant Support: When installing trellises or stakes for peas and beans, don't just stick them in—create a sturdy frame. I use a combination of bamboo stakes and chicken wire wrapped around the edges of the container. This prevents the trellis from leaning over as plants grow heavy. For extra stability, tie the trellis to the container's sides with twine. This simple upgrade prevents collapsed plants mid-season.
Watering Wisdom: The top inch of soil check is perfect, but I've found a better method: use a moisture meter in the middle layer. This gives you the most accurate reading since the bottom layer stays wetter and the top layer can dry out too quickly. Water in the morning so plants have all day to absorb moisture before evening evaporation. For containers, I water until you see runoff at the bottom—this ensures the entire root system gets hydrated.
Pro Tips for The Layered Garden
- Here's what I've learned after years of experimenting with vertical gardening—these tricks will help you maximize every inch of your layered garden.
- Location is Everything: While 6+ hours of sunlight is ideal, pay attention to how the sun moves across your space.
- Soil Strategy for Each Layer: The 50/50 garden soil and compost blend in the bottom layer is non-negotiable for root crops, but you can customize the upper layers.
Frequently asked questions
Got questions about creating your own layered garden?
You’re not alone! Here are answers to the most common queries to help you get started with confidence.
What’s the best way to start a layered garden if I have limited space?
A layered garden thrives in small spaces—just prioritize verticality! Use wall-mounted planters, hanging pockets, or freestanding frames to maximize height. Begin with shallow-rooted plants (like herbs or succulents) on top and deeper-rooted ones (like ferns or small shrubs) below. Even a balcony or patio can become a lush, multi-level oasis!
How long does it take for a layered garden to look established?
Patience is key! With proper care, you’ll see noticeable growth in 4–6 weeks, but a fully layered look (with varying heights and textures) typically takes 3–6 months. Fast-growing plants like ivy, creeping thyme, or trailing petunias will fill gaps quicker, while woody plants (like dwarf boxwood) take longer. Prune regularly to encourage density!
Can I mix edible plants with ornamental ones in a layered garden?
Layered gardens are perfect for edible landscapes. Pair herbs (basil, mint) on top with salad greens or strawberries in mid-layers, and add root veggies (like radishes) in deeper pockets. Just ensure each plant’s light and water needs align—succulents and leafy greens often coexist well. Pro tip: Use drip irrigation to keep moisture consistent!
What’s the easiest way to troubleshoot overcrowding in my layered garden?
Overcrowding happens when layers compete for space. Start by pruning aggressively—trim back overgrown vines or foliage to open up airflow. If roots are tangled, gently separate plants and repot stragglers. For future layers, space out slower growers (like ferns) and cluster fast growers (like trailing nasturtiums) in designated pockets. A monthly trim keeps things tidy!
Are there budget-friendly alternatives to expensive vertical planters?
DIY is your best friend! Repurpose wooden crates, pallets, or even old ladders as frames, line them with landscape fabric, and fill with soil. Upcycle plastic bottles or tin cans as hanging planters for herbs. Thrift stores often have cheap baskets or trellises—get creative! Just ensure containers have drainage holes to avoid root rot.
Wrapping up and next steps
Creating a layered garden isn’t just about maximizing space—it’s about crafting a thriving, dynamic oasis that works for you. Whether you’re a beginner or a green-thumb pro, vertical gardening unlocks creativity, sustainability, and beauty in even the smallest yards.
Start small, experiment with textures and heights, and watch your space transform into a lush, functional retreat.
Ready to dive in? Sketch your design today—grab a pencil, measure your walls, and let your imagination grow! 🌱✨